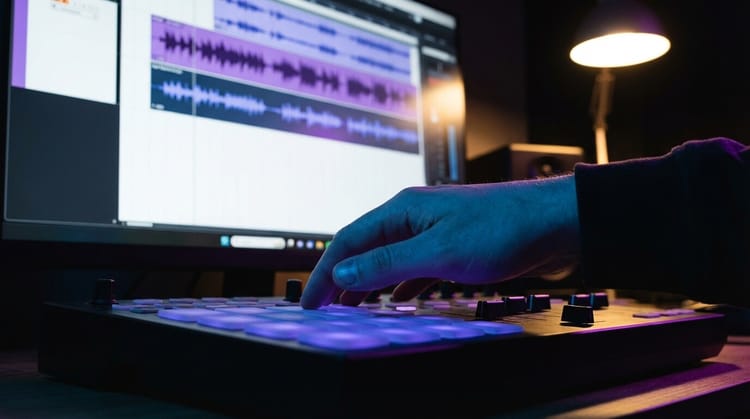
Adjust microphone positions in ACE Studio

Traditional vocal samples typically offer multiple versions of singers recorded from different positions relative to the microphone. However, ACE Studio revolutionizes this process, allowing you to effortlessly achieve customizable microphone positions for vocals. This innovative approach provides unparalleled convenience and flexibility, far surpassing traditional methods. This guide will walk you through the process and offer tips for optimal results.
What is Microphone Adjustment and Why is it Important?
Microphone adjustment refers to the process of altering the placement of a microphone relative to the sound source. This includes changes in distance, angle, and spatial positioning to control how sound is captured. It plays a fundamental role in shaping audio recordings by allowing precise control over tonal quality, ambiance, and resonance. By adjusting the microphone’s position, producers can emphasize specific sound elements, reduce unwanted noise or distortion, and create an immersive sonic environment tailored to their project’s requirements.
For example, positioning a microphone closer to the sound source results in a more direct and detailed sound, often used for lead vocals. Conversely, placing the microphone farther away creates a spacious and ambient effect, ideal for capturing background harmonies or room acoustics. These adjustments also allow producers to simulate real-world settings, such as the dynamics of a live performance, further enhancing the realism and emotional impact of a track.
ACE Studio takes microphone adjustment to the next level by providing virtual tools that let users experiment with various configurations effortlessly. This innovative approach not only saves time but also opens up endless possibilities for creativity and precision.
Why Microphone Adjustment is Important?
Microphone adjustments play a vital role in achieving tailored audio results. They allow producers to shape the sound to suit specific genres, moods, and styles while ensuring high-quality, polished recordings that meet professional standards. By adjusting microphone positions, you can simulate real-world environments, such as live performances or spacious acoustic settings, adding realism and depth to your projects. Moreover, ACE Studio provides flexibility, enabling precise adjustments with efficiency, saving both time and effort while maintaining professional-grade quality.
Understanding Microphone Positioning
Microphone positioning is a critical aspect of audio production that directly impacts the quality and character of your recordings. The way a microphone captures sound can influence resonance, spatial effects, and how the recording interacts with the rest of the mix. Proper positioning allows producers to emphasize or minimize certain elements of the sound, ensuring clarity and balance across the track.
Key benefits of mastering microphone positioning include:
- Improved Tone and Resonance: By adjusting the microphone’s distance and angle, you can fine-tune the tonal quality, emphasizing warmth, brightness, or other desirable characteristics. This is essential for vocals, instruments, and ambient sounds alike.
- Enhanced Spatial Effects: Positioning microphones in specific ways creates a sense of depth and dimension in the recording. This can simulate the feel of a live performance or produce immersive audio landscapes that elevate a track.
- Adaptability to Styles and Genres: Different musical styles often require different sound profiles. For instance, a close-miked vocal track works well in pop music, while a more distant placement might be preferred for orchestral or cinematic recordings.
Microphone positioning isn’t just a technical skill; it’s a creative tool. Experimentation is key, and with tools like those in ACE Studio, producers have the freedom to explore a range of configurations effortlessly. Understanding why different microphone positions are needed will help you fully harness the potential of these tools to create sounds tailored to your needs.
Why are different microphone positions needed?
Different microphone positions (e.g., front, side, near, far) are crucial for capturing a wide range of sound qualities tailored to specific project requirements. Each positioning option, either close, angled, or distant, brings its own unique tonal and spatial characteristics to the recording.
Close microphone placements excel in capturing clear and detail-rich lead vocals, emphasizing nuances like breathiness and texture for a prominent mix presence. On the other hand, distant microphone placements are perfect for creating a spatial effect that adds depth, commonly used for atmospheric effects or blending background harmonies seamlessly into the mix.
Providing multiple microphone positions allows producers to adjust and reposition sounds flexibly, ensuring that every element sits perfectly in the mix. For example, a mix might feature a lead vocal with a close-miked presence while incorporating distant harmonies to simulate a sense of space and dimension.
In live settings such as choirs or band performances, singers and musicians are naturally positioned at varying distances and angles relative to the microphone, creating distinct spatial effects that add depth and realism to the sound. Translating this dynamic into digital production can significantly enhance the authenticity of recordings. ACE Studio simplifies this process by offering intuitive microphone positioning tools, allowing producers to recreate these real-world dynamics with precision. To maximize the potential of these tools, the next section will guide you through the practical steps to adjust microphone positions effectively within ACE Studio.
Steps to Adjust Microphone Positions in ACE Studio
Step 1: Enable Choir Mode
Select a singer track, and click the button shown in the image below to expand the Track Control Panel. Then you will see the "Turn on ChoirMode" button. Don’t worry, Choir Mode is not exclusive to choral vocals; it essentially provides the ability to place singers in specific positions within a space.

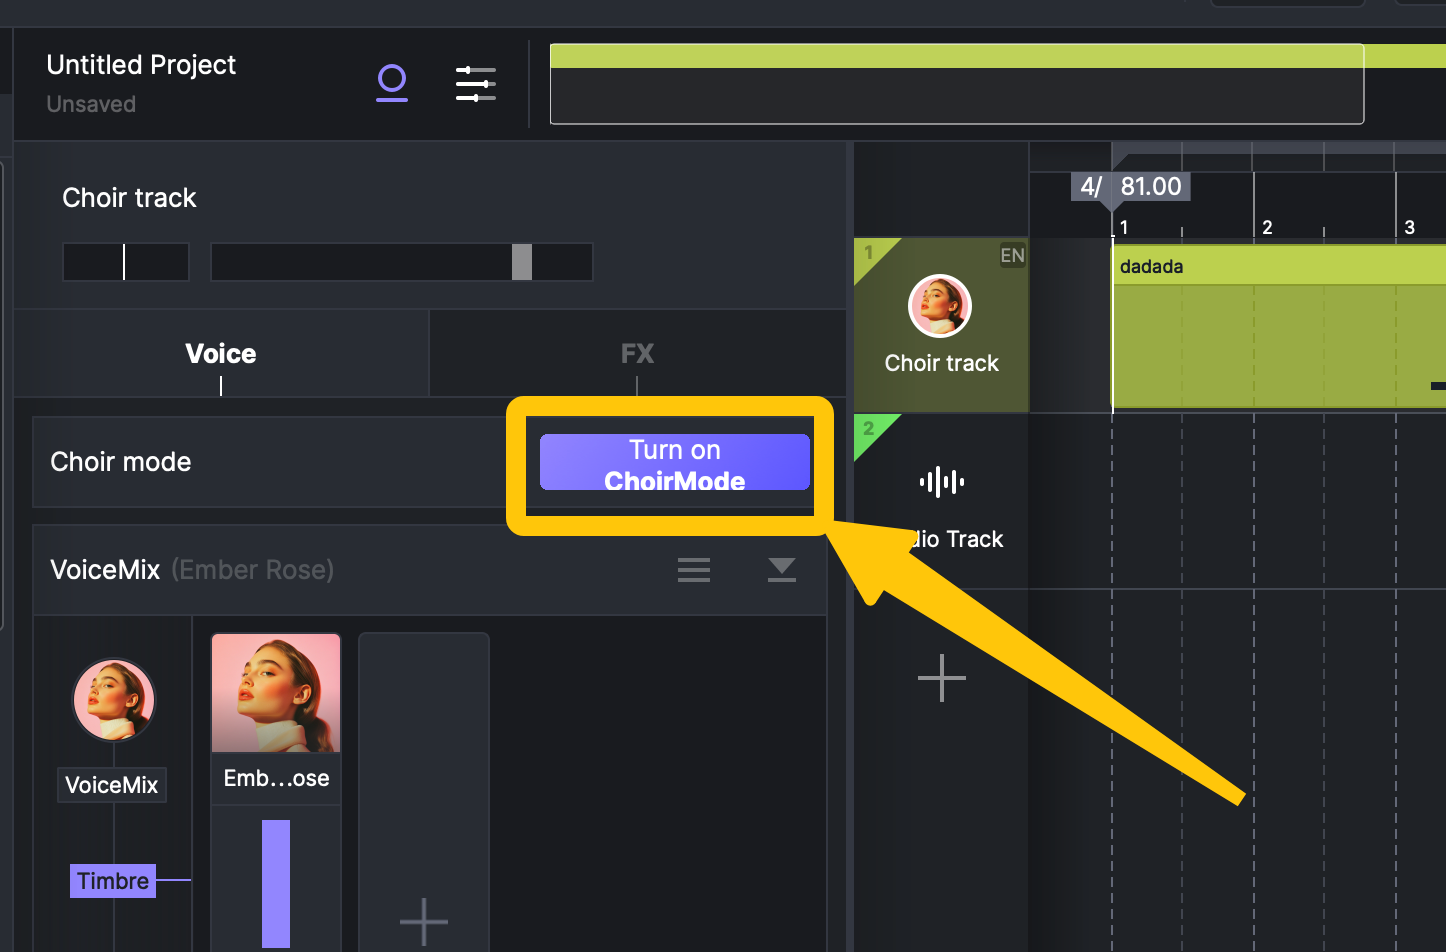
Step 2: Adjust the Position of the Microphone
Next, in Choir Mode you will see the AI singer represented as a small dot placed in a space. You can drag this small dot to adjust the singer’s position.

Tips for Optimal Results
ACE Studio’s microphone positioning tools offer incredible flexibility, but mastering them requires attention to detail. Here are some actionable tips to help you achieve optimal results:
Experiment with Placements
Adjust the position of the virtual microphone to discover the sound that best fits your project, closer for sharper clarity or farther for more ambiance.
Layer Tracks for Depth
Use multiple microphone positions on different tracks to create a fuller, more dynamic sound. This technique is particularly effective for choral or instrumental arrangements.
Preview Adjustments in Real Time
Always listen to how changes affect your mix by playing the track as you make modifications. This ensures that every adjustment enhances your creative vision.
Organize Your Workflow
Label and categorize different microphone setups in ACE Studio for quick adjustments and efficient navigation during complex projects.
By following these tips, you can elevate your recordings and make the most of ACE Studio’s advanced features.
Conclusion
ACE Studio equips producers with powerful tools to fine-tune microphone positions and create professional-quality recordings. These features are designed to accommodate a wide range of creative goals, from achieving sharp, detail-rich lead vocals to crafting immersive choral arrangements. With its user-friendly interface and versatile capabilities, ACE Studio helps you bring your unique artistic vision to life. Unlock the full potential of your recordings and take your sound to the next level today.
FAQ
What is Choir Mode in ACE Studio?
Choir Mode enables you to position AI singers in a virtual space, simulating real-world microphone placements.
Can I use Choir Mode for solo recordings?
Yes, Choir Mode works for both solo and choral arrangements, offering precise sound placement.
How do I preview changes?
Play the track while adjusting positions to hear the effects in real-time.