Convert Audio into AI Vocals with ACE Studio

Turn your audio into expressive AI vocals with ACE Studio, which lets you transform any vocal recording into a fully produced AI performance — no studio time, retakes, or complex editing required. You can start with a voice memo, a rough demo, or an isolated vocal stem and reshape it into a clean, expressive vocal track using advanced audio-to-vocal AI tools.
With real-time voice switching, editable pitch and phrasing, and built-in stem separation, ACE Studio gives you full creative control.
In this guide, you'll learn how to turn audio input into polished AI vocals that are fast to create, easy to edit, and ready to mix into your next production.
Generate Vocals from Audio Input in ACE Studio
While MIDI-to-vocal generation offers full creative control from the ground up, sometimes you already have a vocal performance — a demo, a voice memo, or a rough take — that you'd like to refine, reshape, or even transform entirely. That’s where audio-based vocal generation comes in.
There are two core options available. The first is the "Convert Vocal to MIDI & Lyrics" feature, which analyzes your recorded vocals, extracts the melody and lyrics, and reconstructs the performance using one of ACE Studio’s AI singers. This approach provides full flexibility for editing pitch, rhythm, and lyrics — perfect if you want to change the vocal line or modify the song structure in detail.
The second option is the integrated Voice Changer. If your goal is to retain the original vocal performance but simply alter the vocal identity, for example, changing a male voice to female or transforming the tone and texture, the voice changer is a more convenient and efficient path. It modifies the voice directly without requiring conversion into MIDI and lyrics.
Ultimately, the choice depends on your creative goals. For detailed lyric and melody editing, use the conversion to MIDI and lyrics. For quick vocal character changes without altering the performance, the voice changer offers a faster solution.
Let’s go through how both options work and when to use them.
Convert Vocal to MIDI & Lyrics Step by Step
Step 1 – Convert a Vocal Recording to MIDI and Lyrics
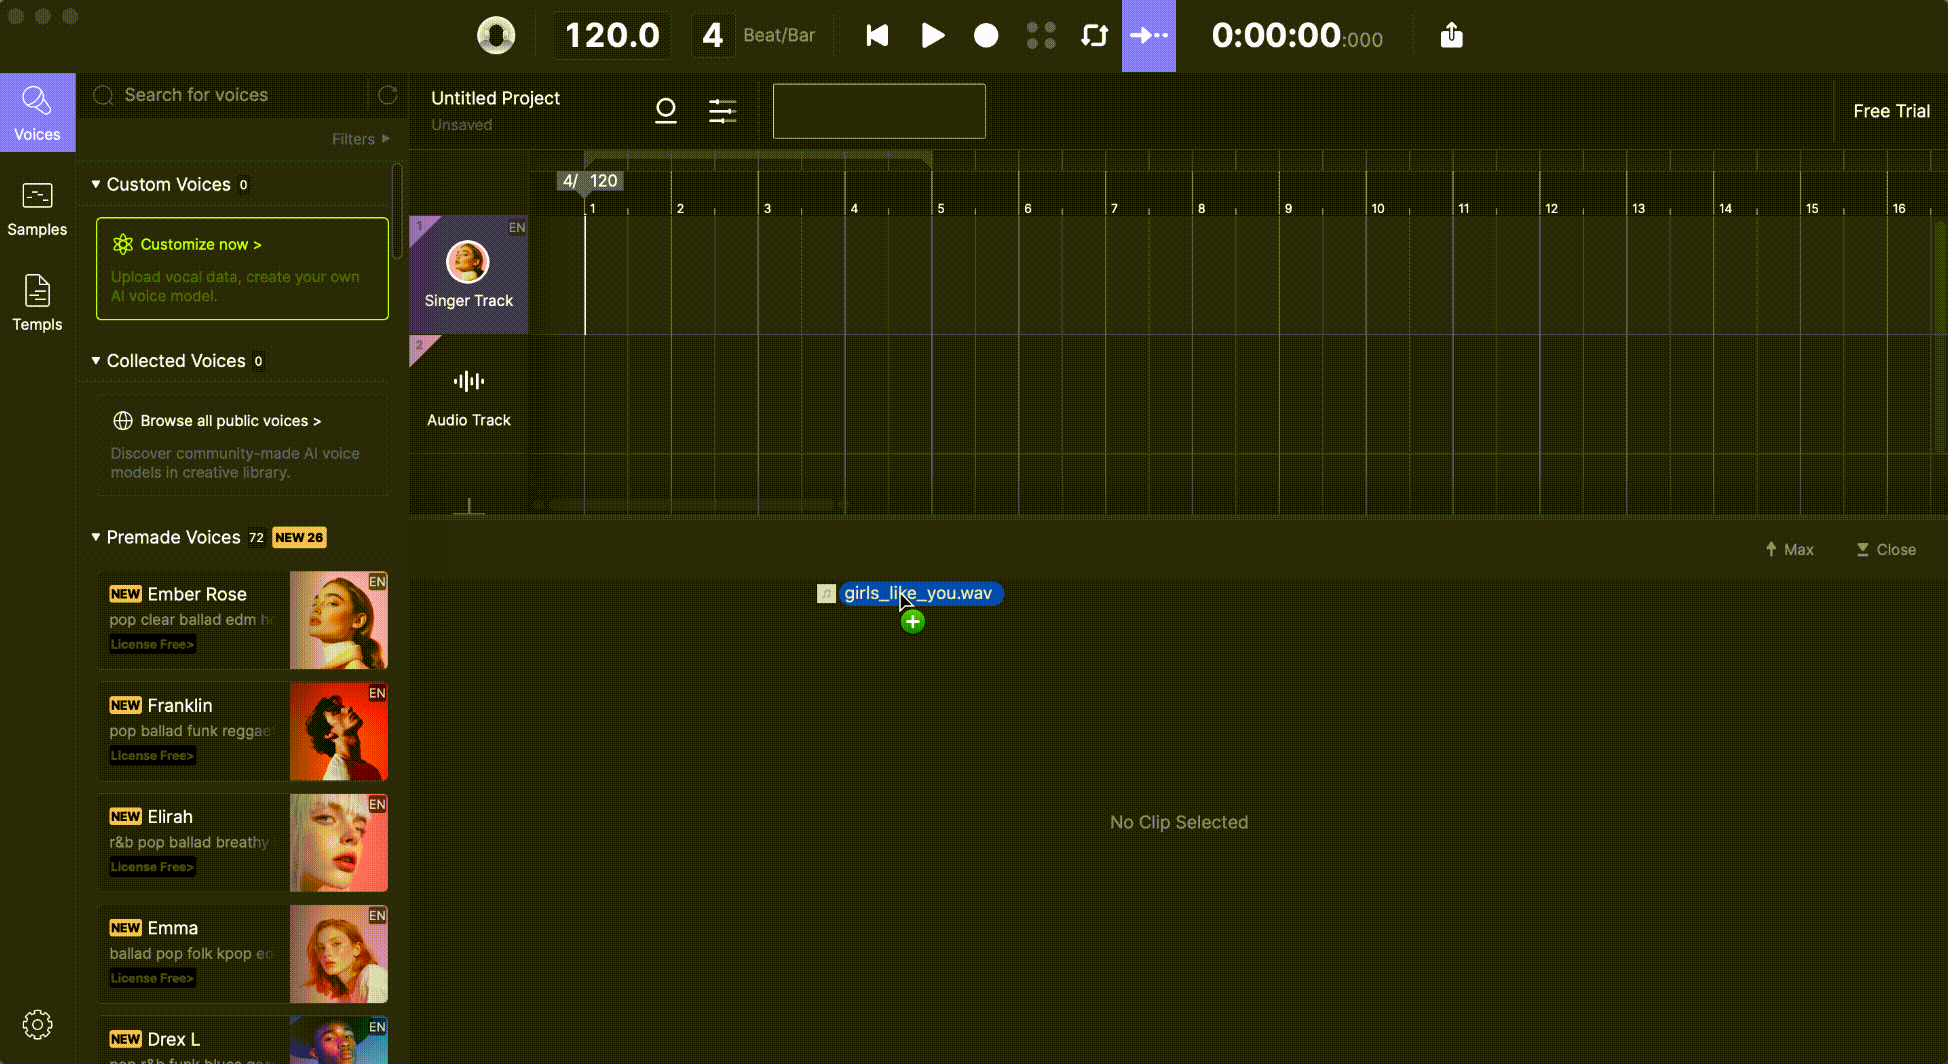
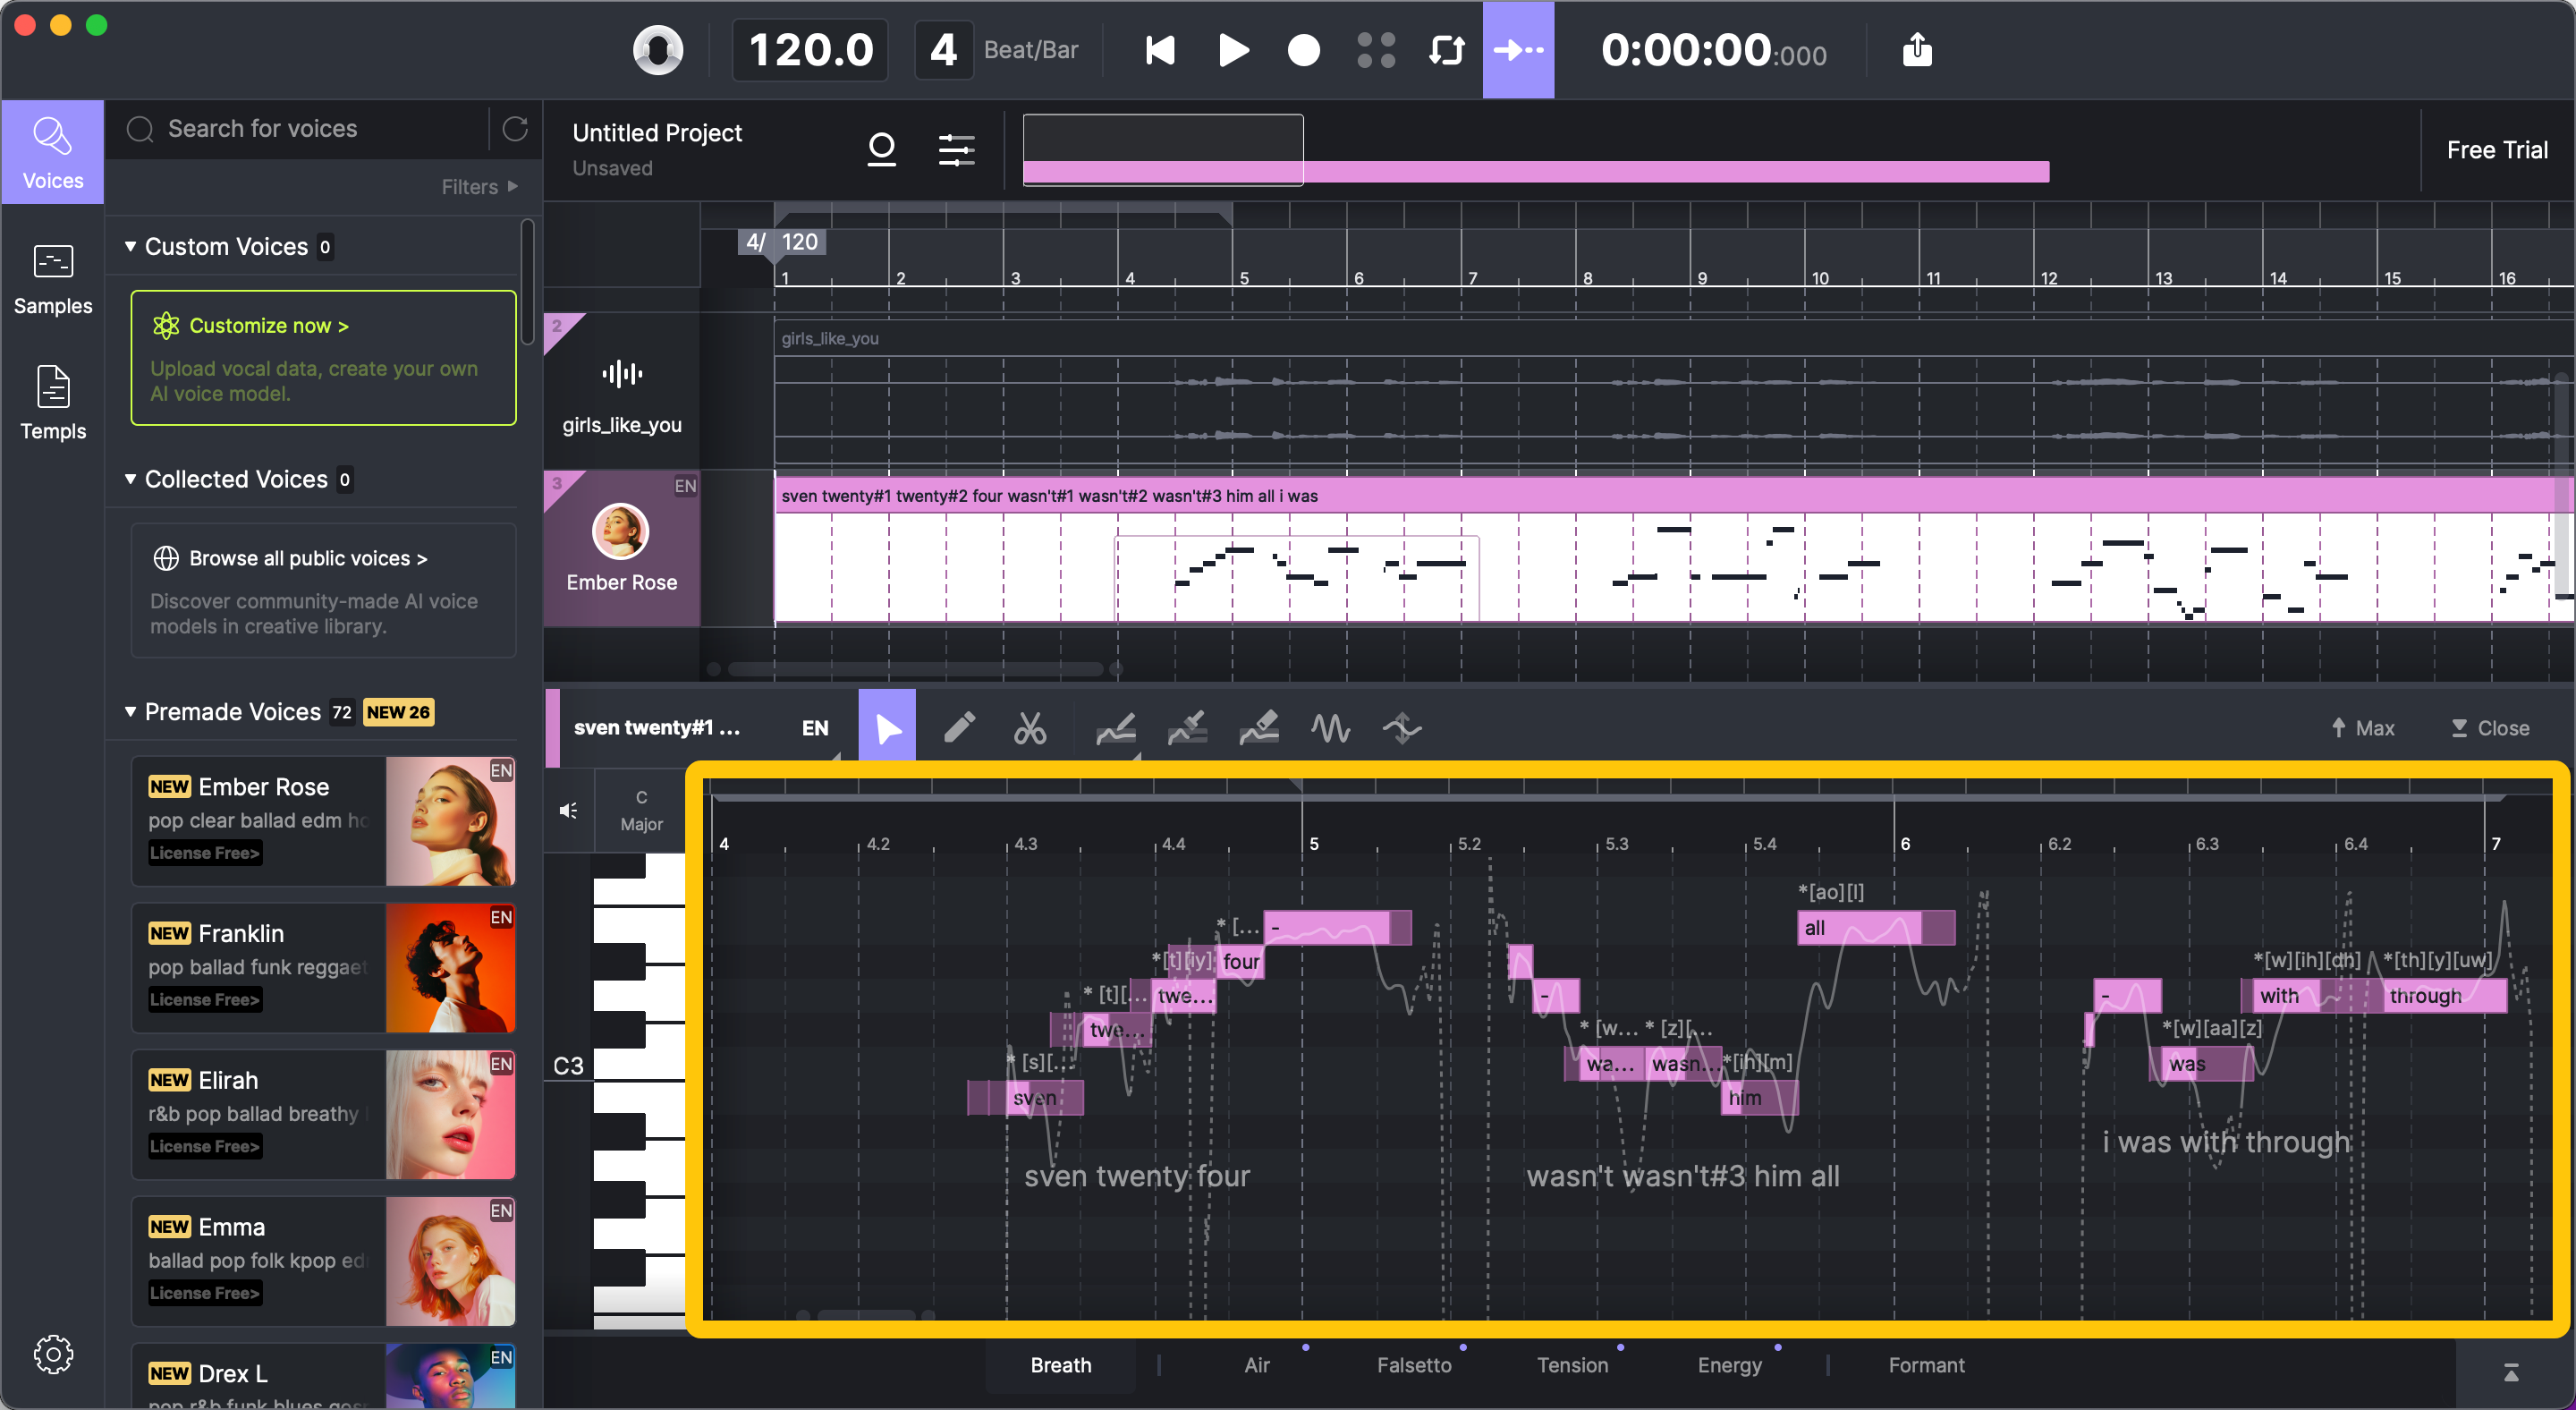
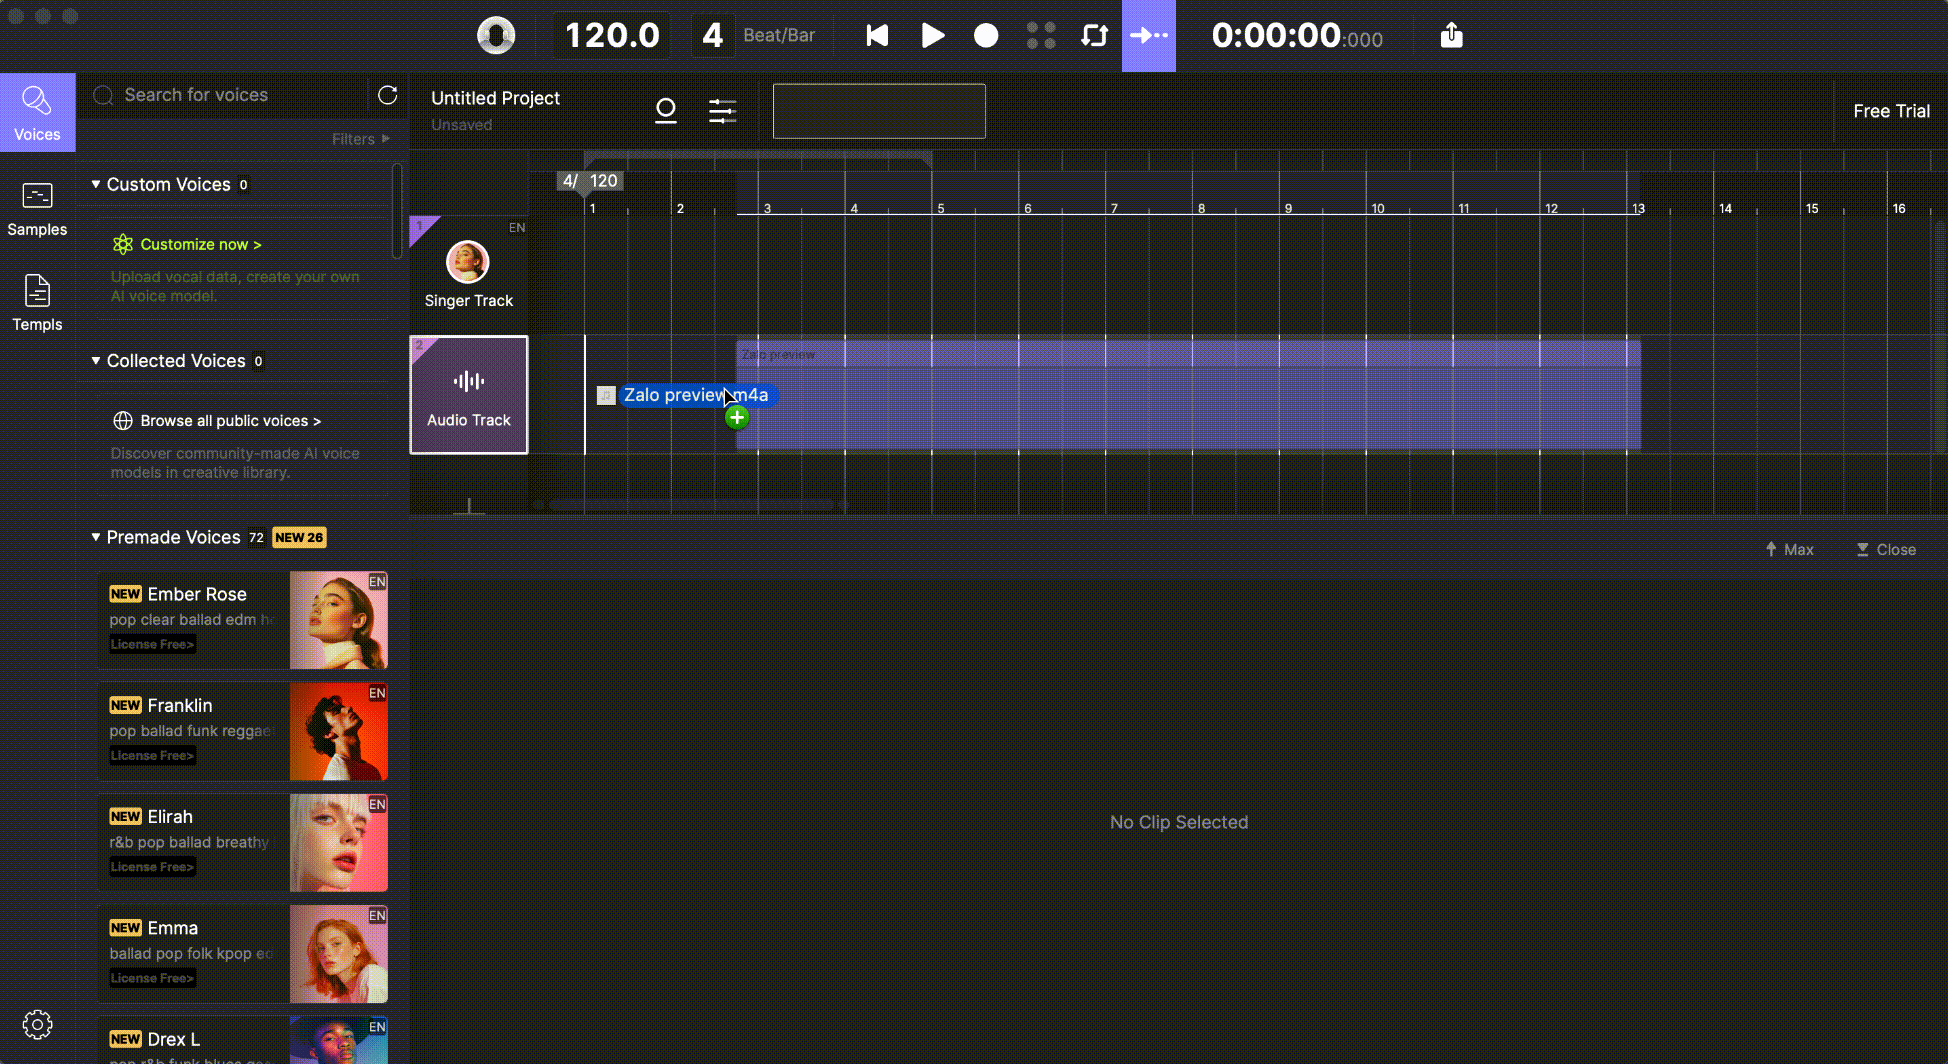
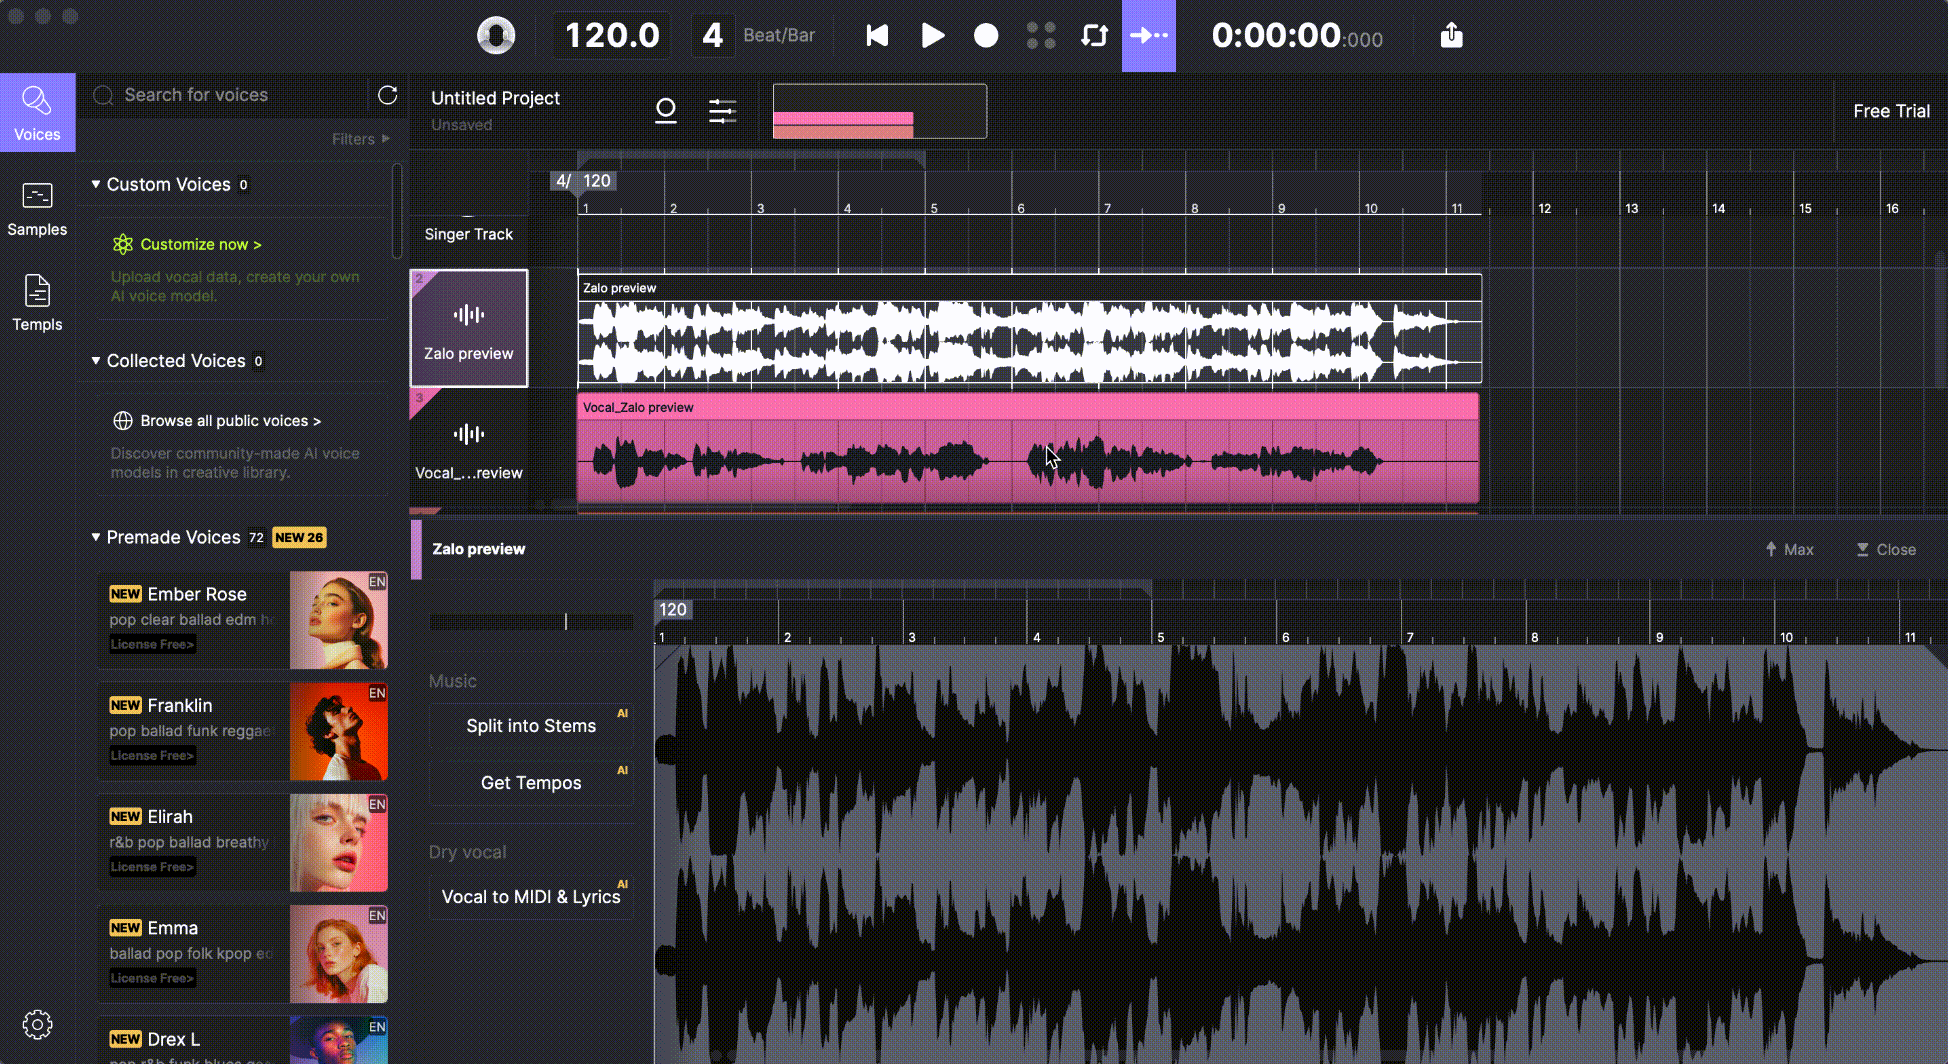
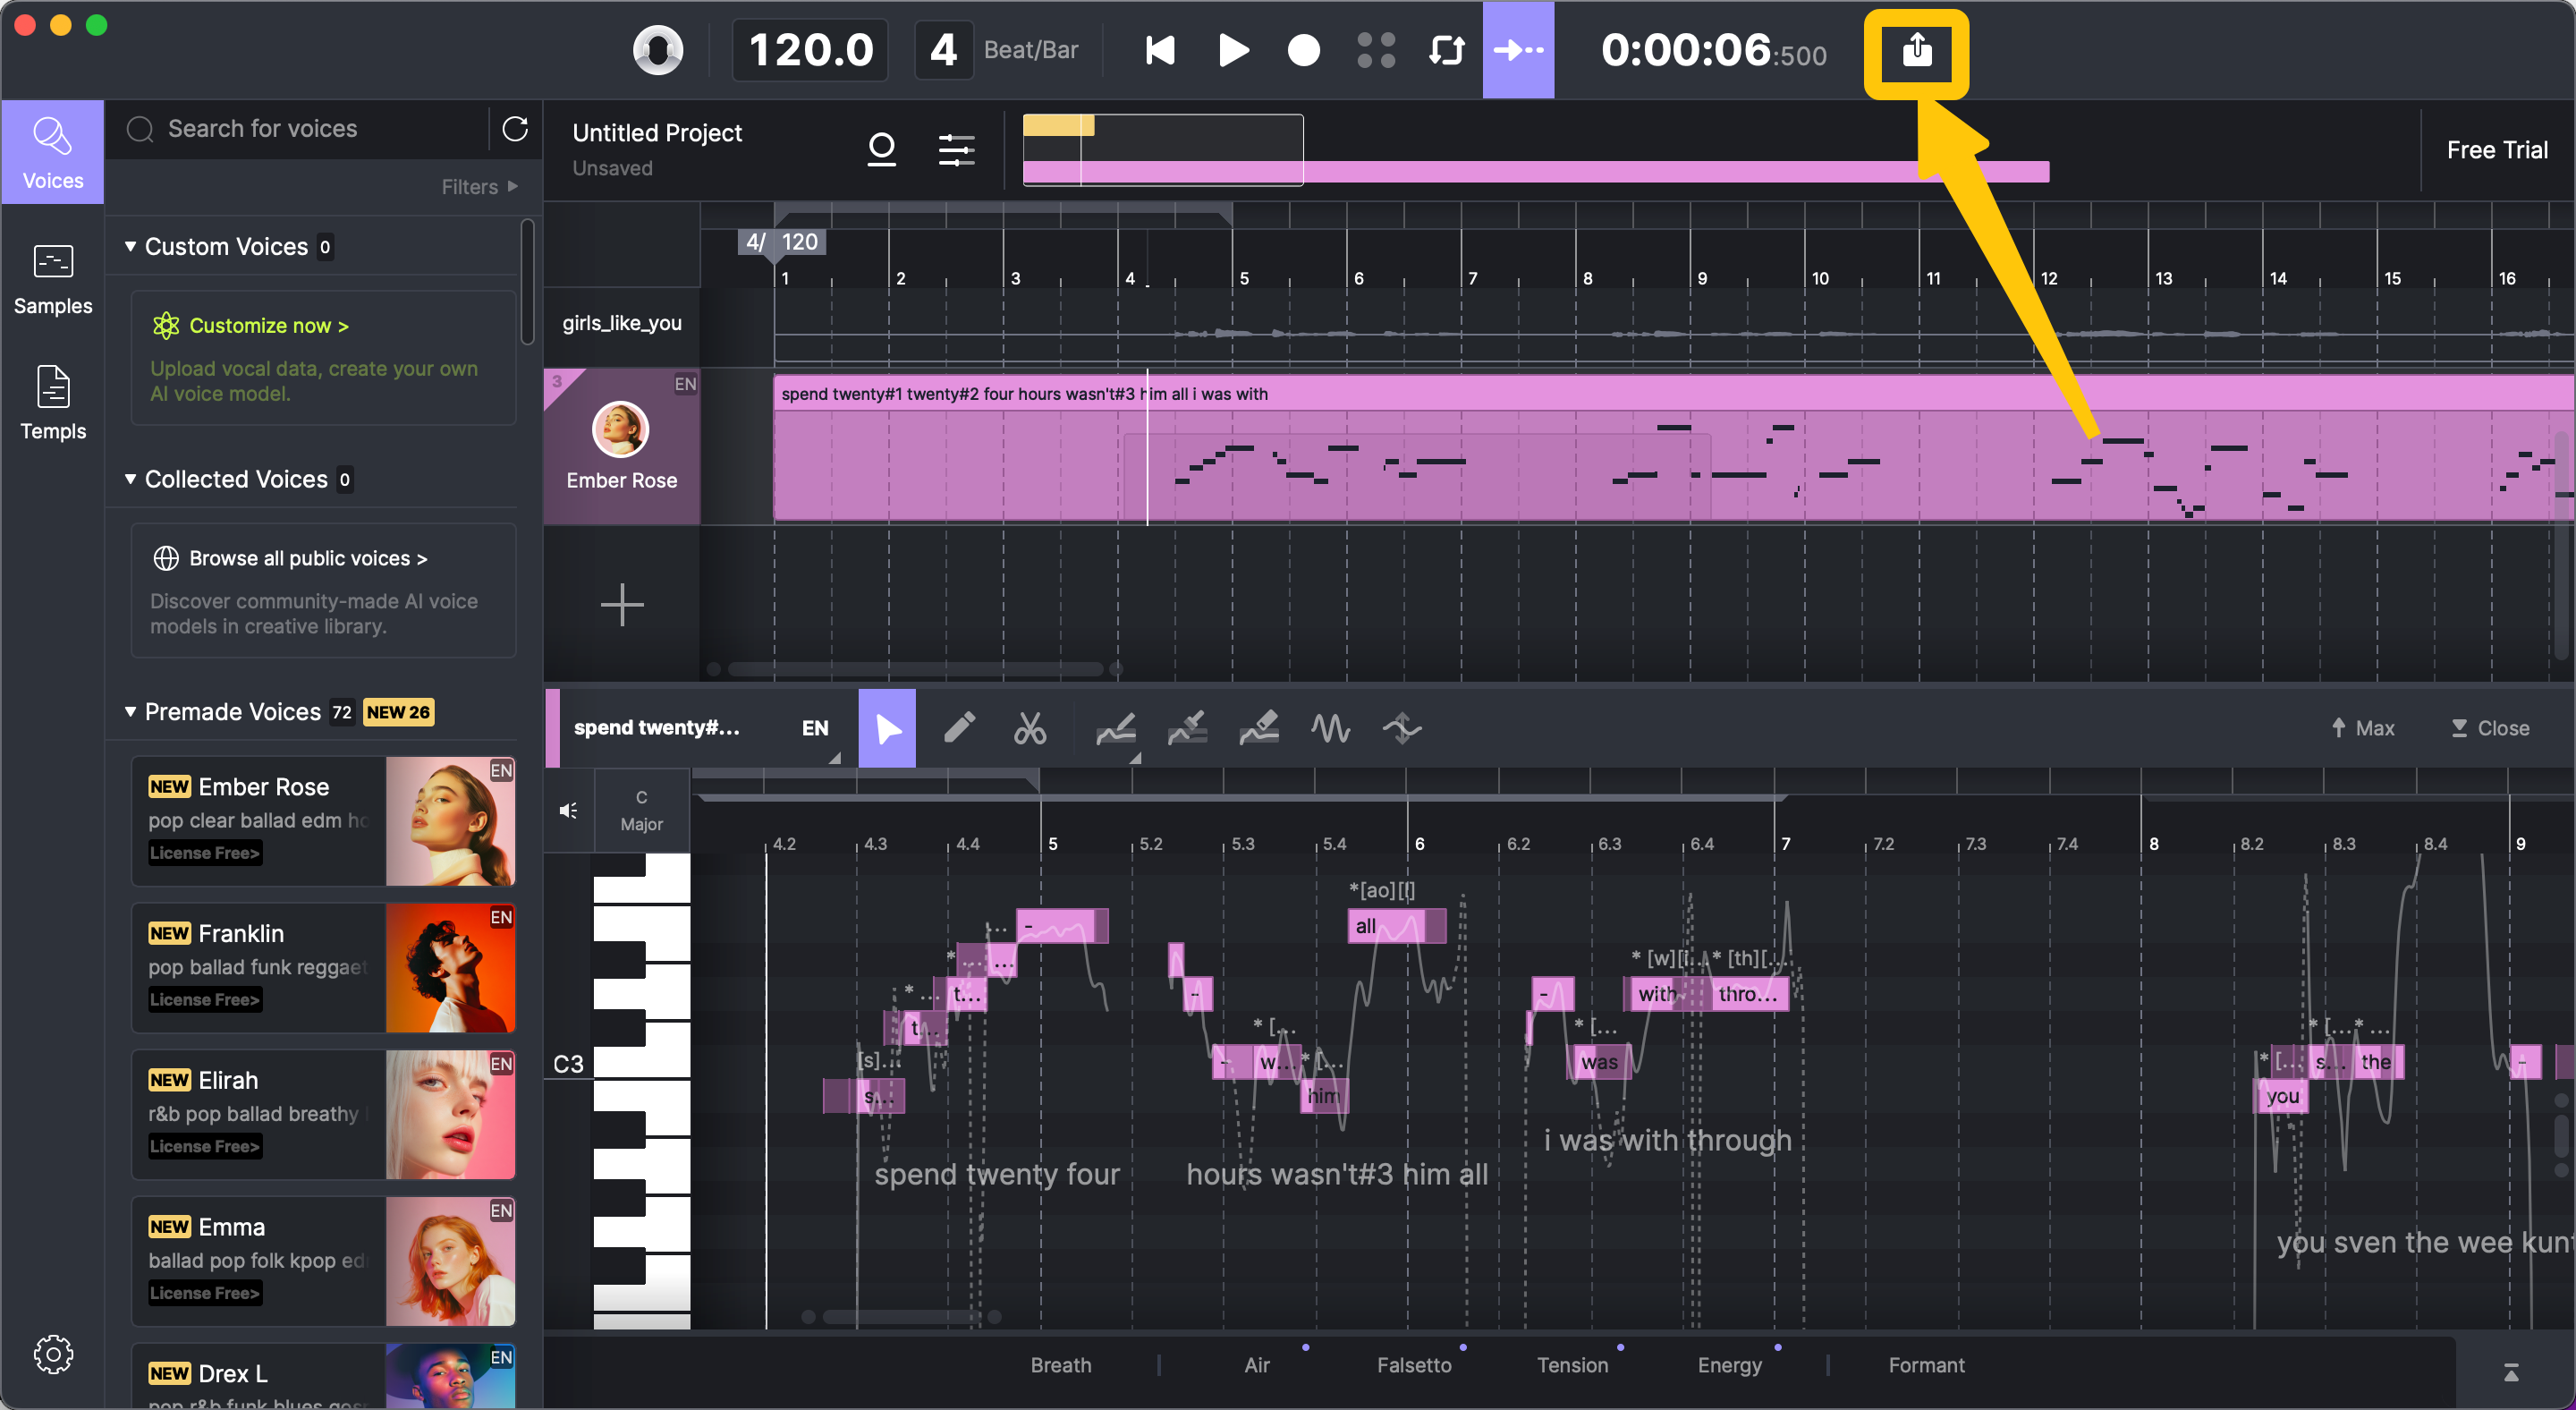
To begin, drag your audio file — preferably a vocal-only track — into the audio track in ACE Studio. Once the file is loaded, click the “Vocal to MIDI & Lyrics” button.
The software will process the audio and extract both the melody and the lyrics, creating a new MIDI-based vocal track. This newly generated track can now be treated just like any other MIDI clip in ACE Studio, allowing you to fine-tune every element of the performance.
If your original audio contains not only vocals but also instrumental backing — for example, a full mix or a demo with accompaniment — you’ll first need to separate the vocals from the rest.
Step 2 – Isolate Vocals Using the "Split into Stems" Tool
In cases where your audio includes both vocals and instrumentals, ACE Studio provides a built-in tool to help: the “Split into Stems” feature.
Simply drag your full audio mix into the timeline and select the “Split into Stems” option. The software will analyze the audio and separate the vocal from the instrumental parts. Once the vocals are isolated, you can proceed to convert them using the same “Vocal to MIDI & Lyrics” process described above.
This is especially helpful when working with old demos or voice memos where re-recording isn’t possible — ACE Studio gives you a second chance to rework those vocals with clean results.
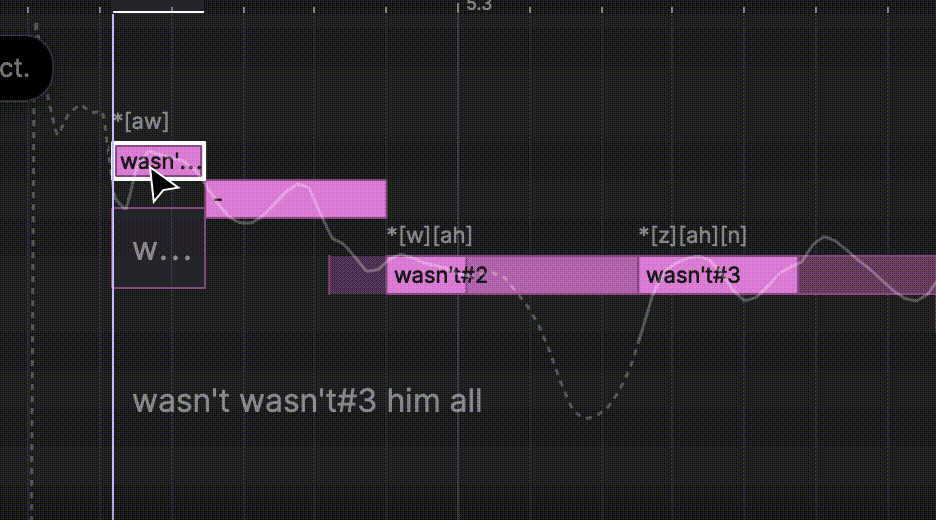
Step 3 – Edit Auto-Generated Lyrics
Once ACE Studio finishes converting your vocal recording into a MIDI project, you’ll see notes and lyrics laid out on the piano roll, similar to a manually created MIDI track. However, since the lyrics are extracted from the vocal audio using phoneme recognition, they might not always be perfect.
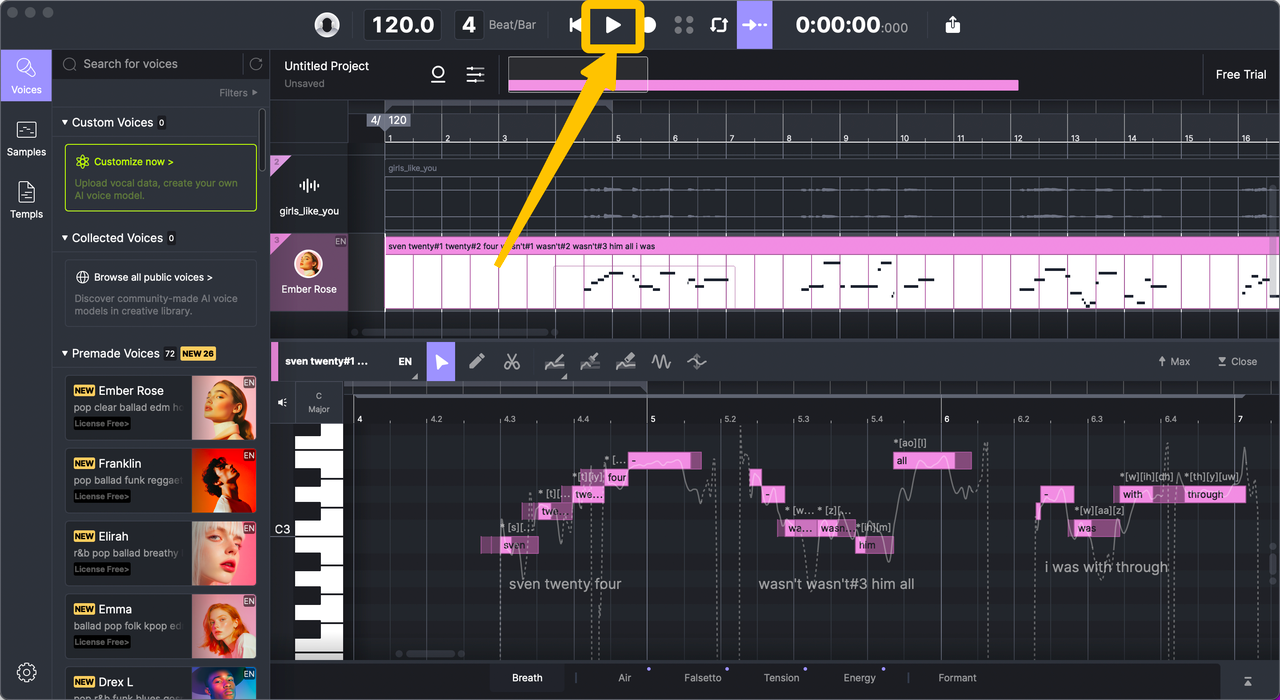
The AI does a good job of detecting pronunciation, but sometimes, it may interpret syllables or words incorrectly, especially if the original recording isn’t very clear. This step is all about refining the output to ensure your lyrics match what you want to hear.
To fix any lyric misinterpretation, simply double-click on the note where the problem occurs. You’ll be able to modify the lyrics associated with that specific syllable or word. If you're working with longer lines, you can also edit full phrases by selecting a group of connected notes and entering the corrected text directly into the phrase field.
The same core rules apply here as in the MIDI workflow:
Each note can only carry one phoneme or syllable. If you want to sing a word with multiple syllables, ACE Studio will automatically split that word across consecutive notes. For example, a word like “paradise” will be divided into three distinct lyric pieces: paradise#1, paradise#2, and paradise#3.
If, on the other hand, you want to stretch a single-syllable word across multiple notes, you can apply the sustain symbol “-” to the second and third notes. So if you're extending a word like “hours” over several beats, you’d input it as: “hours - -”.
By adjusting syllable distribution, refining note timing, and correcting any lyric mismatches, you ensure that the AI singer performs the line just as you imagined — with the right words, pace, and tone.
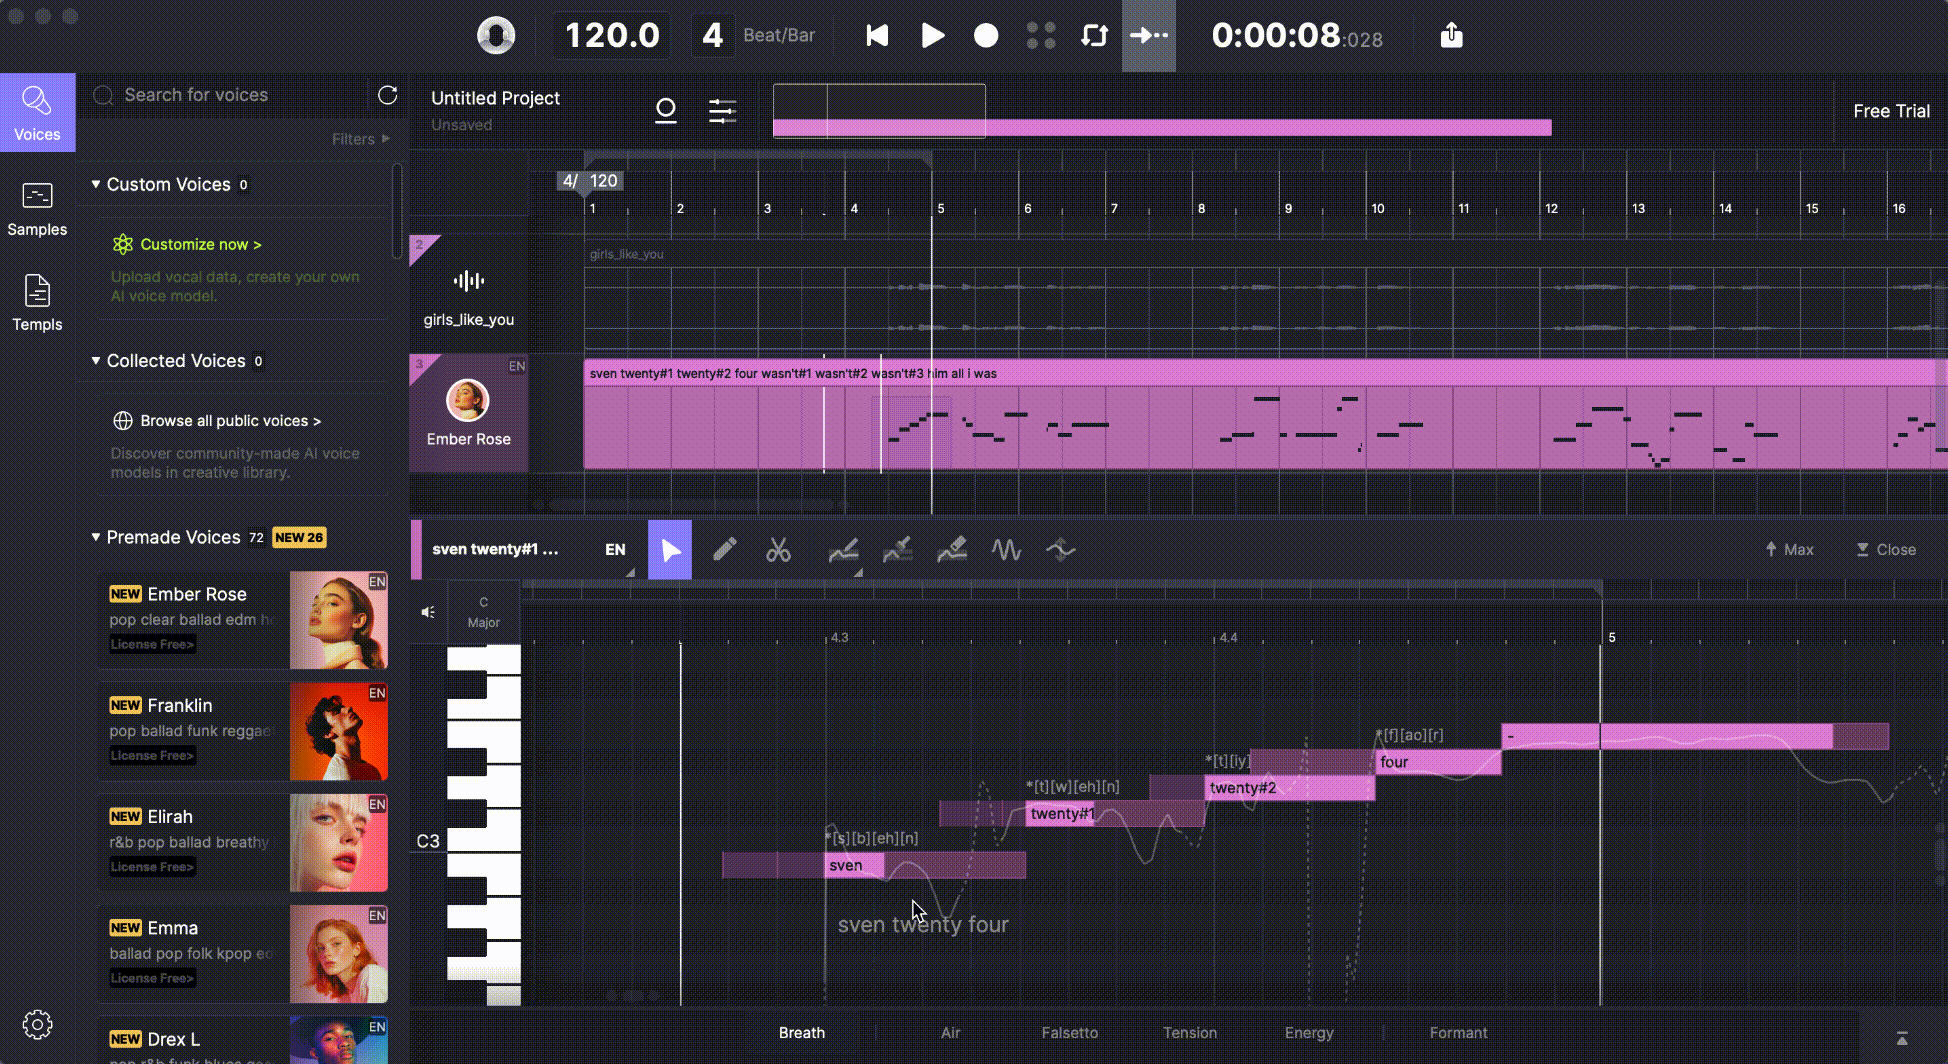
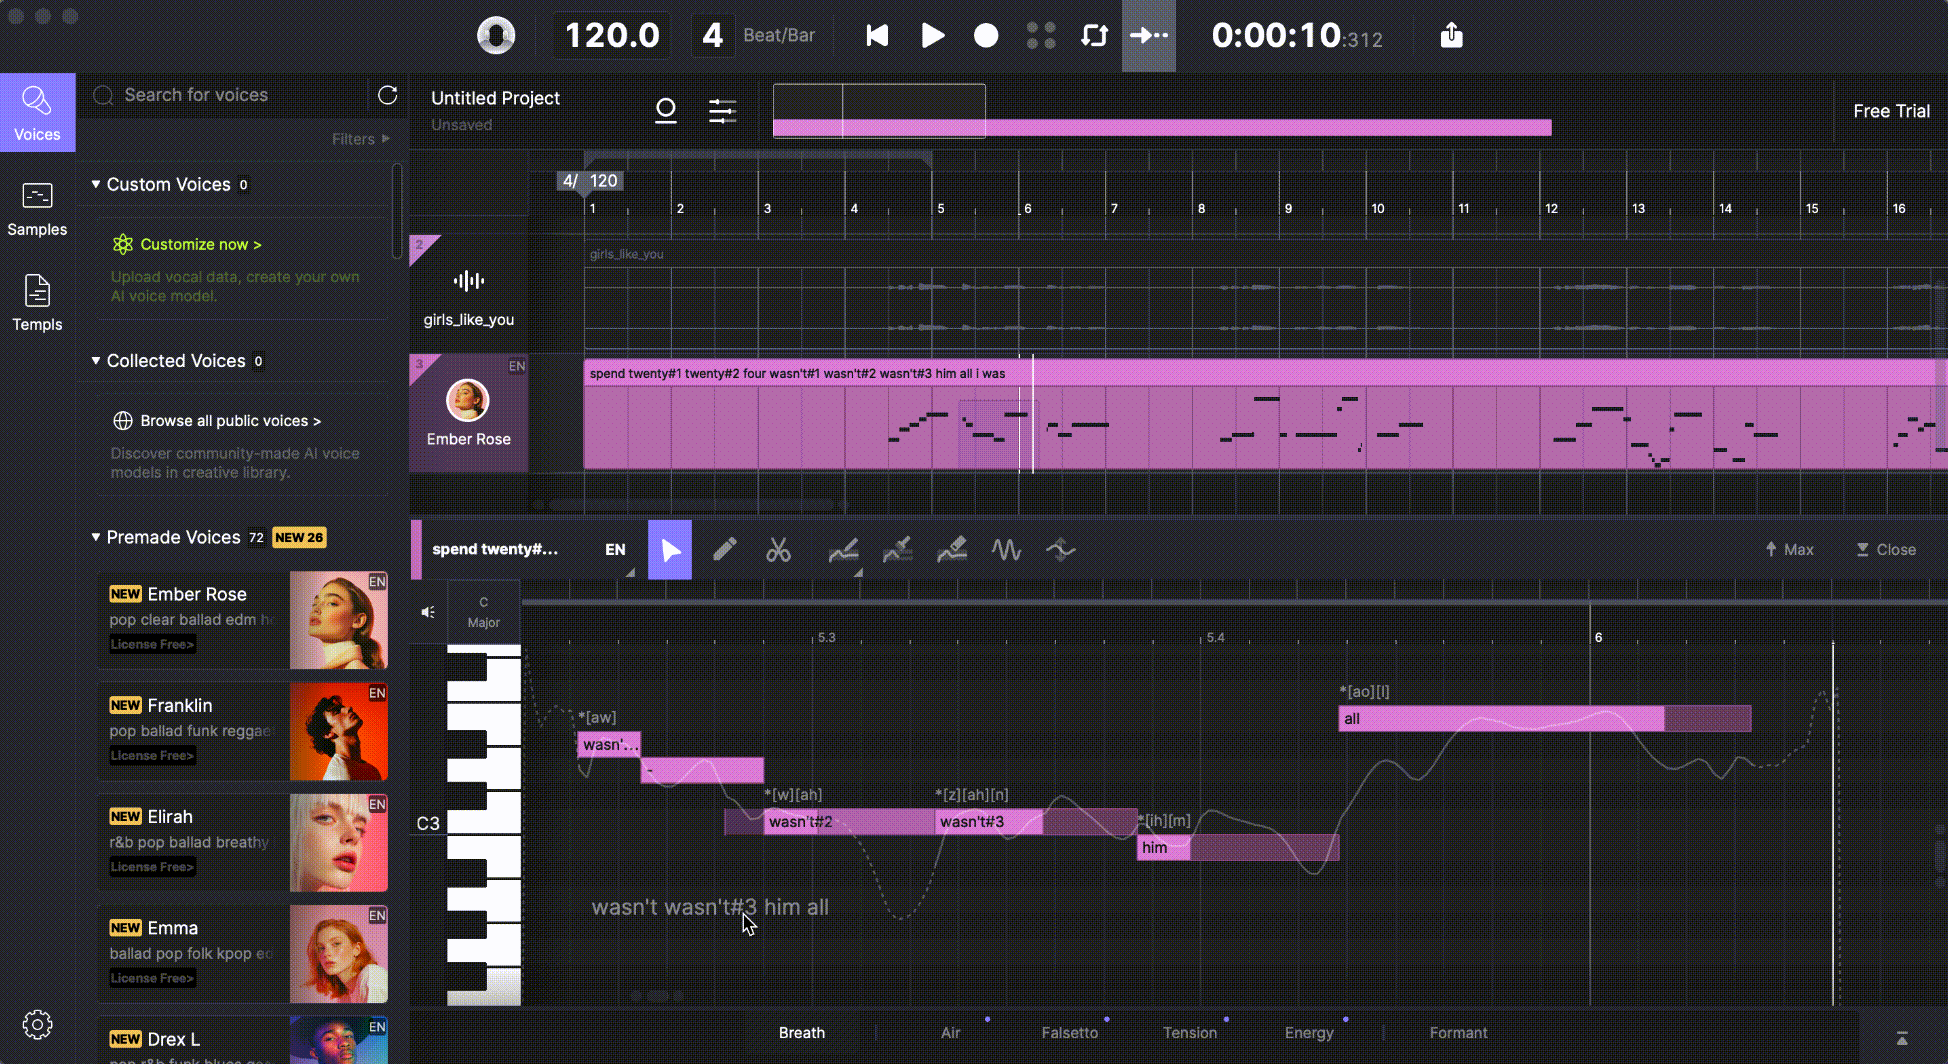
Step 4 – Preview and Export the AI Vocal
Once you’ve reviewed and refined the MIDI notes and lyrics extracted from your vocal recording, you’re ready to listen to the AI version of your performance.
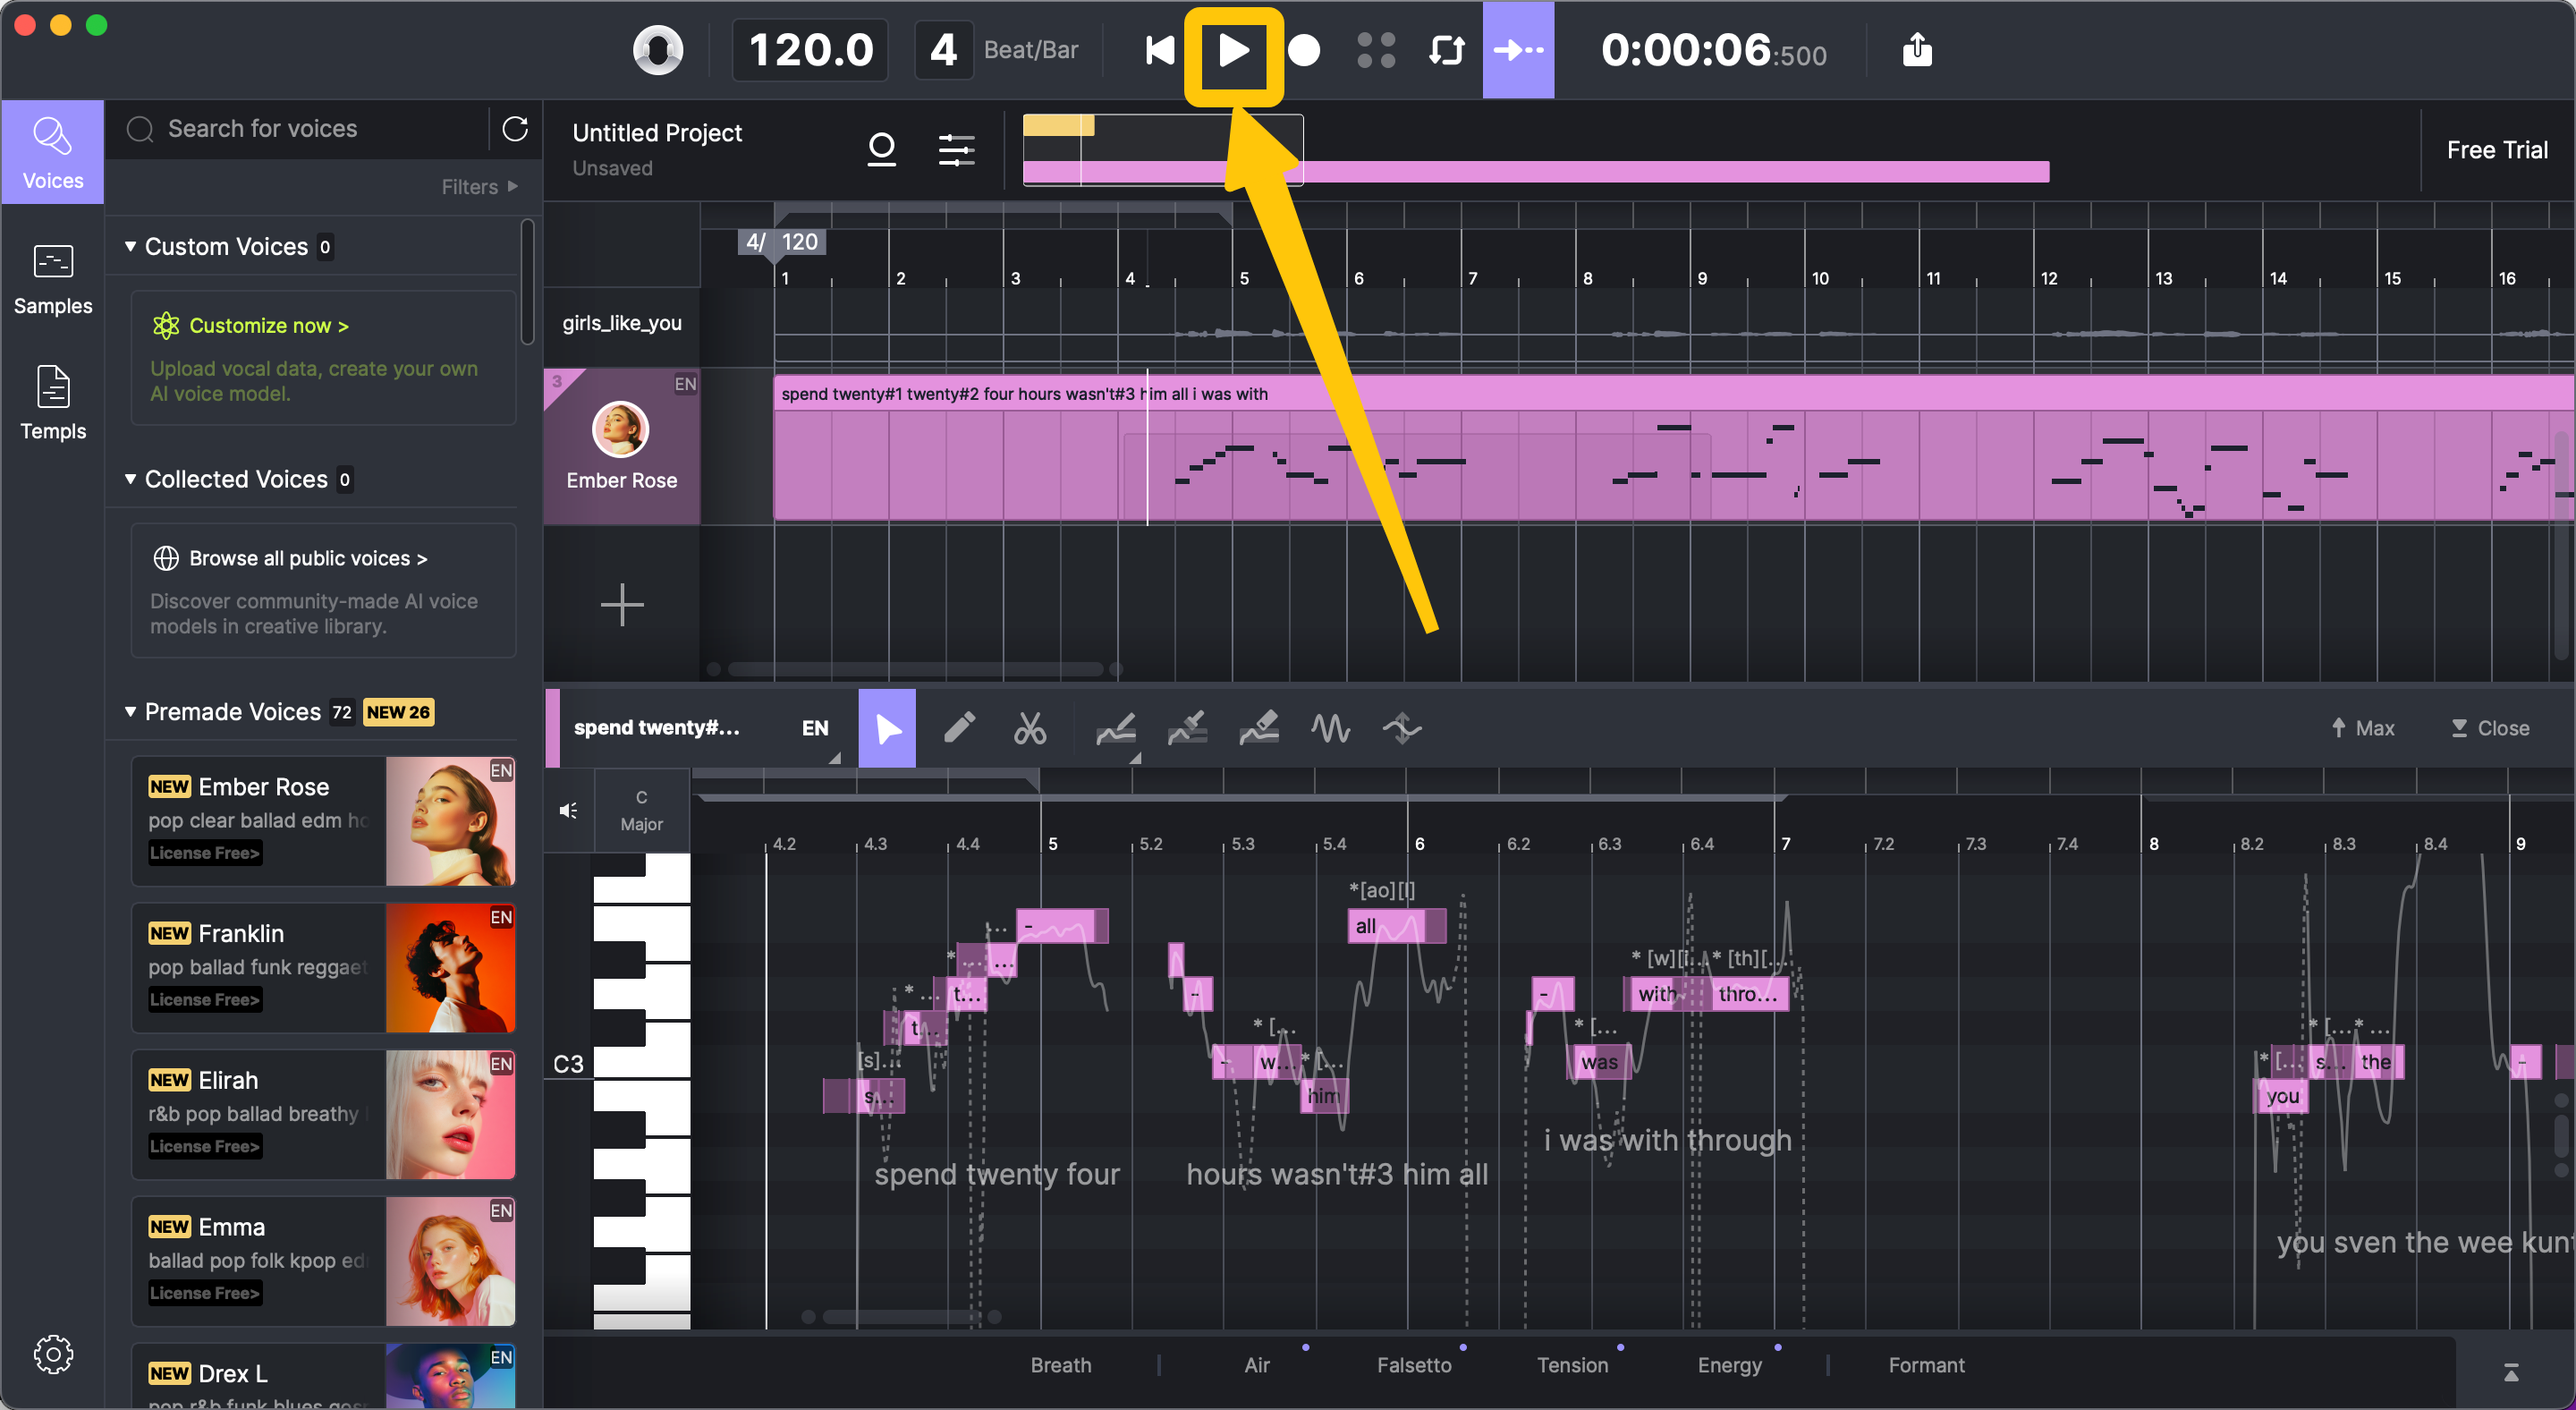
Click the play button to hear the AI singer interpret your vocal, which is now rebuilt with clean, editable MIDI and lyrics. The result will reflect all the adjustments you’ve made — from corrected words to timing and phrasing — giving you a polished version of your original take, but with the flexibility and clarity that AI synthesis allows.
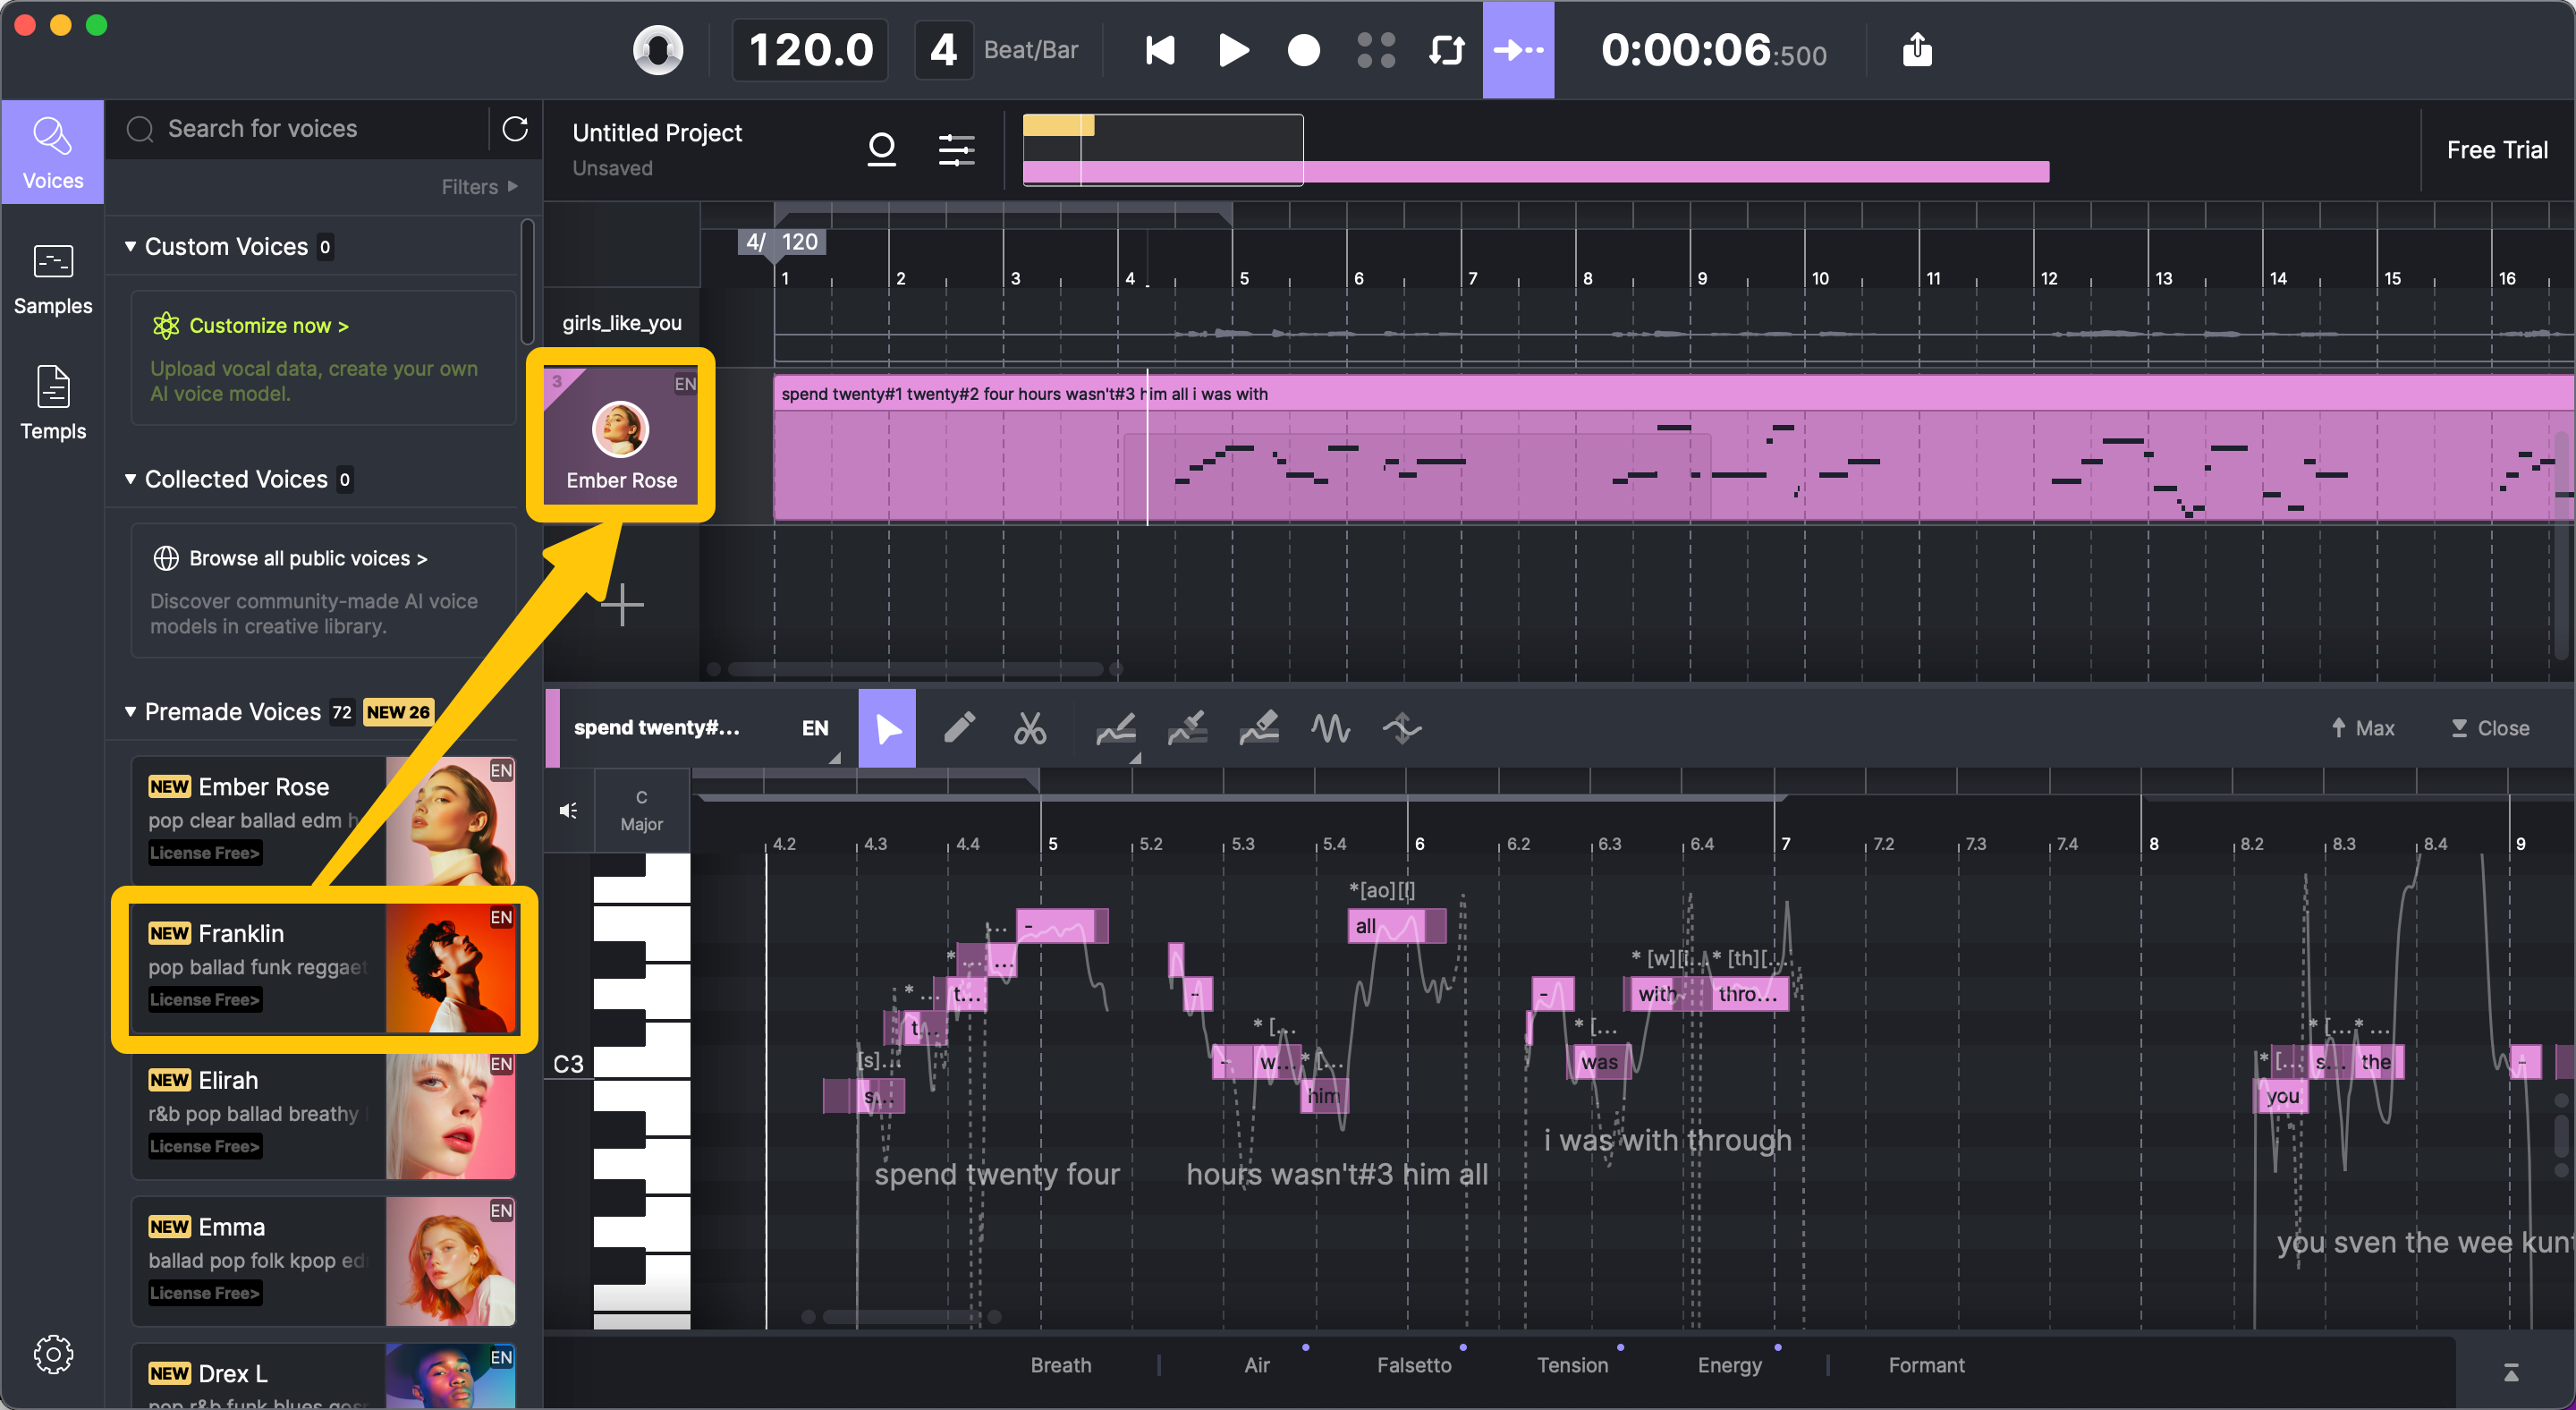
If you’re curious to hear how different voices might perform the same melody, you can try out other AI singers from ACE Studio’s voice list. Just drag a new voice onto the track, and the system will re-render the performance using that voice’s tone and style. This makes it easy to explore different artistic directions or compare vocal textures.
Once you're satisfied with the regenerated performance, you can export the final result just as you would in the MIDI workflow. Whether you're adapting a rough demo, remixing an old take, or creating vocal variations for different versions of a song, ACE Studio makes it fast and intuitive to move from raw audio to a clean, expressive AI performance, ready to use in your production.
How to Use the Voice Changer Step by Step
Step 1 - Open the Voice Changer Tab
Launch ACE Studio and navigate to the second tab in the sidebar library. This section houses all the available pre-made Voice Changer models, neatly categorized into three groups: human voices, instrument models, and your own custom voice models. These options give you the flexibility to transform vocals into anything from different vocal tones to creative instrumental timbres.

Step 2 - Select Your Input Audio
Choose your source audio from the next two possibilities, and decide how you want to input your audio.
The first one is audio input from Arrangement View: Create a selection in the arrangement view that covers the content you want to convert. The selection can contain clips from both audio tracks and AI singer tracks. Therefore, you can convert any audio imported into ACE Studio or recorded directly within it, as well as AI-generated vocals created in ACE Studio.
Once the selection is made, the source box will sync the selection and reflect the corresponding start and end positions.
To clear the selection, click the ‘Clear’ button in the source box.

The second one is from an Audio File: Drag and drop an audio file into the source box. After importing, the audio waveform will be displayed in the source box. To remove the audio file, click the ‘Clear’ button in the source box. Once an audio file is loaded, the source box will no longer sync with any new selection changes.

Step 3 - Select Voice Models for Conversion
After selecting your source audio, you can choose models from the model list to perform the conversion. ACE Studio groups these into three categories:
Voices: Includes all pre-made singing voice changer models designed to convert the source into a target vocal style.
Instruments: Offers a collection of pre-made instrument models that reshape the source into instrument-like sounds.
My Models: Lists all custom voice changer models you've created or uploaded.

Click on any model to select it — you can include up to ten in a single conversion batch. You can select multiple models to convert in one batch. To deselect a model, click it again. Click on the picture of a model to preview its sound.

Each model includes settings for pitch shifting, which can be adjusted by semitones to fit your musical context. For example, you might assign female voices an octave higher and male voices an octave lower to create a layered effect.

Choose up to 10 models for batch conversion. You can mix human voices and instruments.
Step 4 - Click Convert
After selecting your source content and target models, click the ‘Convert’ button to begin the conversion process.
If you have selected multiple target models, the conversion will process them one by one as a batch. While the conversion is in progress, you can start a new conversion by selecting different content and target models.

Below the ‘Convert’ button, there are two checkboxes you can select:
Remove Instrumental: Check this box to remove the instrumental part of the source content before conversion.
Remove Reverb and Harmonies: Check this box to remove reverb and harmonies from the source content before conversion.

Step 5 - Using and manipulating the results
After the conversion is completed, the results will appear in the converted audio list. All converted audio files are organized by conversion batch. Drag and drop the title of a result audio to use it in the arrangement view. (You can also drag and drop the clip directly to your DAW.) Click on the ‘folder’ icon to open the file location in your system. Click the ‘copy’ icon to copy the audio to your clipboard. Right-click on the title bar to delete this file from the right-click menu.

The converted audio files will be saved under the project’s “Samples” folder. If working on a new unsaved project, you will lose all the files when you choose “Don’t save” when closing the program.
Ready to explore it? Launch ACE Studio and access the Voice Changer to start converting your audio.
Customize Your Own Voice Changer Models (Optional)
Click on the “Create a new model” button to jump to the voice changer model customization web page, where you can upload your own samples to train custom voice changer models.

Why Audio to Vocal AI Workflow Is Ideal for Modern Production
Audio to Vocal AI has become an essential tool for today’s music creators who want to transform raw voice recordings into polished, expressive performances without re-recording. Instead of starting from a blank slate, this workflow allows you to build on existing vocal material — a demo, a rough take, or even a voice memo — and turn it into a fully editable track inside ACE Studio.
This approach offers a unique balance of efficiency and control. By converting vocals into MIDI and lyrics, you unlock the ability to edit melody, rhythm, and syllables just like you would in a MIDI-based composition. You can fix pitch imperfections, reshape timing, revise phrasing, and even rewrite lyrics — all with surgical precision. The original performance becomes a flexible foundation for creative exploration, giving you room to reimagine the vocal without losing its emotional core.
For cases where you want to retain the original phrasing but change the vocal identity, the Voice Changer offers an instant transformation. Swap a male voice for a female one, adjust vocal tone to match your genre, or experiment with stylized voices that give your production a distinctive character. It’s fast, intuitive, and doesn’t interrupt your creative flow.
Audio to Vocal AI is especially powerful for remixing old takes, adapting client demos, or working with recordings from artists who aren’t available for re-tracking. Instead of being limited by what was captured in a single session, you gain total freedom to mold the performance into something new — and do it all within a single, integrated environment.
ACE Studio’s audio workflow bridges the gap between raw vocal inspiration and professional vocal execution, making it the go-to solution for modern producers who value both speed and creative depth.
FAQ
What should I do if ACE Studio crashes or lags during processing?
Most performance issues can be solved by optimizing your system. Make sure you’re using a computer that meets ACE Studio’s recommended specs — at least 8GB of RAM and a modern processor. Close background applications while working, and try increasing the buffer size in your DAW if you're experiencing latency. For best results, also make sure you’re running the latest version of the software and drivers.
Can I convert voice recordings to MIDI using AI?
Yes, ACE Studio allows you to convert a vocal recording into editable MIDI notes and lyrics using its audio-to-MIDI AI engine.
Simply drag your voice recording into the audio track and click the “Vocal to MIDI & Lyrics” button. The software will analyze the melody and phonemes in your vocal and generate a fully editable MIDI track, complete with lyric data.
This process works great for turning rough vocal ideas, demos, or even voice memos into full productions. Once converted, you can refine the notes, fix the pitch, reword lyrics, or even assign a different AI voice to recreate the performance in a new style.
Can I use AI vocals in professional music production?
Yes, and many producers already do. AI vocals are used in demos, commercials, background harmonies, and even finished releases. The key is in how you use them — combine thoughtful vocal design with post-production polish, and you can achieve results that sound just as polished as a studio session.
How do I generate AI vocals from audio in ACE Studio?
To generate AI vocals from audio in ACE Studio, start by importing a vocal recording or voice memo into the platform. Use the "Vocal to MIDI & Lyrics" feature to extract melody and lyrics, then assign an AI singer to recreate the vocal line with editable pitch, phrasing, and tone. Alternatively, you can use the Voice Changer to instantly transform the voice into a different vocal identity without needing to convert it to MIDI. Once you're satisfied with the result, export the audio for use in your production.
Can I change the vocal tone without re-recording?
Yes, ACE Studio lets you change the vocal tone without needing to re-record anything. You can either use the built-in Voice Changer to instantly switch vocal style, gender, or tone, or convert your recording into editable MIDI and lyrics, then reassign it to a different AI voice. Both methods allow you to reshape the performance to better match your production — no studio or retakes required.