What is Compression in Music? A Beginner’s Guide to Better Sound

What is Compression in Music?
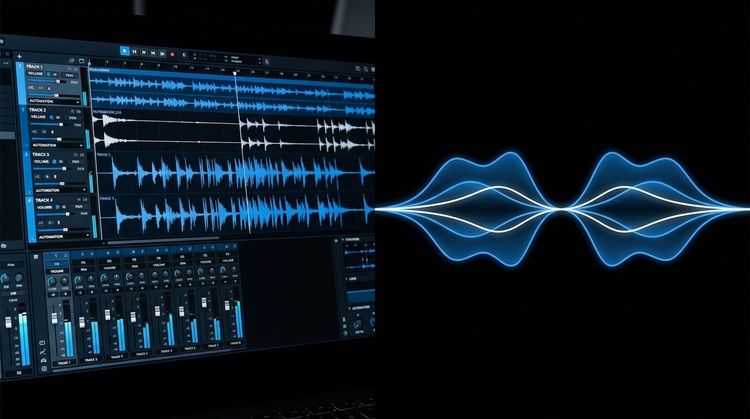
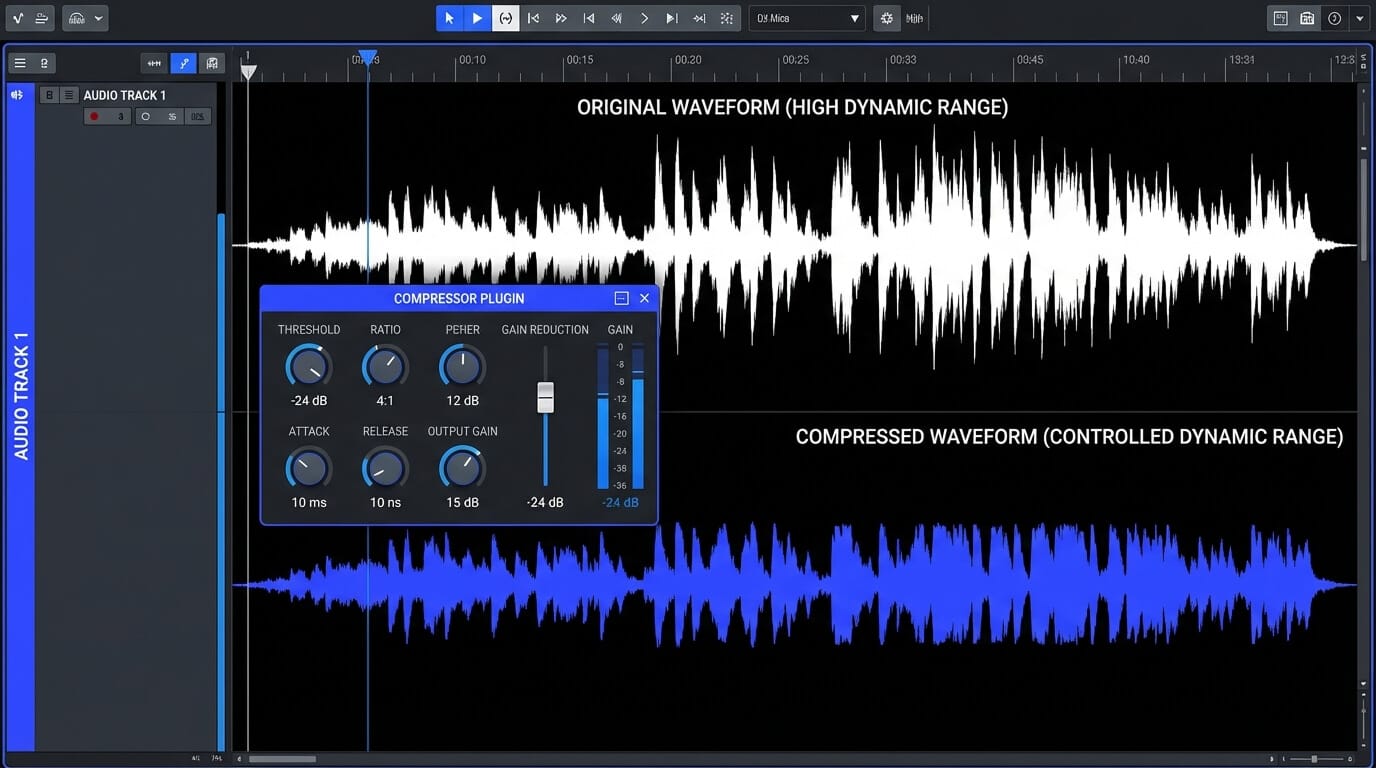
Compression in music is a tool used to control the difference between loud and quiet parts of a sound. That difference is called dynamic range. When a sound gets louder than a level you set, the compressor turns it down. After that, you can raise the overall level of the track so it feels more even and more controlled.
That is the technical definition, but in real music-making, compression is easier to understand by listening for what it changes. A vocal with no compression might have one phrase that disappears and another that jumps too far forward. A bass line might have one note that hits perfectly and the next that feels too weak. A snare might crack hard in one bar and feel small in the next. Compression helps smooth out those shifts so the performance stays readable inside the mix.
This is why compression shows up so often in production. It is not just about fixing mistakes. It is about helping a part hold its shape. A compressed vocal can stay present without constant volume automation. A compressed drum bus can feel tighter and more unified. A compressed instrument can sit in the arrangement without drifting in and out of focus.
That said, compression is not automatically good. Used carelessly, it can flatten a performance and remove the natural rise and fall that gives music emotion. Used well, it does the opposite. It keeps the character of a part intact while making it easier for the listener to hear the details that matter.
A good beginner definition is this: compression is a way to control volume movement without losing musical intent. It does not write the performance for you. It helps the performance translate.
Why Does Compression Matter in Music?
Compression matters because recorded music needs balance. In a raw performance, volume naturally changes from moment to moment. That is part of what makes music expressive. But once you start building a track with drums, bass, vocals, harmonies, synths, guitars, strings, or effects, those natural changes can create problems. A sound that feels expressive on its own may feel unstable once it sits beside everything else.
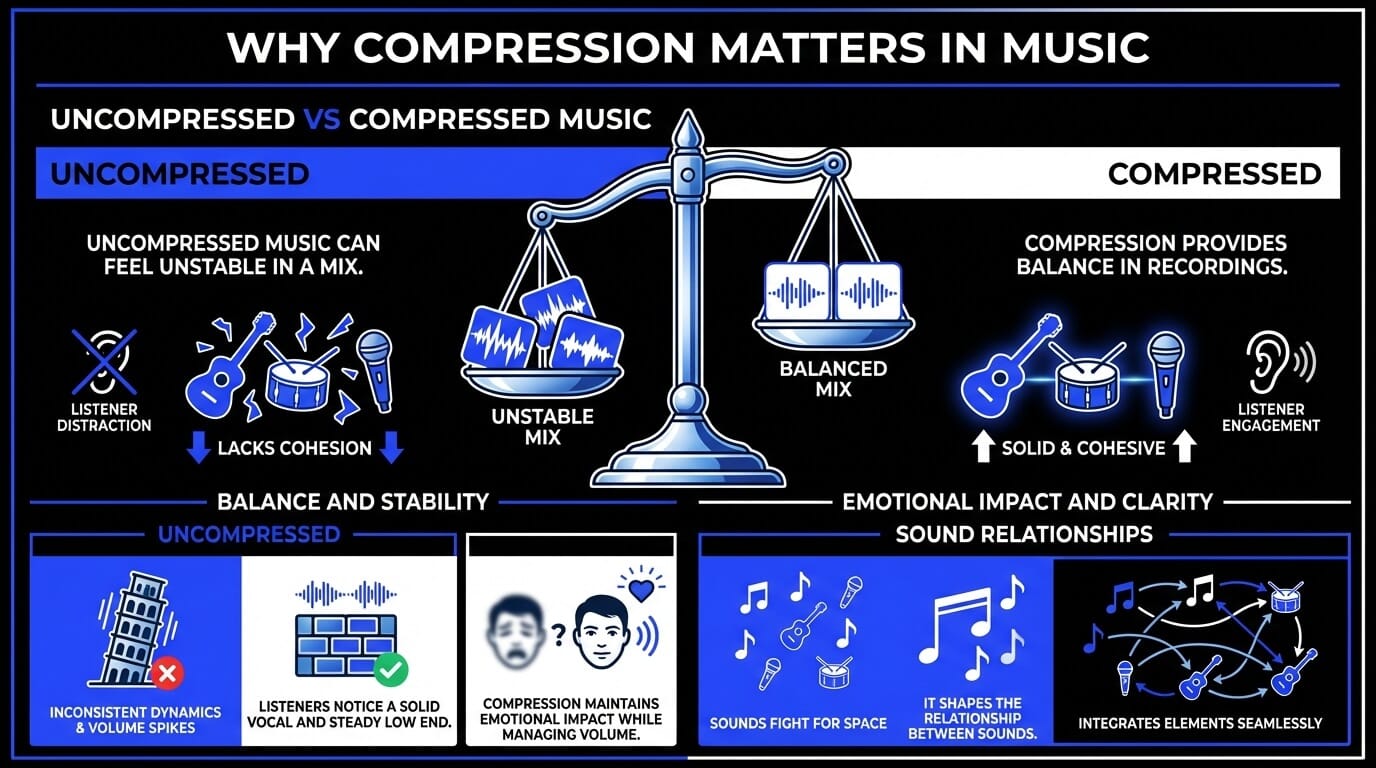
For example, a singer may lean into one word beautifully, but in the mix that word may poke out too hard. A bass player may hit every note with feeling, but one low note may bloom too much and blur the groove. A drum performance may have strong energy, but inconsistent peaks can make the kit feel harder to place. Compression matters because it helps these parts stay emotionally convincing while becoming easier to manage.
It also shapes the way listeners experience a song. When compression is handled well, the listener does not usually notice it directly. They notice that the vocal feels solid, the low end feels steady, and the mix feels connected. In other words, compression often works best when it supports clarity without calling attention to itself.
This is especially important for beginners because compression is one of the first tools that teaches you to hear music as a relationship between sounds, not just as isolated tracks. You begin to notice that a part does not only need to sound good alone. It needs to behave well with everything around it.
That is why compression matters so much. It gives you control. It helps you shape dynamics, protect important details, and keep a mix feeling intentional from the first bar to the last.
How Does Compression Work?
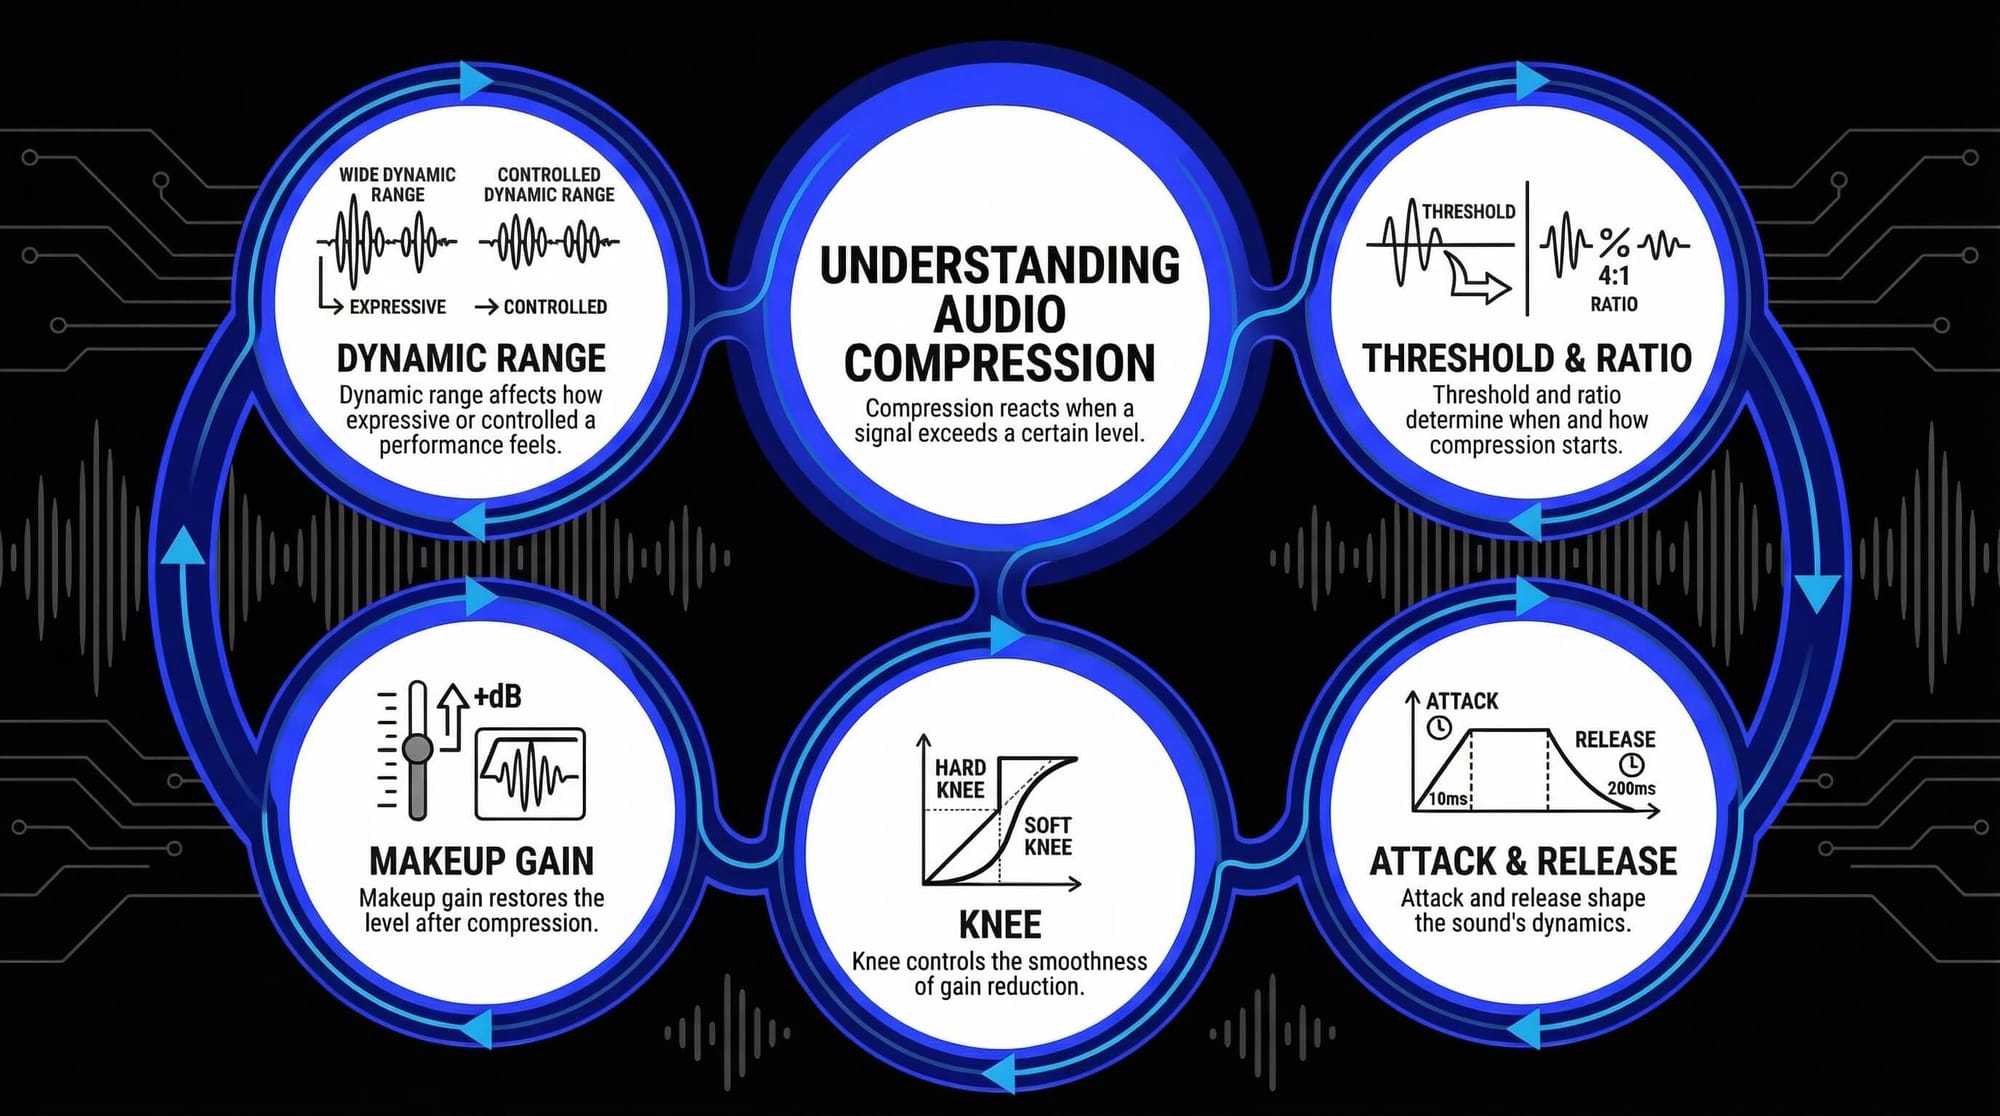
A compressor works by reacting when a signal gets louder than a level you choose. Once the sound crosses that point, the compressor reduces the gain according to the settings you have dialed in. That is the basic mechanism, but the musical result depends on how much it reduces, how fast it reacts, and how smoothly it lets go.
Think of compression as a volume control with rules. Instead of riding the fader by hand every second, you tell the compressor when to step in and how firmly to respond. That is why the same compressor can sound nearly invisible in one mix and very obvious in another. The settings decide whether it simply tidies up peaks or actively reshapes the character of a sound.

This is also why beginners often find compression confusing at first. A compressor does not add a single obvious effect in the way reverb or distortion does. Its job is subtler. It changes movement, consistency, punch, sustain, and perceived loudness. You may not hear it as a separate layer. You hear it in the way the part sits.
A good way to learn compression is to stop asking, “Is it working?” and start asking, “What is it changing?” Is the vocal staying steady? Is the kick losing punch? Is the bass holding the groove more firmly? Is the guitar suddenly feeling flat? Compression becomes much easier once you connect each control to a musical outcome rather than treating the plugin like a technical puzzle.
The main controls you need to understand are dynamic range, threshold, ratio, attack, release, knee, and makeup gain. Once those make sense, compression stops feeling mysterious and starts feeling practical.
What is Dynamic Range?
Dynamic range is the difference between the quietest and loudest parts of a sound. In music, that range is constantly moving. A singer may begin a phrase softly, then push into a stronger note. A drummer may ghost one snare hit and crack the next one. A piano part may breathe between gentle chords and more forceful accents. That movement is not a problem by itself. In fact, it is often where expression lives.
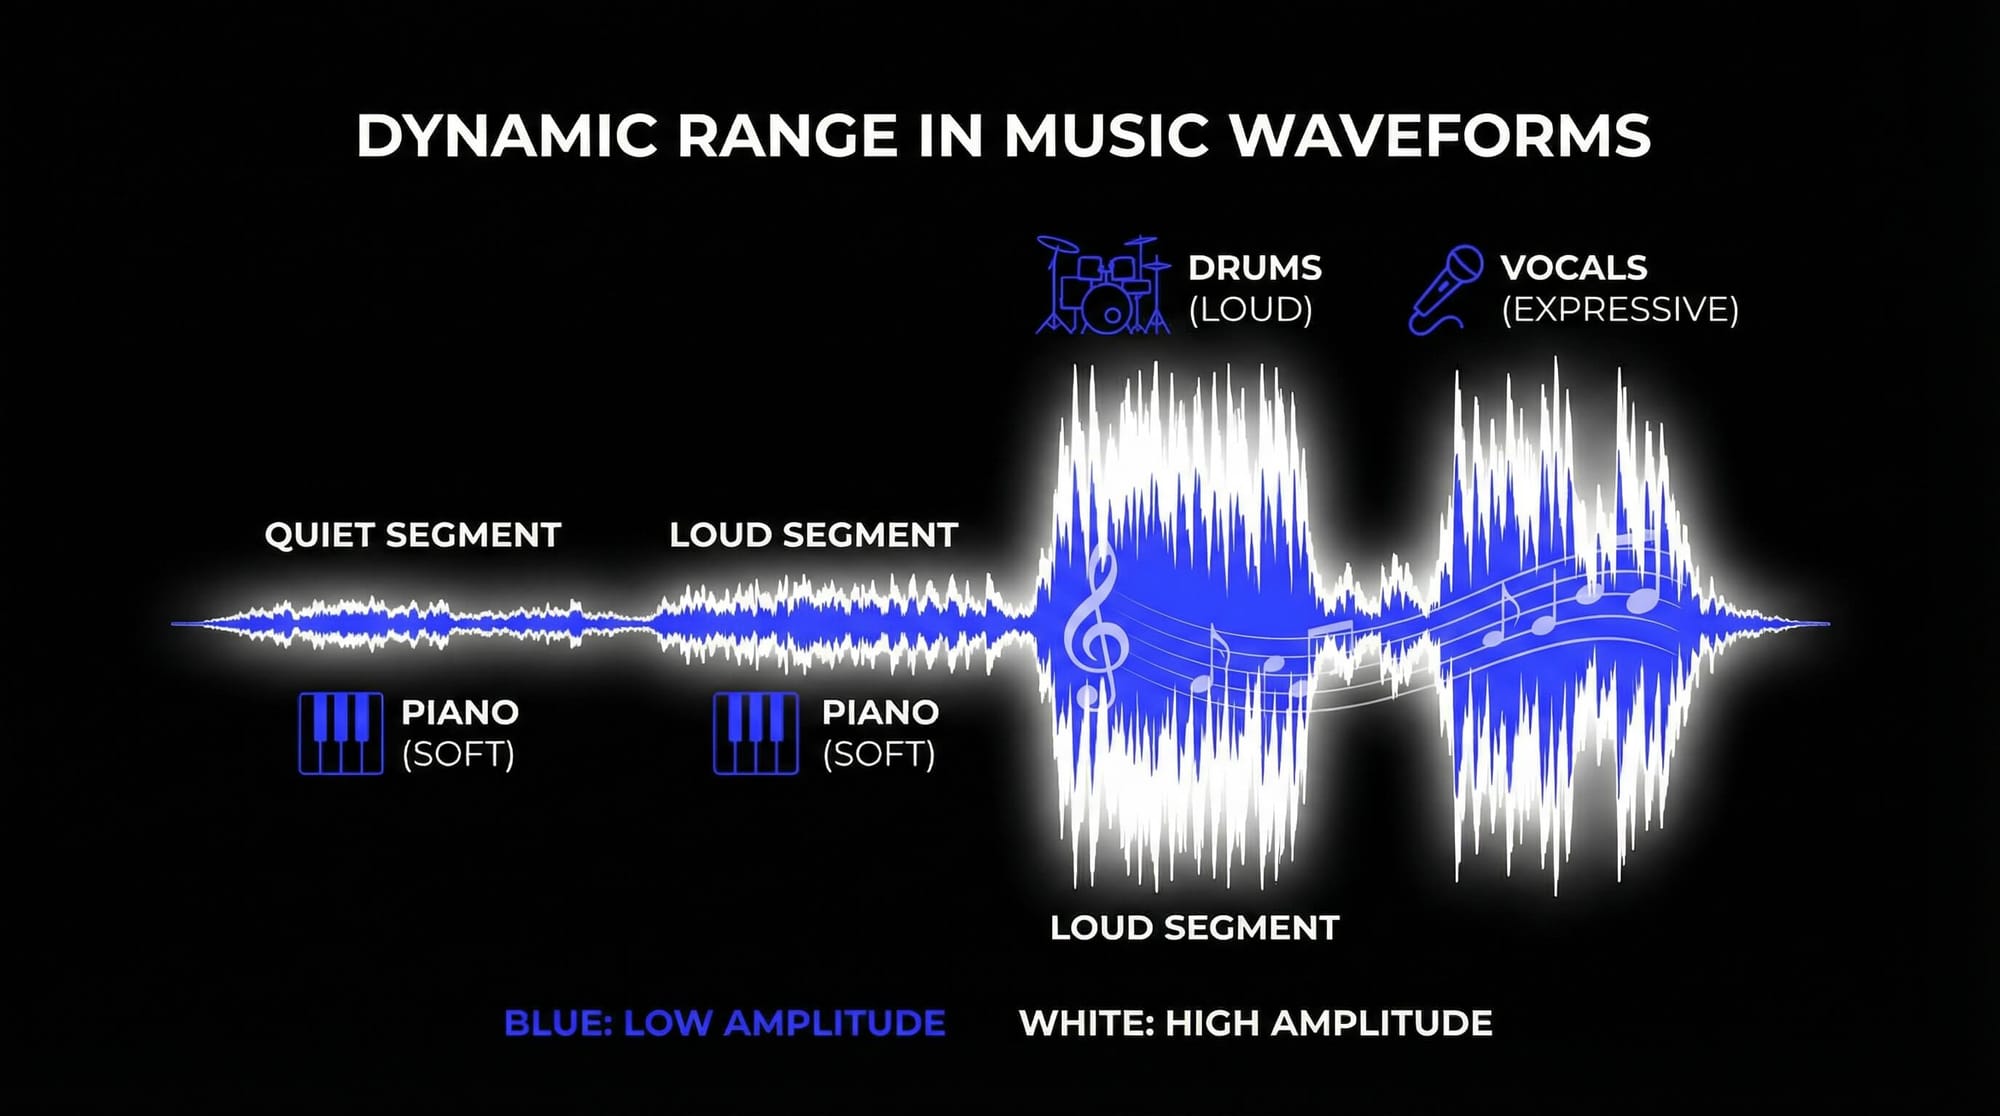
Compression matters because some dynamic range helps a performance feel human, while too much dynamic range can make a track hard to control. If the quiet parts disappear and the loud parts leap out too aggressively, the listener has to work harder to follow the performance. A compressor narrows that gap so the part stays readable.
This does not mean every track should be flattened. Different sounds need different amounts of movement. A lead vocal often benefits from more control because every word matters. A jazz piano may need more natural variation. A bass part may sound stronger with tighter dynamics, while an ambient guitar may need room to swell and fade naturally.
The real goal is not to eliminate dynamic range. It is to shape it. You want enough movement to keep the performance alive, but not so much that it distracts from the song. Once you hear dynamic range clearly, you start making better compression decisions because you stop compressing out of habit and start compressing with intent.
A useful listening habit is to compare the loudest moment of a part to the softest one. If the distance feels expressive, leave it alone. If it feels distracting, compression may help.
What Do Threshold and Ratio Do?
Threshold and ratio are the two controls that decide when compression starts and how hard it works.
The threshold sets the level where the compressor begins reacting. If the signal stays below that level, nothing happens. Once it crosses the threshold, gain reduction starts. Lowering the threshold usually means more of the signal gets compressed because the compressor is stepping in more often. Raising it means the compressor only reacts to louder peaks.
The ratio decides how strongly those peaks are reduced. A low ratio such as 2:1 gives gentle control. A higher ratio such as 6:1 or 8:1 sounds firmer and more obvious. At extreme settings, compression starts to approach limiting, where peaks are held down much more aggressively.
These two controls work together. A low threshold with a high ratio can feel heavy-handed very quickly. A higher threshold with a gentle ratio may only catch occasional peaks and sound almost invisible. That is why copying settings from one source to another rarely works perfectly. A whispery vocal, a spiky snare, and a smooth synth pad will all hit the compressor differently.
For beginners, it helps to think in terms of purpose:
- Need light control? Use a moderate threshold and low ratio.
- Need peak taming? Set the threshold so it only catches louder moments.
- Need a very firm sound? Lower the threshold or increase the ratio carefully.
The meter can help, but your ears matter more. If the vocal becomes steadier without sounding pinned down, you are likely in a good range. If the drum loses impact or the instrument starts sounding smaller for no clear reason, the settings may be too aggressive.
Threshold tells the compressor when to wake up. Ratio tells it how strict to be once it gets there.
How Do Attack and Release Shape Sound?
Attack and release are where compression starts to feel musical.
Attack controls how quickly the compressor reacts after the signal crosses the threshold. Release controls how quickly it stops compressing after the signal falls back below that point. These two settings shape the motion of the part, not just its level.
A fast attack grabs peaks quickly. That can smooth out sharp transients, control harshness, and make a sound feel more even. On a vocal, this may help tame hard consonants or sudden bursts of volume. On drums, though, too fast an attack can shave off the initial hit and make the part lose punch.
A slower attack lets more of the front edge through before compression clamps down. That can help a kick or snare feel punchier because the transient still speaks before the body gets controlled. On some instruments, it can preserve energy and articulation.
Release is just as important. A fast release lets the compressor recover quickly, which can make a part feel lively and energetic. But if it is too fast, the gain may bounce up and down in a distracting way. A slower release sounds smoother and steadier, but if it hangs on too long, the sound can feel held down or less responsive.
This is why attack and release are not just technical settings. They shape feel. They determine whether compression sounds tight, soft, punchy, calm, obvious, or nearly invisible.
A practical rule is to listen for what the front and tail of the sound are doing. If a drum loses its crack, the attack may be too fast. If a vocal feels unnaturally squeezed between phrases, the release may be too slow. If the compressor seems to flutter, the release may be too fast. These are the controls that make compression breathe with the music instead of fighting it.
What Does Knee Do?
Knee controls how smoothly the compressor moves into gain reduction around the threshold.
With a hard knee, compression begins more abruptly once the signal crosses the threshold. The action feels firmer and more direct. This can be useful when you want clear, assertive control over peaks, especially on sounds that need obvious discipline.
With a soft knee, the compressor starts easing in before the signal fully crosses the threshold and reaches full compression more gradually. The result is usually smoother and less noticeable. That is often helpful on vocals, pads, or other sources where you want the control to feel natural rather than mechanical.
Knee is one of those controls beginners sometimes ignore, but it can change the texture of compression in a meaningful way. If threshold and ratio decide the basic amount of compression, knee affects how politely or how firmly that compression arrives. Two settings with the same ratio can feel quite different depending on the knee.
In practice, soft knee settings tend to be easier for subtle leveling. They can make a compressor feel more forgiving, especially when a performance moves around a lot. Hard knee settings can work well when you want the compressor to step in clearly and keep peaks on a tighter leash.
You do not always need to obsess over knee, but it is useful when a compressor feels technically correct yet still sounds slightly wrong. If the gain reduction feels too abrupt, softening the knee may help. If the compressor feels too relaxed and you need a firmer response, a harder knee can make it more decisive.
It is a small control, but it affects how natural the compression feels under the fingers and in the ear.
What is Makeup Gain?
Makeup gain is the level you add back after compression has reduced the signal. Since a compressor turns down louder parts, the track often comes out quieter overall. Makeup gain lets you raise the level again so the compressed signal sits properly in the mix.
This step matters because compression often sounds “better” simply because louder sounds seem more impressive to the ear. If you do not level-match before comparing, it is easy to mistake extra volume for improvement. Makeup gain helps you judge the actual effect of compression rather than being fooled by the loudness difference.
It also plays a big role in why compression can make a sound feel more present. Once the peaks are under control, you can lift the overall level more safely. That means quieter details become easier to hear. Breath in a vocal, body in a bass note, sustain in a guitar, or room tone in a snare may all become more audible after compression plus makeup gain.
But this is also where beginners can overdo things. If you add too much makeup gain, the track may end up louder than it needs to be, and you may think the compression is working better than it actually is. In reality, you may just be turning the signal up.
A good habit is to compare the compressed and uncompressed versions at roughly the same perceived level. That lets you ask a more useful question: not “Which one is louder?” but “Which one sits better, feels better, and communicates the performance more clearly?”
Makeup gain is the final balancing step. It does not create good compression on its own, but it helps you hear the result honestly and use the compressor musically instead of chasing loudness.
When Should You Use Compression?
You should use compression when a sound has the right tone and performance, but its volume movement is making the mix harder to manage. That is the simplest test. Compression is not a rule, and it is not something every track needs by default. It is a response to a problem or a creative goal.

Sometimes the problem is obvious. A vocal might jump out on one line and disappear on the next. A snare might crack too hard in a few spots. A bass line might feel uneven enough to weaken the groove. In those cases, compression helps control the part so it stays consistent. Other times, the goal is more aesthetic. You may want a drum bus to feel tighter, a vocal to feel more intimate, or a sustained instrument to hold its body a little longer. Compression can do that too.
The key is to avoid using it just because a plugin slot is empty. A track does not need compression simply because it exists. It needs compression when there is something to shape. That might be level consistency, punch, sustain, density, or glue. Once you know what you want the compressor to do, the settings become much easier to judge.
A good beginner habit is to ask one question before inserting a compressor: what is bothering me about this sound right now? If the answer is “nothing,” leave it alone. If the answer is “it is too jumpy,” “the peaks are distracting,” or “it will not sit still in the mix,” compression may be the right tool. The best results come from clear intention, not routine processing.
Compressing Vocals
Vocals are one of the most common places to use compression because the human voice naturally moves in volume from word to word and phrase to phrase. That movement is part of what makes a performance emotional, but in a mix it can also create instability. A quiet phrase may fall behind the instruments, while a louder word may suddenly poke out. Compression helps keep the vocal present without forcing you to automate every line immediately.
For beginners, vocal compression is often about leveling rather than effect. You are not trying to erase the life in the singer’s performance. You are trying to make sure the listener can follow the lyric and feel the performance from start to finish. A gentle ratio and a threshold that catches louder phrases can often do a lot without sounding obvious.
Attack and release matter here. If the attack is too fast, the vocal may lose some of its natural edge and start to feel overly controlled. If the release is poorly timed, the compression may breathe in a distracting way between words. A soft knee often helps vocal compression feel smoother, especially when the singer moves around dynamically.
It also helps to remember that one compressor does not have to do everything. Sometimes light compression followed by volume automation works better than trying to force the plugin to solve every issue. The goal is not perfection. The goal is readability, consistency, and emotional clarity.
A useful listening test is to focus on whether the lyric stays connected. If some words still vanish, you may need more control. If the vocal starts sounding flat or pinned in place, you may have gone too far. Good vocal compression keeps the performance human while making it easier to hear.
Compressing Drums
Drums are a great way to learn compression because the results are often easier to hear. A compressor can change the shape of a drum hit in a very direct way. It can tighten a kick, soften a snare, add sustain to room mics, or make a drum bus feel more unified. But drums also teach an important lesson: compression is not only about control. It is also about feel.
On individual drum tracks, compression is often used to manage peaks or shape the envelope of the sound. A slower attack can let the transient of a kick or snare come through before the compressor clamps down, which helps preserve punch. A faster attack can smooth that front edge and make the hit feel rounder or less aggressive. Release affects whether the drum breathes naturally or starts to feel choked.
On a drum bus, compression often becomes more about glue. Instead of fixing one unstable hit, you are helping the kit move together. This can make the drums feel more cohesive, especially in dense productions where the shells, cymbals, and rooms need to speak as one musical unit.
The danger with drums is over-compressing them until they lose contrast. If everything is pushed into the same dynamic shape, the groove can feel smaller even if the kit is technically louder. Punch usually comes from controlled contrast, not from crushing every peak.
A helpful beginner approach is to listen for the front of the hit and the tail that follows it. If the crack of the snare disappears, the attack may be too fast. If the compressor never seems to let go before the next hit, the release may be too slow. Drums respond clearly to these changes, which makes them one of the best places to train your ears.
Compressing Bass and Instruments
Bass often benefits from compression because low-end inconsistency is easy to feel, even when it is harder to identify in words. One note may jump out and overload the groove, while another may sink back and weaken the line. Compression helps make the bass feel steadier so the rhythm section holds together. This is less about making the bass louder and more about making it more dependable from note to note.
A controlled bass part usually supports the song better because the listener stops noticing volume swings and starts feeling the line as a continuous foundation. That is especially helpful when the arrangement is busy or when the bass has a lot of dynamic variation in the performance itself. Gentle to moderate compression is often enough. Too much can remove the natural weight and phrasing that make the bass feel musical.
Other instruments can benefit from compression too, but the reason changes depending on the role of the part. Acoustic guitar may need help staying even in a dense mix. Electric guitar may use compression for sustain or a smoother body. Piano may need light control if some notes are leaping out too sharply. Strings, synths, and pads may not need much compression at all if they are already stable, but they can still benefit from subtle control when they are taking up a lot of space in the arrangement.
This is where context matters most. A part that sounds dynamic and beautiful alone may feel erratic once vocals and drums enter. On the other hand, a part that already has a stable shape may not need additional compression. The right question is not “Do instruments need compression?” The right question is “What role does this instrument play, and is its dynamic movement helping or hurting that role?”
Compression on instruments works best when it serves arrangement, not habit.
Compression in Mixing and Mastering
Compression in mixing is usually about helping individual elements and groups sit together with more intention. You might compress a vocal so it stays present, a bass so it locks with the kick, or a drum bus so the kit feels tighter. In that stage, compression is often specific. You are listening to what one part is doing inside the larger picture and deciding whether it needs more control, more density, more sustain, or more cohesion.
Bus compression in mixing can be especially useful when several sounds need to feel connected. Backing vocals, layered guitars, or grouped drums often respond well to a touch of shared compression because it encourages them to move together rather than as separate pieces. Used lightly, this can make an arrangement feel more finished without drawing attention to the processing itself.
Mastering compression is different. At that stage, you are not fixing the behavior of one instrument. You are shaping the dynamics of the full stereo mix. That requires more restraint because every move affects everything. A small amount of compression can add polish and control, but too much can flatten the song, reduce contrast, and make the track feel smaller emotionally. This is why mastering compression is often subtle. The changes may be small, but they are broad.
For beginners, it helps not to rush into heavy mix bus or mastering compression too early. It is better to learn what compression does on vocals, drums, and bass before trying to shape an entire song with one processor across the stereo output. Once you can hear how compression changes individual sources, you will make better decisions at the mix and master level.
Compression in mixing and mastering should support the emotional arc of the song, not overpower it. When it works, the track feels stable, connected, and clear without sounding squeezed.

Common Compression Mistakes
Compression gets easier once you understand the controls, but beginners still tend to run into the same problems. Most of them come from one habit: using compression before having a clear reason. A compressor can solve real mix issues, but it can also create new ones when it is added automatically or pushed too far.
The good news is that compression mistakes are usually fixable. They are less about “bad technique” and more about listening for the wrong things. Many beginners focus only on whether the track sounds louder or more polished in the moment. A better approach is to ask whether the sound is now more stable, more musical, and easier to place in the mix. If the answer is no, the compressor may be working against you.
Another common problem is judging compression in solo for too long. A sound that feels exciting by itself may become too flat once the full arrangement returns. The opposite can also happen: a subtle amount of compression may feel unremarkable in solo, but make the track sit perfectly in context. Compression decisions become more reliable when you move back and forth between detailed listening and full-mix listening.
These mistakes matter because compression is powerful. It can tighten a performance, shape energy, and improve clarity. But it can also remove contrast, blunt transients, and make a track feel small. Learning what not to do is part of learning what good compression actually sounds like.
Using Too Much Compression
One of the most common mistakes is simply using too much compression. This usually happens when the compressor keeps solving one small issue, so you keep turning it up until the whole signal changes character. The vocal becomes steady, but also lifeless. The drums become controlled, but lose punch. The bass becomes consistent, but feels less musical. At that point, the compressor is no longer helping the sound communicate better. It is flattening it.
This is easy to do because heavier compression can sound impressive at first. A compressed track often seems louder, denser, and more forward. That can trick you into thinking it is automatically better. But once the ear adjusts, you may notice that the part has lost movement, contrast, or emotional shape.
The risk is especially high when you are chasing consistency without respecting performance. Not every dynamic change is a problem. Some accents are meant to stand out. Some phrases are meant to pull back. Good compression supports those choices. Too much compression overrides them.
A useful safeguard is to bypass the compressor and compare often. Ask whether the processed track still feels like the same performance, just easier to manage. If it feels smaller, flatter, or strangely pinned in place, you may have gone too far.
It also helps to remember that compression is not the only answer. Sometimes a single loud word is better fixed with automation. Sometimes uneven playing needs editing, not more gain reduction. The best compression often sounds like restraint.
Choosing the Wrong Attack and Release
A compressor can have the right threshold and ratio and still sound wrong because the attack and release are working against the source. This is one of the most common beginner mistakes. The settings technically compress the signal, but they do not follow the natural motion of the sound.
If the attack is too fast, a sound can lose its front edge. Drums may stop punching. A vocal may lose some of its natural articulation. A bass note may feel less defined at the start. If the attack is too slow, sharp peaks may slip through untouched, which means the compressor is not really controlling what you wanted it to control in the first place.
Release causes a different set of problems. If the release is too fast, the compressor may let go so quickly that the level seems to bounce or flutter. This can sound nervous, especially on vocals or sustained instruments. If the release is too slow, the compressor may still be holding down the signal when the next phrase or hit arrives. That can make the track feel stuck or overly smoothed.
This is why attack and release should be chosen by listening to the rhythm and envelope of the sound. A snare, a bass line, and a lead vocal do not move the same way, so they should not automatically get the same timing settings. These controls shape how the compressor breathes with the performance.
A helpful listening method is to exaggerate the settings first. Make the attack obviously fast or slow, then listen to what happens to the front of the sound. Do the same with release and listen to the recovery. Once you hear the extremes, it becomes easier to settle on a musical middle ground.
Compressing Without a Clear Goal
This may be the most important mistake of all: using compression without knowing what you want it to do.
It is very common for beginners to add a compressor because they have heard that vocals, drums, bass, or mixes are “supposed” to be compressed. That mindset leads to vague choices. You lower the threshold, adjust a few knobs, and hope the track improves. Sometimes it does. Often it just becomes different, not better.
Compression works best when it has a job. Maybe the goal is to smooth a vocal so the lyric stays clear. Maybe it is to make a bass line more even. Maybe it is to tighten a drum bus or hold back a few harsh peaks. Once the goal is clear, the controls start making sense. You know what to listen for, and you can tell whether the compressor is helping.
Without that goal, it becomes easy to over-process. You may chase loudness when the real issue is inconsistency. You may crush transients when the real issue is a single note or phrase. You may keep tweaking because you are listening for a dramatic effect instead of a useful change.
A strong beginner habit is to say the purpose out loud before inserting the compressor. Something as simple as “I want this vocal to stay steady” or “I want this snare to keep its punch but lose the sharpest peaks” is enough. That one sentence gives direction to every control that follows.
Compression is not just about settings. It is about intent. Clear intent leads to better listening, and better listening leads to better compression.
Tips for Learning Compression Faster
Compression becomes much easier once you stop treating it like a mysterious plugin and start treating it like a listening skill. Most beginners struggle with compression not because the controls are too advanced, but because the changes can be subtle at first. Reverb gives you space. Distortion gives you grit. Compression often gives you something less obvious: steadiness, control, density, or punch. That means you have to train your ear to notice movement, not just tone.
One of the fastest ways to learn is to work on one source at a time. Start with something clear and familiar, like a lead vocal, a snare, or a bass line. Listen to the raw sound and ask what feels unstable about it. Is it jumping in level? Are the peaks too sharp? Does it disappear in certain moments? Once you know what problem you are hearing, compression becomes easier to judge because you are listening for a specific improvement instead of hoping the sound becomes “more professional.”
It also helps to exaggerate settings on purpose. Push the threshold lower than you normally would. Try a higher ratio. Make the attack very fast, then very slow. Do the same with release. This teaches you what each control is actually changing. Once you hear the extremes, subtle settings stop feeling random. You begin to recognize that attack affects the front edge of a sound, release affects its recovery, and threshold decides how often compression steps in.
Another useful habit is to level-match when comparing. A compressed sound often feels better simply because makeup gain has made it louder. That can fool you. Bring the processed and unprocessed signals to a similar perceived level, then compare again. If the compressed version still feels steadier, clearer, or more controlled, the change is probably helping. If it only feels bigger because it is louder, you have not really judged the compression yet.
You will also learn faster if you stop working in solo all the time. Compression is easier to hear on an isolated track, but it is easier to judge in the full arrangement. A vocal that sounds slightly over-controlled in solo might sit perfectly in the mix. A drum track that feels punchy by itself might become too aggressive once the rest of the song returns. Move between solo and full playback often. Compression is a mixing decision, not just a plugin decision.
Finally, remember that compression is not always the answer. Sometimes the better move is clip gain, editing, or automation. If one word is too loud, you may not need to compress the whole vocal. If one bass note blooms too much, you may not need to control the entire performance more aggressively. Learning compression faster also means learning when not to use it.
FAQ
What does a compressor do in music?
A compressor reduces the difference between the loudest and quietest parts of a sound, helping vocals, drums, bass, and instruments feel more even and controlled in the mix. Rather than changing the notes or tone directly, it shapes how a sound moves in level, which can make a part feel steadier, more present, and easier to place.
Does compression make music louder?
Compression can make music feel louder because it controls peaks and allows you to raise the overall level more easily, but its main job is dynamic control, not loudness by itself. That is why compressed audio often sounds fuller or more forward, even when the actual improvement comes from better balance rather than just more volume.
What is the best compressor setting for beginners?
There is no single best compressor setting for beginners because the right settings depend on the source and the goal, but gentler settings usually work best when you are learning. A low ratio, moderate threshold, and careful attack and release will help you hear what the compressor is doing without flattening the sound too quickly.
When should you avoid compression?
You should avoid compression when a sound already feels balanced, expressive, and easy to place in the mix, or when the real issue would be better solved with automation, editing, or EQ. If there is no clear dynamic problem to fix, adding compression can remove natural movement and make the performance feel smaller or less alive.
What is the difference between compression and limiting?
Compression and limiting both control dynamics, but a limiter is a more aggressive tool designed to stop peaks from going above a set ceiling, while compression is usually more flexible and musical in how it shapes a sound. In simple terms, compression manages dynamic movement, while limiting is mainly used for strict peak control.