How to Mix Vocals: Complete Step-by-Step Guide for a Pro Sound

A well-mixed vocal feels naturally integrated into the song, balanced, expressive, and emotionally connected to the music. When done right, it enhances the storytelling, guides the listener’s attention, and gives the entire production a sense of polish and depth. Raw recordings, no matter how strong the performance, often lack this level of refinement.
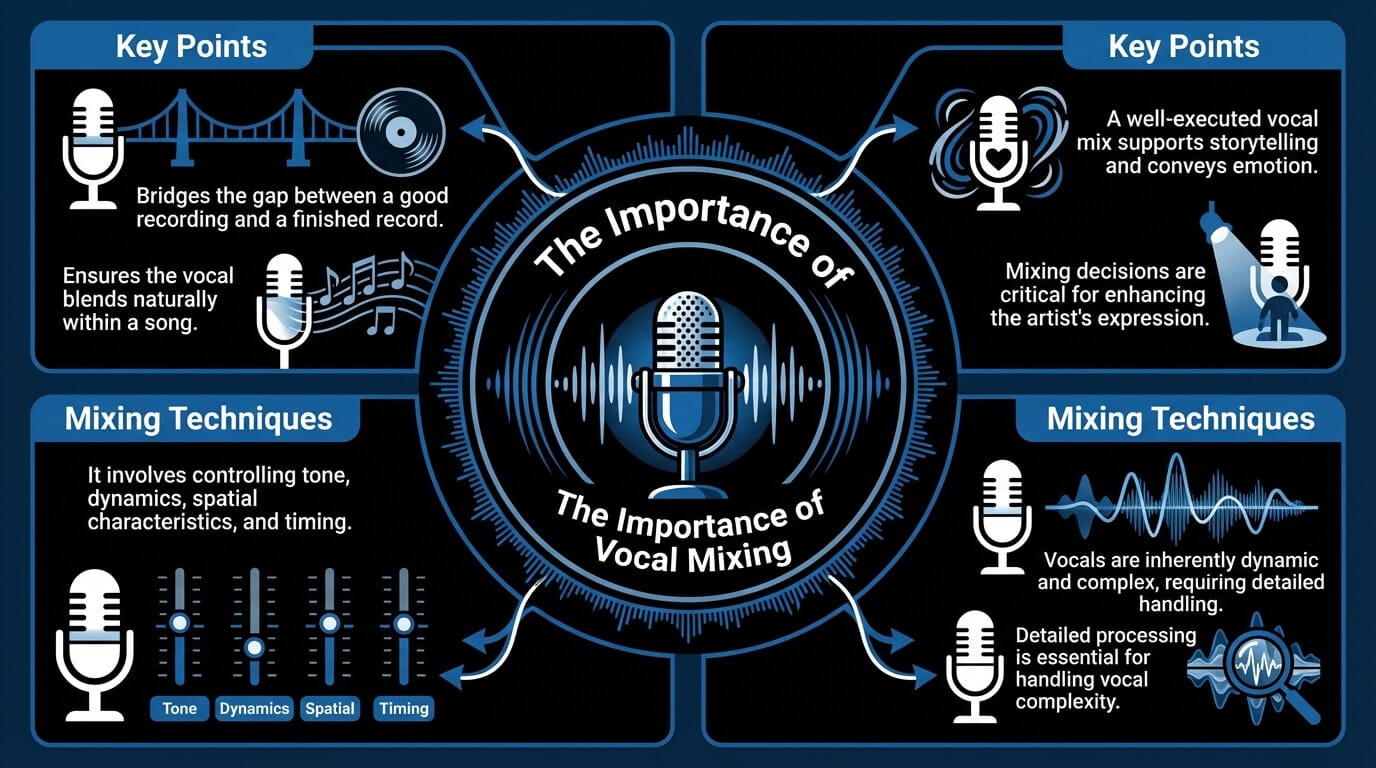
Vocal mixing bridges the gap between a good recording and a finished record. It requires both technical accuracy and musical intuition: shaping tone, managing dynamics, and creating space so the voice breathes within the arrangement. This guide walks you through every stage of the process, from essential tools and preparation to advanced techniques and genre-specific approaches, helping you achieve vocals that sound powerful, clear, and professional.
What Is Vocal Mixing and Why Does It Matter
Vocal mixing is the process of refining a recorded vocal track to ensure it blends naturally within a song. This involves controlling tone, dynamics, spatial characteristics, and timing so the voice feels intentional and musically cohesive. Without proper mixing, even a great performance can feel disconnected or overpowering, lacking the clarity and depth expected in a professional production.
A well-executed vocal mix shapes the way a listener experiences a song. It supports storytelling, conveys emotion, and maintains balance across different playback systems. The mixing stage is where decisions are made that either enhance or obscure the artist’s expression, making it one of the most critical phases in the production process.
Why Vocals Are the Most Important Element
In most genres, the vocal carries the core message of the song. It holds the listener’s attention and often defines the track’s identity. Because of its central role, any imbalance, whether in tone, volume, or presence, can distract or confuse the listener.
Unlike instruments, vocals are inherently dynamic and complex. Breath, phrasing, pitch variation, and articulation all demand detailed handling. A strong vocal mix ensures the performance feels human and intentional, while staying consistent and present within the musical landscape.
Mixing vs. Mastering: What's the Difference?
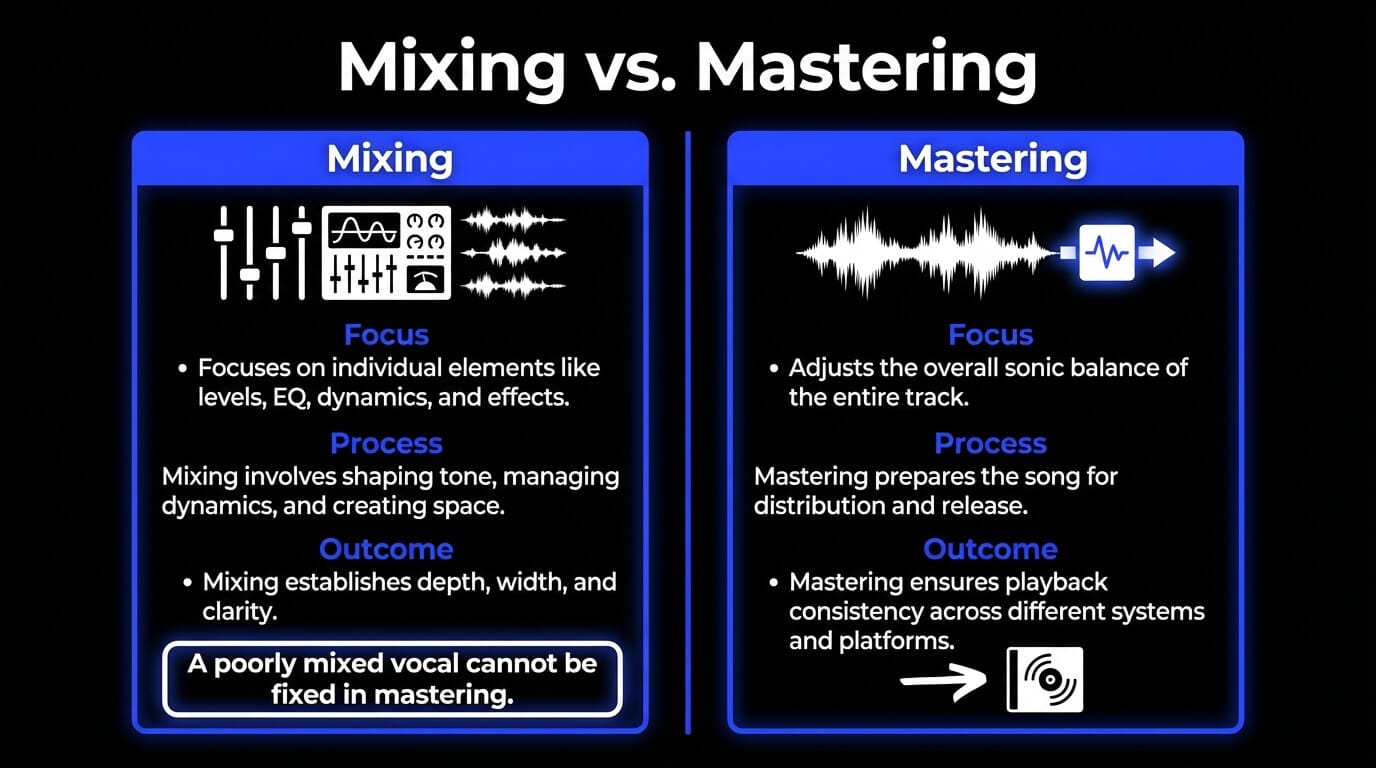
Mixing and mastering are distinct stages in the audio production process. Mixing focuses on the relationship between individual elements, adjusting levels, EQ, dynamics, and effects for each track, especially vocals. It’s where depth, width, and clarity are established.
Mastering, on the other hand, is the final polish. It adjusts the overall sonic balance of the entire track, applies final compression and limiting, and prepares the song for distribution and release. While mastering enhances what’s already there, mixing is where the foundation is built. A poorly mixed vocal cannot be “fixed” in mastering.
Tools You Need Before You Start
Before beginning the mixing process, it’s essential to have a well-organized and reliable setup. The tools you use directly affect the quality of your decisions, especially when working with vocals, where subtle changes have a significant impact. While creativity plays a role, precision depends on the tools at hand and one's understanding of their function.
Choosing a DAW and Monitoring Setup
Your digital audio workstation (DAW) serves as the central platform for all mixing. Whether you’re working in Logic Pro, Pro Tools, Ableton Live, FL Studio, or another environment, the DAW should offer flexible routing, non-destructive editing, and support for third-party plugins.
Equally important is your monitoring system. Studio monitors with a neutral frequency response enable more objective judgments, while high-quality headphones can be beneficial when room acoustics are less than ideal. Switching between monitors and headphones is a helpful practice to catch imbalances that may not be apparent on a single system.
Essential Plugins: EQ, Compression, and Reverb
To mix vocals effectively, you need tools that shape tone, control dynamics, and place the voice in space. At a minimum, your plugin chain should include:
- Equalizer (EQ): Used to remove muddiness, reduce nasal or harsh frequencies, and highlight vocal presence.
- Compressor: Controls the vocal’s dynamic range, keeping quieter parts audible and preventing louder phrases from dominating.
- Reverb and Delay: Create a sense of space and dimension, helping the vocal blend naturally with the rest of the track.
Other valuable tools include saturation plugins, de-essers, and multiband compressors, depending on the complexity of the vocal and the desired style.
Pitch Correction and Editing Tools
Precise pitch control is essential for a polished vocal mix, even when the performance is strong. Tools like Melodyne, Auto-Tune, or built-in pitch editors in your DAW allow for transparent tuning without compromising the character of the voice. These should be applied early in the chain to establish a solid foundation before dynamic or spatial processing.
Timing correction is also part of the preparation stage. Minor timing issues can affect how the vocal feels rhythmically in the mix. Most DAWs offer tools for nudging phrases or aligning syllables to match the groove of the instrumental without sounding artificial.
How to Prepare Your Vocals for Mixing
A clean and consistent vocal track provides a stable foundation for every subsequent processing step. Skipping this stage often leads to more work later, as poorly prepared vocals tend to clash with other elements and respond unpredictably to processing.
Editing and Cleaning Raw Vocal Takes
Start by selecting the most consistent and expressive takes. Once chosen, remove unwanted artifacts such as background noise, mouth clicks, excessive breaths, and plosives. These imperfections may not be obvious at first, but often become more prominent after compression or EQ adjustments.
Manual editing remains the most accurate approach for removing distractions, though some spectral repair tools or noise gates can assist when used carefully. It’s important to preserve the natural tone and phrasing of the performance during cleanup.
Gain Staging and Normalizing
Proper gain staging ensures that the vocal sits within an optimal level range before processing begins. Peaks should generally fall between -6 dB and -3 dB to maintain headroom and avoid clipping. Setting levels early also helps compressors and saturation plugins behave more predictably.
Normalization can be helpful when working with inconsistent recordings. However, it should be used conservatively to avoid exaggerating room noise or floor-level hiss in quieter passages.
Timing Adjustments and Pitch Correction
Timing inconsistencies, such as syllables landing slightly ahead or behind the beat, can disrupt the groove of the entire mix. Tightening these areas by manually adjusting clip placement helps the vocal feel rhythmically aligned without sounding rigid.
Once timing is corrected, apply pitch correction. Subtle tuning preserves the human feel while correcting off-key notes that could otherwise weaken the mix. Transparency is key here; the goal is to enhance musicality without drawing attention to the correction itself.
Mixing Synthesized Vocals from ACE Studio
Vocal stems generated in ACE Studio are designed to be musically expressive and technically clean. However, they still require proper mixing to blend naturally within a song. Once exported from ACE Studio via ACE Bridge, these stems can be treated like traditional vocal recordings.
Begin by organizing your audio tracks within your DAW. Although ACE vocals are usually well-tuned and time-aligned, it's still worth checking phrasing and micro-timing against the instrumental to ensure a cohesive feel. From there, apply the same steps you would use on any lead vocal: gain staging, tonal shaping with EQ, dynamic control through compression, and placement with reverb and delay.
ACE Studio vocals typically benefit from minimal processing, as they are free from the noise and inconsistencies inherent in raw recordings. However, they can still feel sterile without human-like variation. Adding gentle saturation, spatial modulation, or subtle volume automation can help bring life and realism to the performance.
Ultimately, ACE Studio is not a mixing tool, but it delivers mix-ready sources that respond well to traditional processing. The more intentionally you shape these layers, the more naturally they will sit in the mix.
Advanced Vocal Mixing Techniques
Once the core processing is in place, additional techniques can bring polish and energy to a vocal mix. These approaches aren’t necessary for every track, but they can make a significant difference when used with intention. Rather than relying on presets or exaggerated effects, the focus here is on subtle control, which reinforces emotion, enhances clarity, and guides the listener’s attention across the performance.
Vocal Riding and Dynamic Automation
Even after compression, volume automation remains one of the most effective tools for vocal control and adjustment. Riding the vocal manually, raising softer syllables, and lowering overly sharp peaks allows for musical phrasing that no compressor can fully replicate. This technique is especially useful in dense arrangements, where even slight level adjustments can affect intelligibility.
Automated vocal rides can also be applied to manage transitions between sections, such as bringing the vocal slightly forward in verses and pulling it back during choruses to make room for layered elements.
Parallel Compression for Energy
Parallel compression involves blending a heavily compressed version of the vocal with the unprocessed signal. This approach retains the natural dynamics of the original take while adding weight and presence through the compressed layer.
The parallel path should have aggressive settings, a low threshold, a high ratio, a fast attack, and be mixed in at a controlled level. The result is a vocal that feels more energetic and solid, without sounding flattened or overly controlled. This technique is often employed in pop, rock, and hip-hop mixes, where vocal presence is crucial.
Ducked Reverb and Delay
In mixes where clarity is a priority, reverb and delay can interfere with articulation. Ducking solves this by lowering the effect level when the vocal is active, then bringing it back during pauses. This keeps the intelligibility of the performance while still allowing the space to breathe.
Duck effects can be created using sidechain compression or with built-in ducking features available in specific plugins. This method works particularly well for lead vocals in modern productions, where precision and depth must coexist.
Vocal Layering and Harmonies
Layered vocals add width, depth, and richness to a mix. While a single lead vocal can carry a song, the use of doubles, harmonies, and backing layers introduces complexity that supports emotional intensity and sonic interest. These additional parts don’t just fill space; when placed correctly, they create dimension and reinforce the melodic and lyrical structure of the song.
Layering typically involves multiple takes of the same vocal part, either identical or harmonized, to create a more complex and nuanced sound. These are then panned, EQ’d, and balanced against the lead to achieve the desired effect. Subtle doubling can make a vocal sound fuller without being obvious, while wide-panned harmonies can build choruses or bridge sections into dynamic climaxes.
When recording with a vocalist, each layer is tracked separately. However, when working with synthesized vocals or AI-generated performances, the process becomes more flexible and creatively open. ACE Studio enables users to design complex harmonies and unique timbral textures through its advanced generation tools, making vocal layering both faster and more creative.. You can quickly build multiple harmony parts, vary tone and style, and create layered vocal ensembles that sound organic and cohesive.
Instead of manually tracking every part, ACE Studio allows you to assign different MIDI lines to individual AI voices, control phrasing, and generate harmonies algorithmically. Each voice can be exported as an individual stem and then imported into your DAW through ACE Bridge 2. From there, you can mix these layers just like recorded vocals, shaping tone with EQ, managing dynamics, and applying reverb or delay to achieve spatial balance.
Although AI-generated vocals require less corrective work than live recordings, the same artistic principles apply:
- Lower harmonies provide warmth and grounding.
- Higher harmonies add brightness and energy.
- Wide-panned doubles expand stereo space.
- Gentle pitch and timing variations keep the sound natural and expressive.
By thoughtfully arranging and processing these layers, even the simplest vocal line can evolve into a rich, emotionally engaging performance.
How to Create and Mix Harmonies with ACE Studio
When building harmony layers, the goal is to create distinct yet cohesive vocal parts that complement the lead without distracting from it. ACE Studio provides you with complete creative control over this process, allowing you to experiment with intricate harmonies, vocal textures, and tone variations directly within the platform.
Using Choir Mode, you can assign multiple MIDI parts with separate lyrics or melodic intervals and select contrasting voice types across different ranges or octaves. This feature makes it easy to build unison stacks, close harmonies, or expansive choir arrangements that sound natural and dynamic.
For even more refined results, VoiceMix lets you blend different voice models and tonal qualities. By mixing and matching vocal seeds, you can design custom layers, for example, combining a brighter tone for the higher harmonies with a softer, warmer texture for the lower ones. Once finalized, each harmony is exported as an isolated stem and transferred into your DAW session through ACE Bridge 2 for mixing.
Inside the mix:
- Apply EQ to carve space around the lead vocal and prevent frequency overlap.
- Use gentle compression to balance dynamics and maintain cohesion between layers.
- Introduce short reverbs or mid/side delays for width and atmosphere without muddying the center.
ACE Studio doesn’t replace the mixing stage, it provides clean, expressive vocal layers ready for professional processing. Treat each harmony stem as you would a recorded take: align timing if needed, refine tone, and sculpt depth so that every part enhances the emotional impact of the song.
Mixing Vocals for Different Genres
Vocal mixing is not a one-size-fits-all process. Each genre has its own aesthetic expectations that influence tonal balance, spatial treatment, and dynamic behavior. Understanding these conventions allows engineers to make informed decisions that serve the song’s emotional and stylistic goals. The objective is not to follow rules, but to align the vocal with the genre's sonic identity while preserving artistic intent.
Pop Vocals – Bright, Polished, and Present
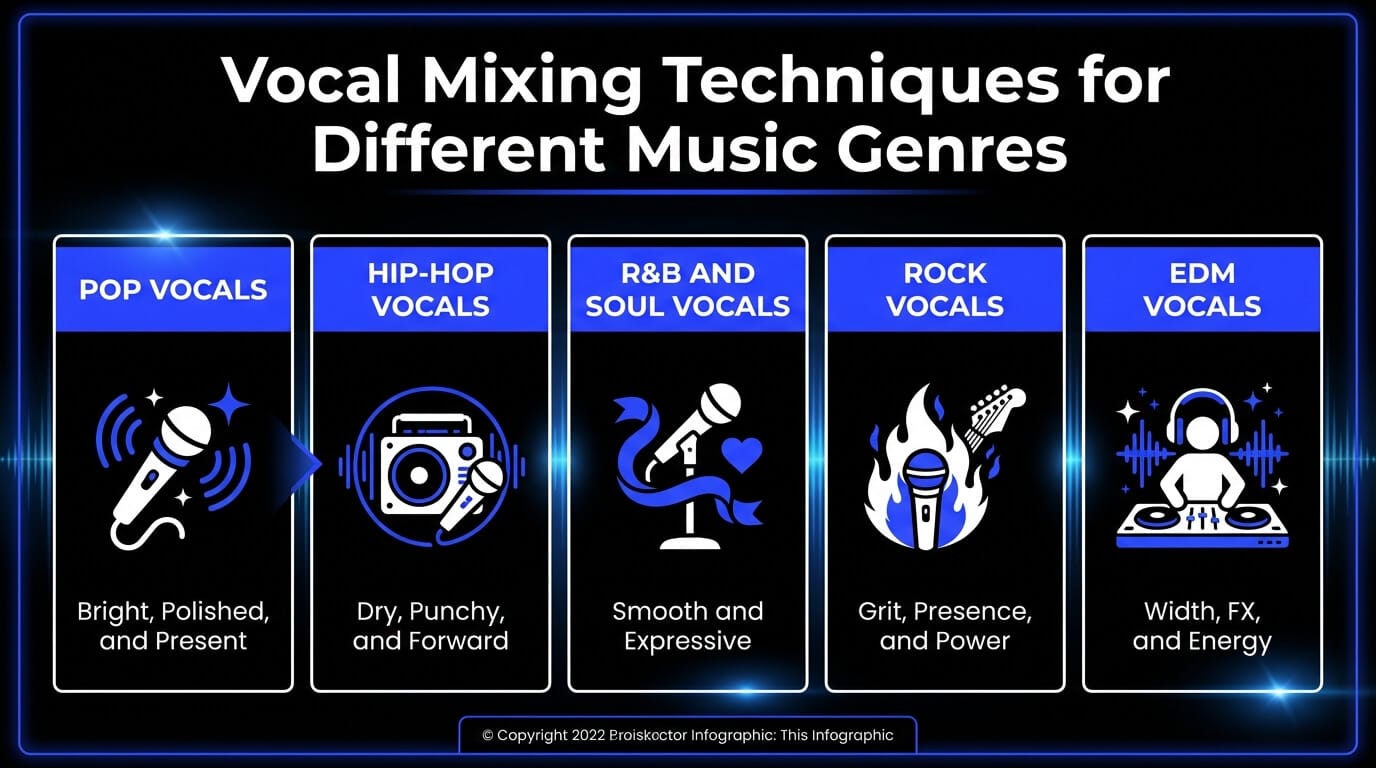
Pop vocals are typically mixed to be upfront, clean, and highly intelligible. The vocal should remain stable in level and consistent across different playback systems. High-frequency clarity is emphasized, often with gentle boosts above 10 kHz to add air and sheen. Compression is used not just for control, but also to create a modern, energetic tone that keeps the vocal anchored in the mix.
Spatial effects are subtle but deliberate. Short reverbs and tempo-synced delays add width and movement without crowding the vocal. Automation is often employed to maintain vocal presence throughout dynamic shifts in the arrangement.
Hip-Hop Vocals – Dry, Punchy, and Forward
In hip-hop, the vocal is the primary focus. It carries the rhythm, meaning, and tone of the track. The mix should emphasize articulation and impact, with minimal reverb or delay. A dry, focused vocal helps preserve intelligibility and aggression.
Clarity is achieved by removing low-end rumble and enhancing the upper midrange, typically around 2–5 kHz. Parallel compression is commonly used to improve punch without flattening the dynamics. Any spatial effects, if used, are usually tight and rhythmic, avoiding the washed-out sound associated with other genres.
R&B and Soul Vocals – Smooth and Expressive
R&B vocals demand warmth, emotional depth, and a sense of intimacy. Compression settings tend to favor slower attack and release times to retain dynamic nuance and vocal expression. EQ adjustments are more subtle, often focused on enhancing the low-mid body and softening any harshness in the high-mids.
Reverb and delay are used more liberally to create a spacious, ambient sound. Long reverb tails or stereo delays can emphasize phrasing and add depth, particularly during sustained vocal lines. The vocal should feel embedded in the mix without losing its emotional core.
Rock Vocals – Grit, Presence, and Power
Rock vocals must compete with loud guitars, dense drums, and saturated textures. To cut through, the vocal mix often involves midrange emphasis, especially between 3–5 kHz, along with controlled use of harmonic saturation. This adds edge and texture without making the vocal sound distorted or harsh.
Compression settings are moderate, allowing the vocal to maintain its aggressive character. Reverb choices tend toward plate or chamber types, adding dimension without softening the vocal’s impact. In some styles, a slight overdrive or analog-style effect can be used to match the intensity of the instrumentation.
EDM Vocals – Width, FX, and Energy
Electronic dance music often features processed vocals that are tightly synced with the track's rhythm and energy. Brightness and clarity are emphasized, often with high-frequency enhancement and transient shaping. Compression is usually aggressive, ensuring the vocal maintains presence through dense, sidechained arrangements.
Effects play a significant role; stereo delays, modulation, pitch shifts, and automation are frequently used to enhance transitions and build-ups. Reverbs may be exaggerated during drops or breakdowns to create dramatic contrast. The vocals should follow the flow of the track, adapting dynamically to structural changes.
Common Vocal Mixing Mistakes to Avoid
Even with the right tools and solid technical knowledge, vocal mixes can fall short due to a few common missteps. These mistakes often stem from over-processing, misjudged balance, or a lack of contextual listening. Identifying and avoiding these pitfalls is key to maintaining clarity, emotion, and mix translation across systems.
Over-Compressing the Vocal
Excessive compression removes natural dynamic range and can make the vocal sound lifeless or overly controlled. When the attack is too fast or the ratio too high, transients are lost, and the voice loses its emotional contour. Instead of adding presence, the result often feels dull and flat.
A good vocal mix should preserve expressive contrast. Compression should enhance consistency, not erase variation.
Drowning It in Reverb
Reverb is essential for depth and space, but too much of it can blur articulation and push the vocal backward in the mix. This is especially problematic in fast-paced arrangements or songs with dense instrumentation, where clarity is crucial.
To avoid this, reverb should be tested in the full context of the track, not in solo. Ducked or pre-delayed reverbs often provide space without compromising definition.
Ignoring Room Noise and Artifacts
Clicks, hums, background hiss, and mouth noises are frequently overlooked during editing, but they often become prominent after compression or EQ boosts. Failing to clean these artifacts early in the process introduces distractions and reduces the overall polish of the mix.
Manual editing combined with spectral tools or noise reduction plugins helps preserve vocal integrity while removing unwanted elements.
Poor Volume Automation
Relying solely on compression to manage dynamics results in a uniform, mechanical vocal tone. Without proper volume automation, emotional peaks may be underrepresented, and lyrical details can be lost.
Automation allows for nuanced phrasing and intentional emphasis. It also helps the vocal adapt to different sections of the arrangement, supporting musical movement rather than resisting it.
Final Thoughts
Vocal mixing is a process that demands both precision and musical sensitivity. Technique should serve emotion, not replace it. The most successful mixes aren't always the most complex; they're the ones that know when to hold back, preserve the performer’s expression, and let the song breathe.
In every mix, the voice is the link between the music and the listener. When treated with care, it doesn’t just sound clean; it tells the story in a way that feels natural, convincing, and in harmony with the rest of the arrangement.
If you're working with recorded vocals or synthesized layers from ACE Studio, the goal remains the same: to make the vocal feel like a living part of the song. Every decision you make, from choosing your tools to setting the final reverb, should support that outcome.
Don’t be afraid to revisit, compare, and adjust. Ultimately, a good mix depends less on gear and more on how intentionally and attentively you shape every sound.
FAQ
Should I mix vocals in mono or stereo?
Vocal processing should begin in mono. Mixing in mono helps identify phase issues, balance problems, and frequency masking that stereo imaging can conceal. Once the vocal sits well in mono, it will usually translate better across different playback systems.
Stereo elements, such as reverb or delay returns, can be introduced later to add width and depth, but the core vocal should remain centered and focused.
What’s the ideal reverb setting for vocals?
There’s no universal reverb setting, as the right choice depends on tempo, arrangement, genre, and mood. In modern pop or hip-hop, short plate or room reverbs with subtle pre-delay help preserve clarity. For more ambient or expressive styles, longer tails and modulated reverbs can enhance emotion and space.
Instead of aiming for a "perfect" setting, adjust reverb based on how it interacts with the rest of the mix. Use EQ on the reverb return if it clashes with the vocal tone.
How loud should vocals be in a mix?
Vocals should feel integrated with the track, yet remain intelligible and emotionally engaging. There’s no fixed level in dB, but a standard guideline is to keep vocals sitting between -18 and -12 LUFS integrated loudness during mixing, depending on genre.
Final level adjustments are often made during mastering, but a well-balanced mix allows the vocal to maintain its presence without artificial loudness.
Can AI tools like ACE Studio replace manual mixing?
AI-assisted tools can streamline specific tasks such as pitch correction, noise reduction, or basic effect chains. They are especially useful for speeding up workflow during early mix stages or for users who want guided results.
However, AI tools should not be seen as a replacement for critical listening or creative decision-making. They offer support, not artistic direction. Manual refinement is still required to achieve a mix that feels intentional and emotionally connected to the track.