What is audio mastering? The ultimate comprehensive guide
Key takeaways
- Mastering is the final quality-control stage that prepares a finished mix for release, making sure it sounds balanced, polished, and consistent across streaming platforms, headphones, car speakers, club systems, and other playback environments.
- Mixing and mastering are not the same process. Mixing shapes the individual tracks inside a session, while mastering works with the final stereo mix to refine loudness, tonal balance, stereo image, and technical delivery.
- A better mix leads to a better master. Clean headroom, lossless file formats, proper gain staging, and well-prepared source material give the mastering engineer more room to enhance the track without fighting avoidable problems.
- Modern mastering balances technology with human judgment. AI-assisted tools can help with loudness, EQ suggestions, and technical analysis, but the final creative decisions still depend on the producer or mastering engineer’s taste, intent, and understanding of the song.
- ACE Studio can support the pre-mastering stage by helping producers refine vocals, build expressive AI instrument parts, separate stems, convert audio to MIDI, and develop prompt-based layers before the final mix is exported for mastering.
The final step between your mix and the listener
In the professional music production pipeline, audio mastering represents the final bridge between the creative studio environment and the listener. It is the definitive stage of post-production where a collection of recorded and mixed tracks are unified into a cohesive, polished, and commercially viable product.
Mastering is often described as the last line of defense in quality control, ensuring that audio translates accurately across a diverse array of playback systems, from high-fidelity home theaters to mobile device speakers and club sound systems.
Basics of audio mastering
At its core, sound mastering is the process of optimizing a final mix to achieve the best possible sound quality and consistent playback across all platforms. While the recording and mixing phases focus on individual elements like vocals, drums, and synthesizers, mastering treats the song as a singular, stereo entity.

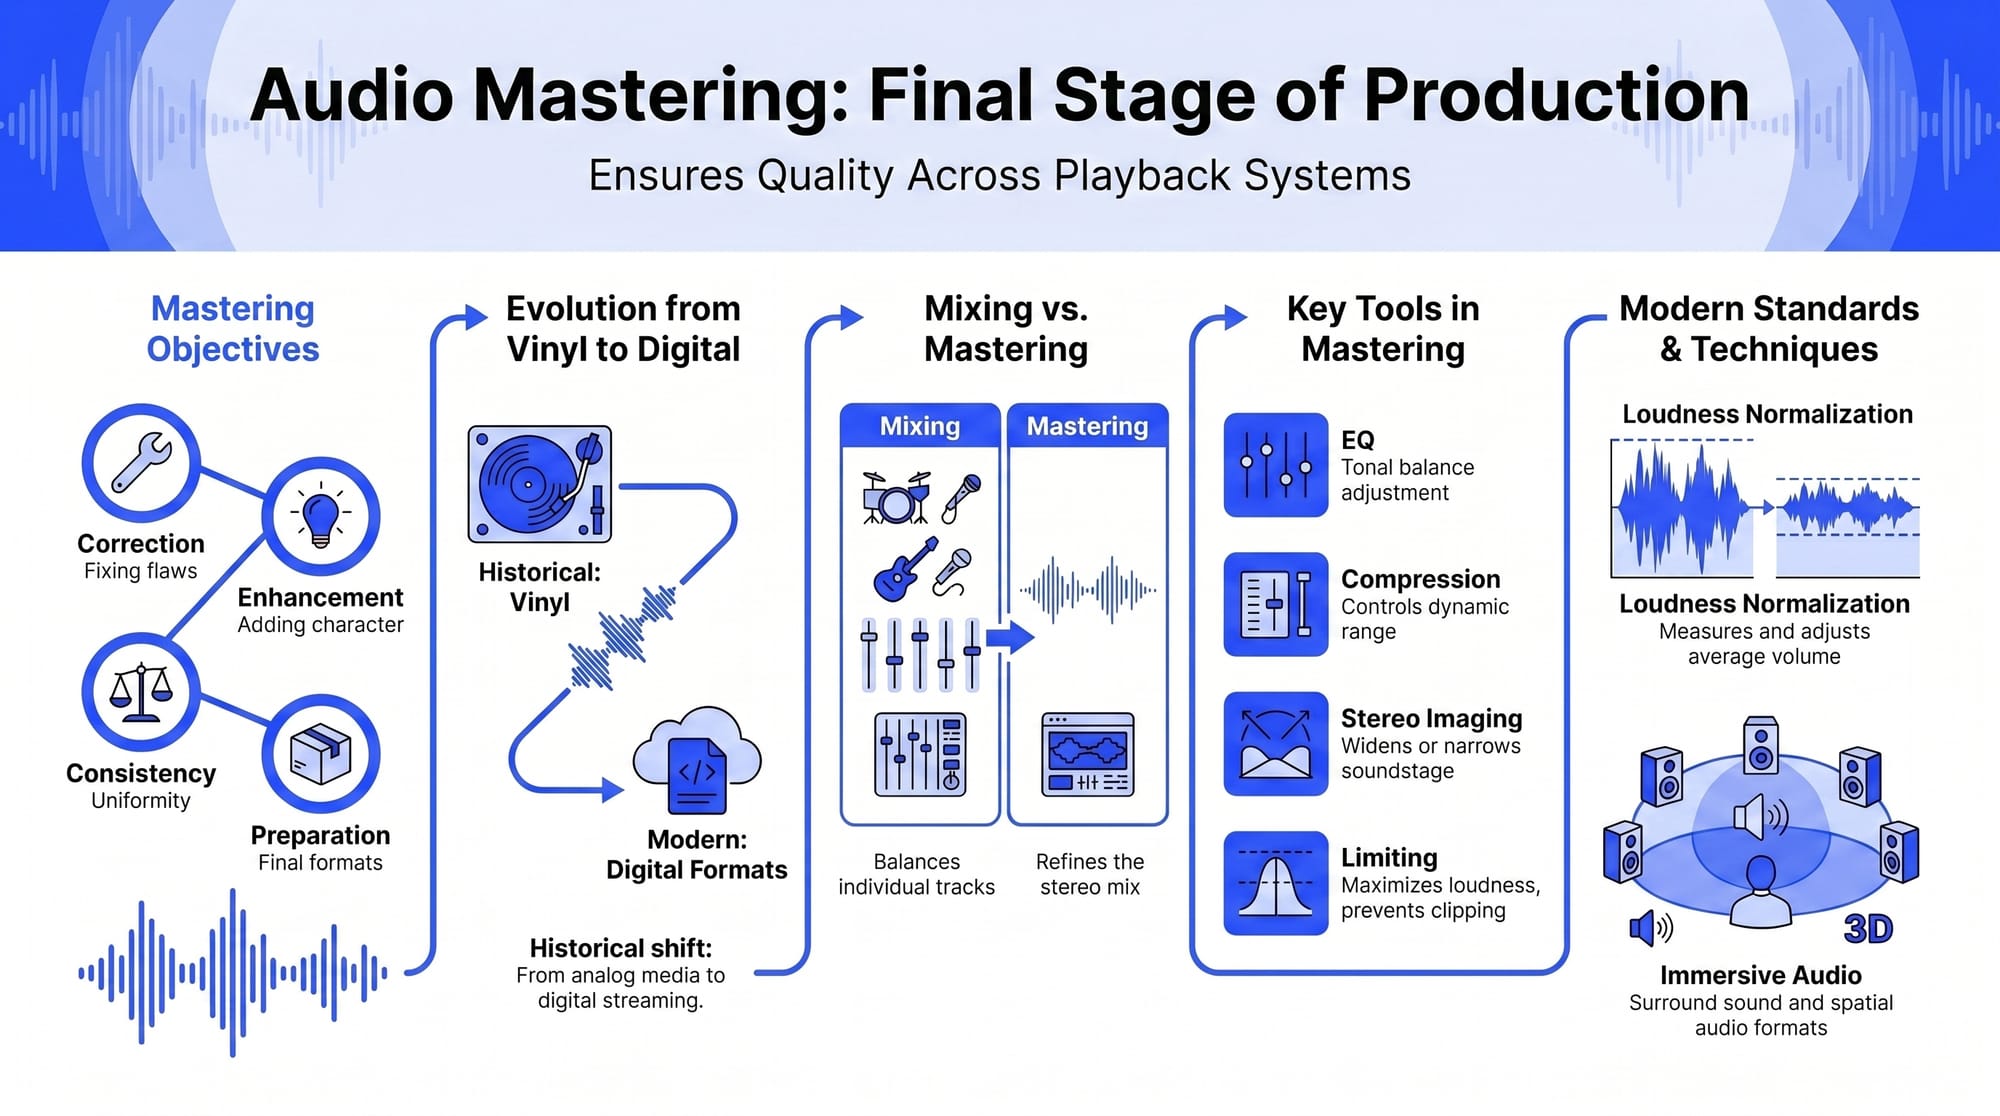
The primary objectives of this stage include:
- Correction: Identifying and resolving spectral imbalances or technical anomalies missed during the mixing phase.
- Enhancement: Adding professional shine, clarity, and depth to the audio signal.
- Consistency: Ensuring that multiple tracks on an album or EP share a similar tonal balance and loudness level.
- Preparation: Generating the final master files in the correct formats and resolutions for distribution platforms such as Spotify, Apple Music, vinyl pressing, or CD manufacturing.
The history of mastering
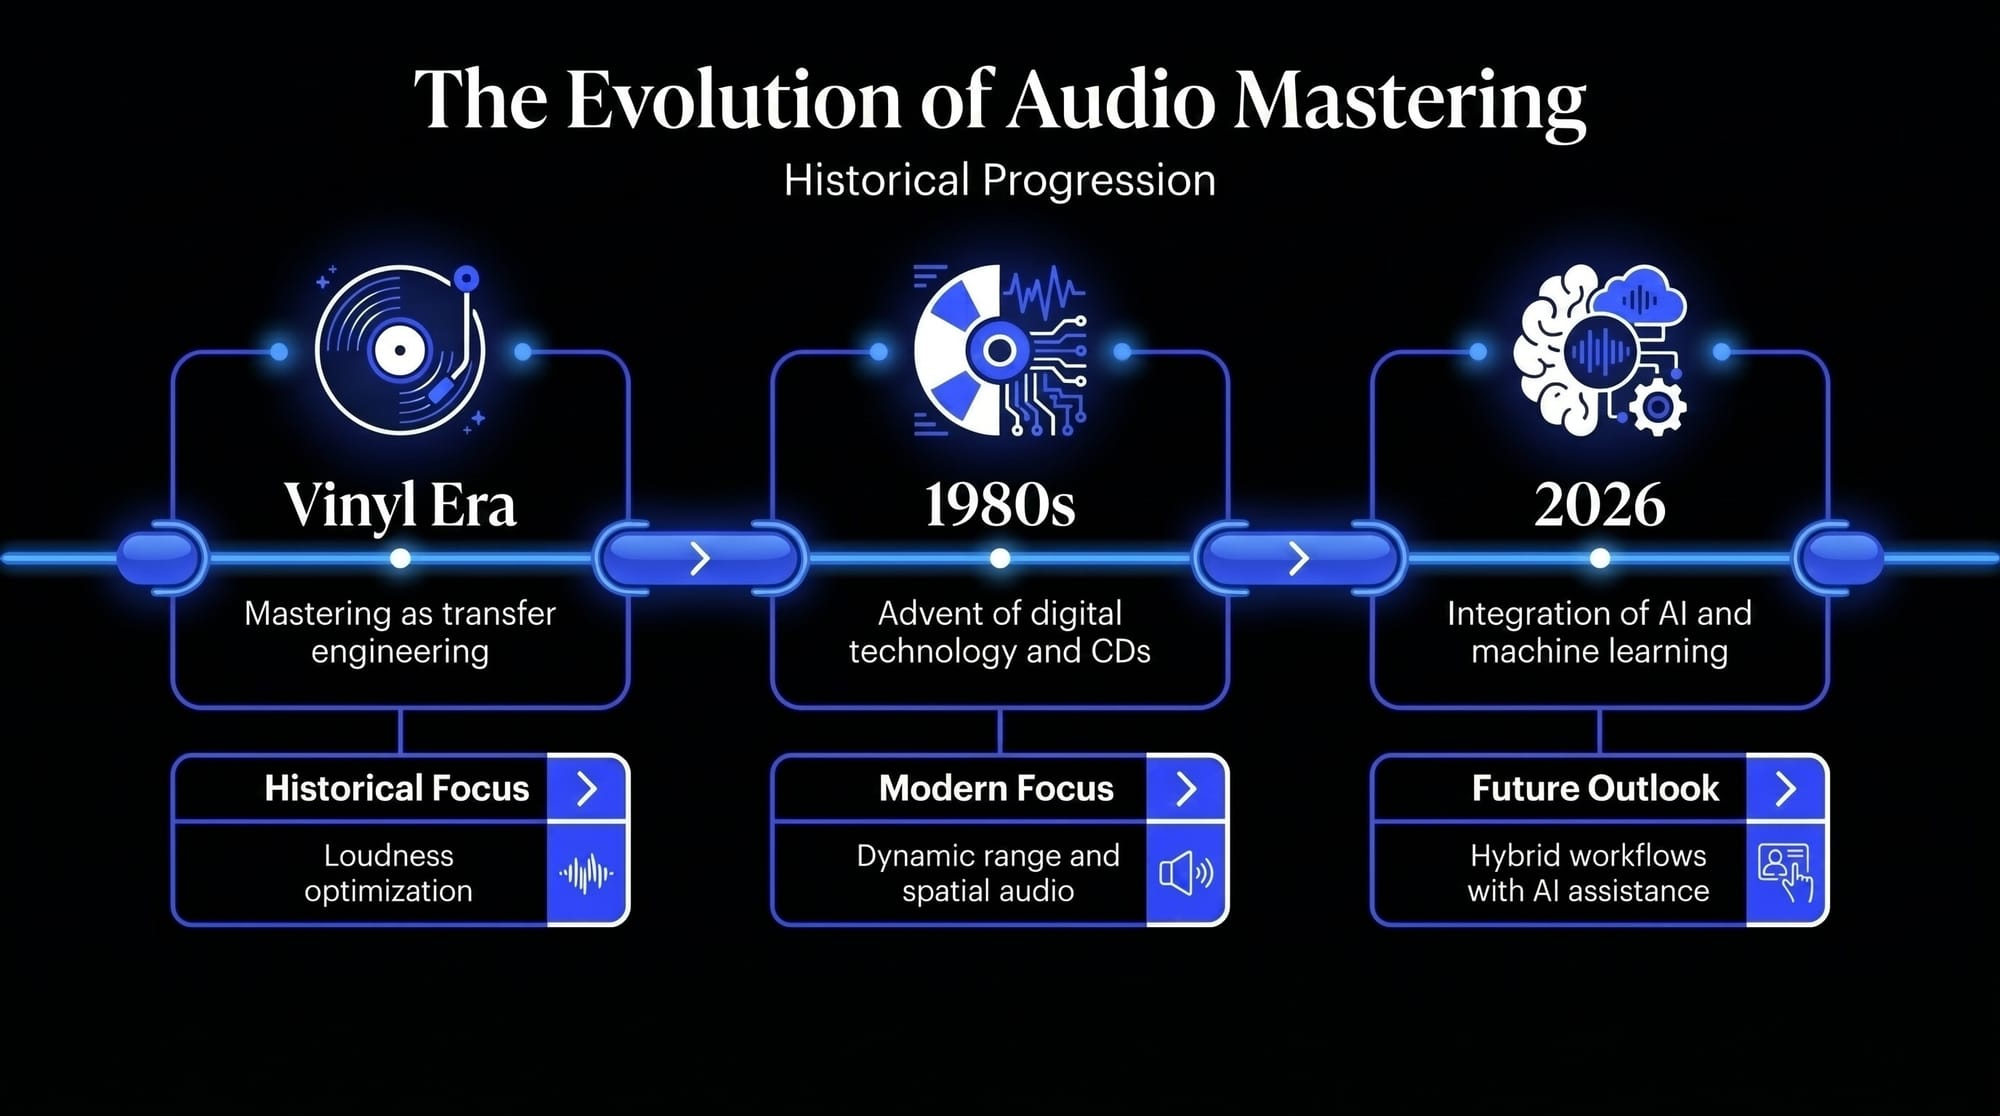
Historically, the mastering engineer was known as a transfer engineer. Their primary role was to transfer recorded audio from magnetic tape to a master lacquer disc used for vinyl production. This required deep technical knowledge of the physical limitations of vinyl, such as preventing the needle from jumping out of the groove due to excessive low-end frequencies or out-of-phase signals.
With the advent of digital technology and the Compact Disc (CD) in the 1980s, the role evolved. The focus shifted toward loudness optimization and digital signal processing. Today, in 2026, mastering has become a sophisticated blend of traditional analog sensibilities and cutting-edge assistive audio technology, including machine learning algorithms and neural networks that help engineers make more informed decisions.
Mixing vs. mastering: key differences
One of the most frequent points of confusion for those new to music production is the difference between mixing and mastering. While they share similar tools, their scope and intent are fundamentally different.
Focus and scope
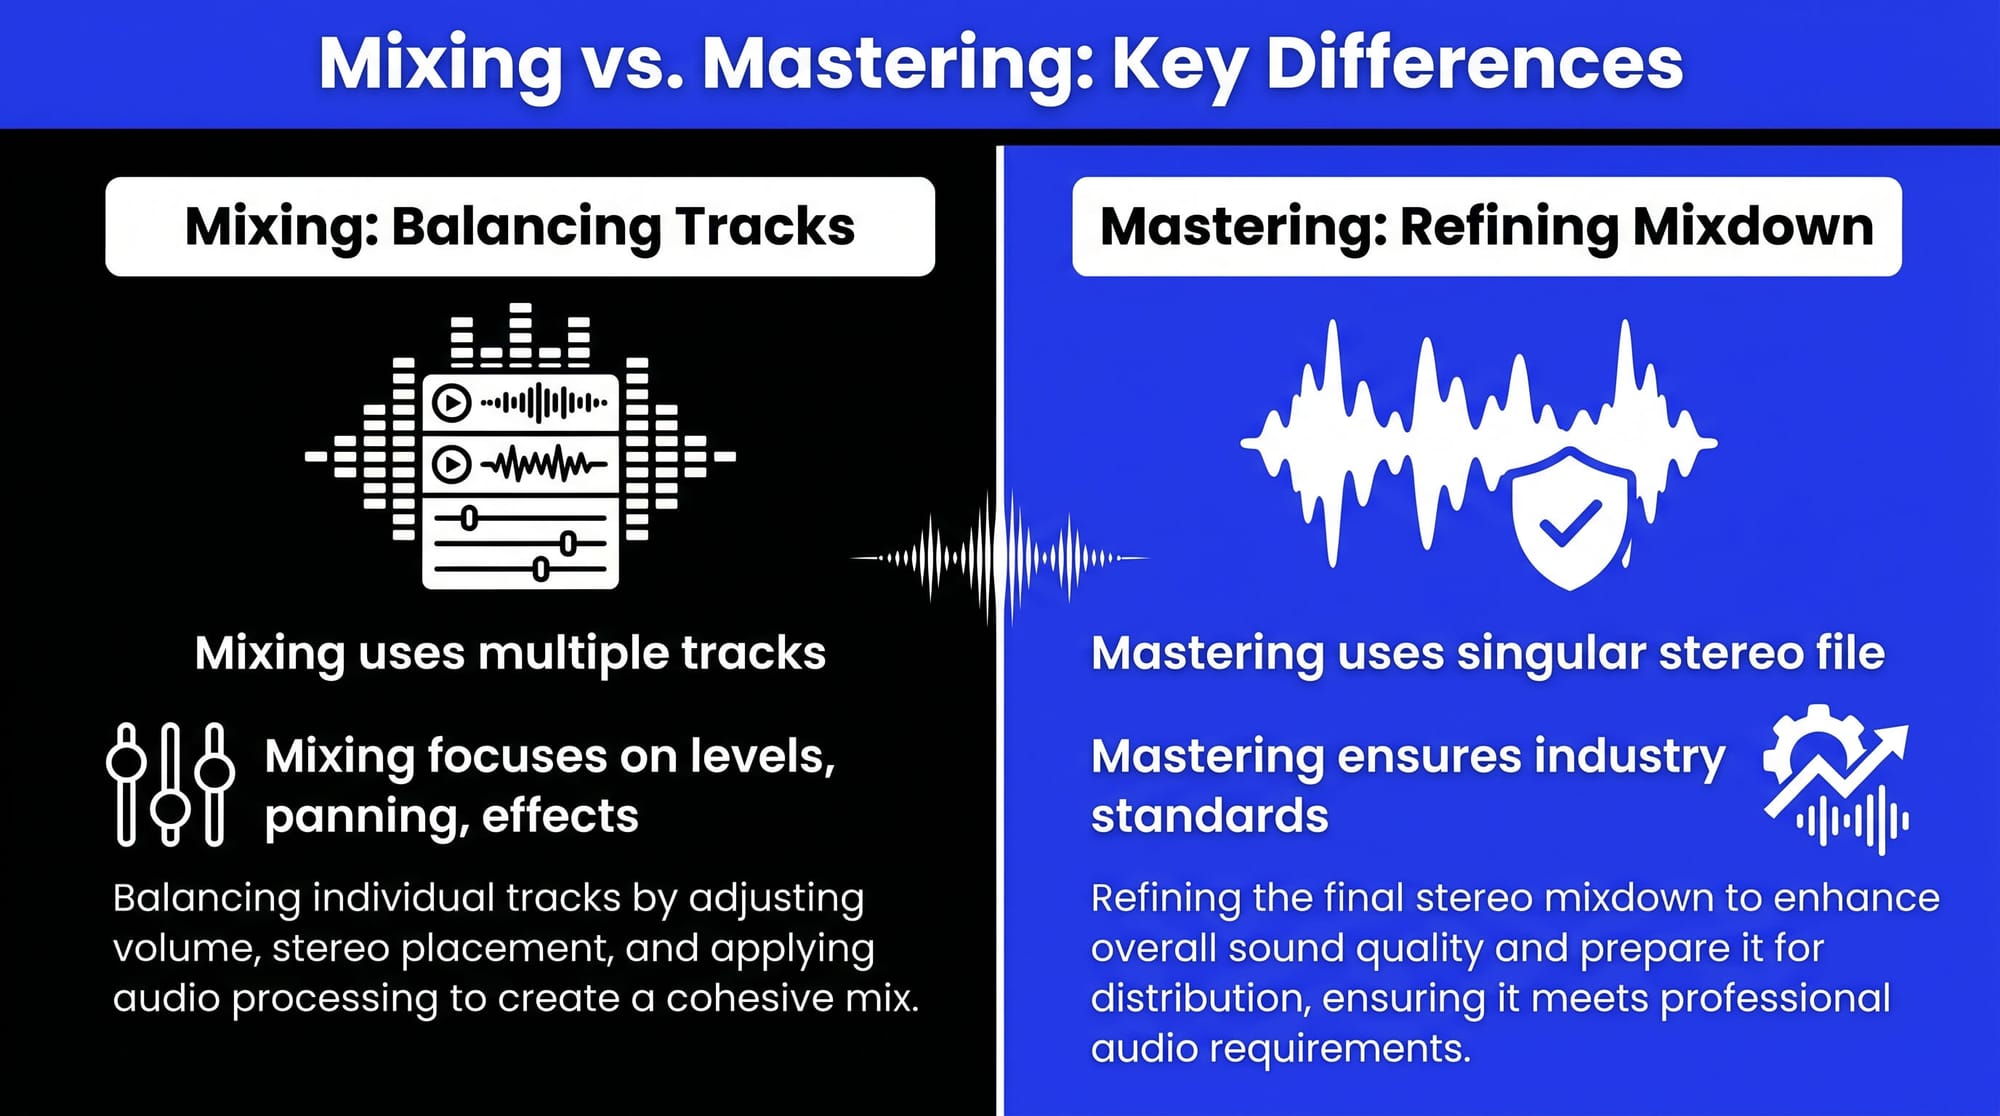
- Mixing: The process of balancing individual tracks (stems) within a project. An engineer adjusts the levels, panning, and effects of every instrument to create a cohesive song.
- Mastering: The process of refining the final stereo mixdown. The engineer works with a single stereo file (or a small group of stems) to ensure the track meets industry standards for distribution.
Comparative overview: mixing vs. mastering
Why is audio mastering necessary?
Is mastering truly necessary? The answer is almost always yes. Even the most pristine mix benefits from a second set of objective ears in a calibrated listening environment.
Audio mastering advantages
- Professional polish: Mastering provides the final 5% of sonic quality that separates an amateur demo from a commercial release.
- Playback translation: A mix might sound perfect in your home studio but thin in a car or muffled on a phone. Mastering ensures the frequency response is balanced for all scenarios.
- Loudness normalization: Streaming platforms have specific standards for loudness (measured in LUFS). Mastering ensures your track hits the competitive target without distorting or losing its dynamic range.
- Error detection: Mastering engineers catch clicks, pops, or phase issues that the mixing engineer may have become deaf to after hours of repetitive listening.
Pre-mastering prep: final mix preparation
The success of a master depends heavily on the quality of the source material. Effective final mix preparation is the first step in the professional workflow.
1. Headroom and gain staging
Leave sufficient headroom for the mastering engineer. This means the loudest peaks of your mix should not hit 0 dBFS. Ideally, aim for peaks between -3 dB and -6 dB. Avoid using a limiter on your master bus during the mixdown, as this permanently removes the dynamic range the mastering engineer needs to work with.
2. File format and resolution
Export your files in the highest possible resolution.
- Sample Rate: Keep it at the native rate of the project (e.g., 48 kHz or 96 kHz).
- Bit Depth: 24-bit or 32-bit float is standard to preserve the dynamic range.
- File Type: WAV or AIFF (lossless formats).
3. Metadata and documentation
Provide the engineer with essential metadata:
- Artist Name and Track Title.
- The exact order of the track listing (for albums/EPs).
- ISRC codes (if already assigned).
- Reference tracks that represent your desired sonic aesthetic.
Before mastering: Shaping the parts that shape the final sound
A strong master starts long before the mastering chain. If the vocal feels disconnected, the harmony is too thin, the strings sound static, or the arrangement leaves too much space in the wrong places, mastering can only do so much. The final master can bring clarity, loudness, balance, and translation, but it cannot fully rewrite the musical choices inside the mix.
This is why the production stage matters so much. Before exporting the final stereo mix, producers often need to make small but important decisions: should the chorus have another vocal layer? Does the lead line need more breath and tension? Would a string part support the emotion better than another synth pad? Is the demo idea strong enough to mix, or does it need one more layer before mastering?
This is the kind of stage where ACE Studio becomes very useful. ACE Studio 2.0 has expanded from an AI vocal workstation into a broader AI music generator, with tools for AI vocals, AI instruments, stem separation, audio-to-MIDI conversion, generative layers, and DAW-connected production workflows.
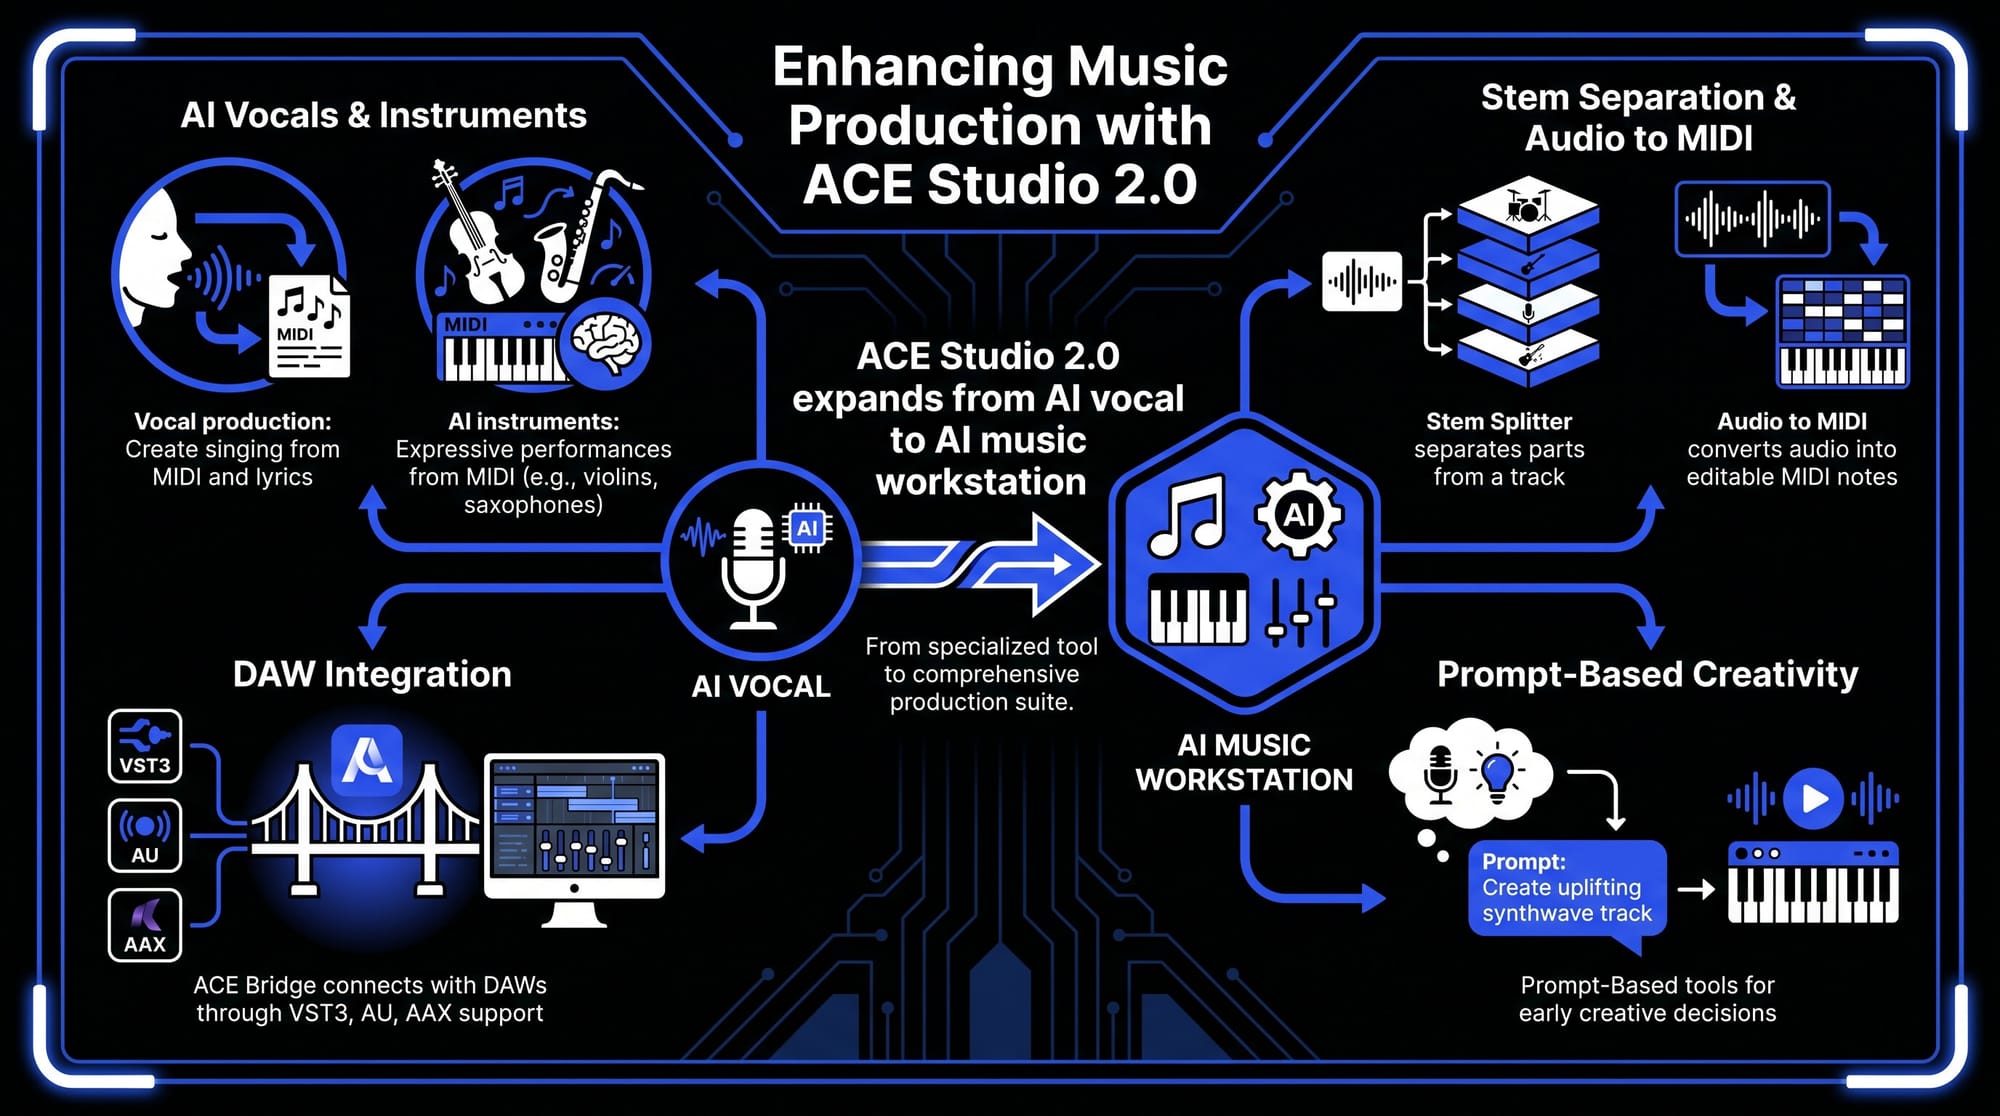
For vocal production, ACE Studio lets you create singing from MIDI and lyrics, then refine the details that often affect how a vocal sits in the mix: pitch, timing, vibrato, breath, phonemes, and emotional tone. Instead of treating a vocal as a fixed recording, you can shape it phrase by phrase until it feels closer to the song’s intention.
The AI instruments allow producers to create expressive instrumental performances from MIDI, including instruments such as violins, violas, cellos, saxophones, trumpets, and duduk. These parts can be shaped with articulation control, which matters when an arrangement needs movement rather than just another static layer.
This can help before mastering because it gives the mix more intentional source material. A controlled backing vocal stack, a cleaner instrumental layer, or a more expressive MIDI-based performance can reduce the need for heavy correction later. The goal is not to use AI to finish the song for you. The goal is to keep more creative decisions editable while you are still close enough to the arrangement to make them properly.
ACE Studio also includes tools that can help when working with existing audio. Stem Splitter can separate parts from a track, while Audio to MIDI can convert audio into editable MIDI notes for further production work. That can be useful when rebuilding a rough demo, replacing a placeholder idea, or tightening a musical part before the final mix is printed.
For producers who already work inside a DAW, ACE Studio can connect through ACE Bridge, with VST3, AU, and AAX support. This allows AI vocals and instruments to sit inside a more familiar production workflow instead of feeling like a separate process.
Prompt-Based Ideas Without Losing Control
ACE Studio also includes prompt-based tools for early creative decisions. Inspire Me can create music from a text description or lyrics, while Add a Layer can generate new audio layers such as instrumentals, vocals, or sample loops directly inside a selected part of the project. Music Enhancer can reimagine existing audio based on style descriptions while letting you decide how closely the new version follows the original.
For a mastering workflow, these tools are best understood as sketching and development tools. They can help you test a backing layer, explore a different texture, or strengthen a rough section before the mix is finalized. You still decide what belongs in the song. You still refine the arrangement. You still prepare the final mix for mastering. ACE Studio simply gives you more flexible material to work with before the audio becomes a fixed stereo file.
The step-by-step audio mastering process
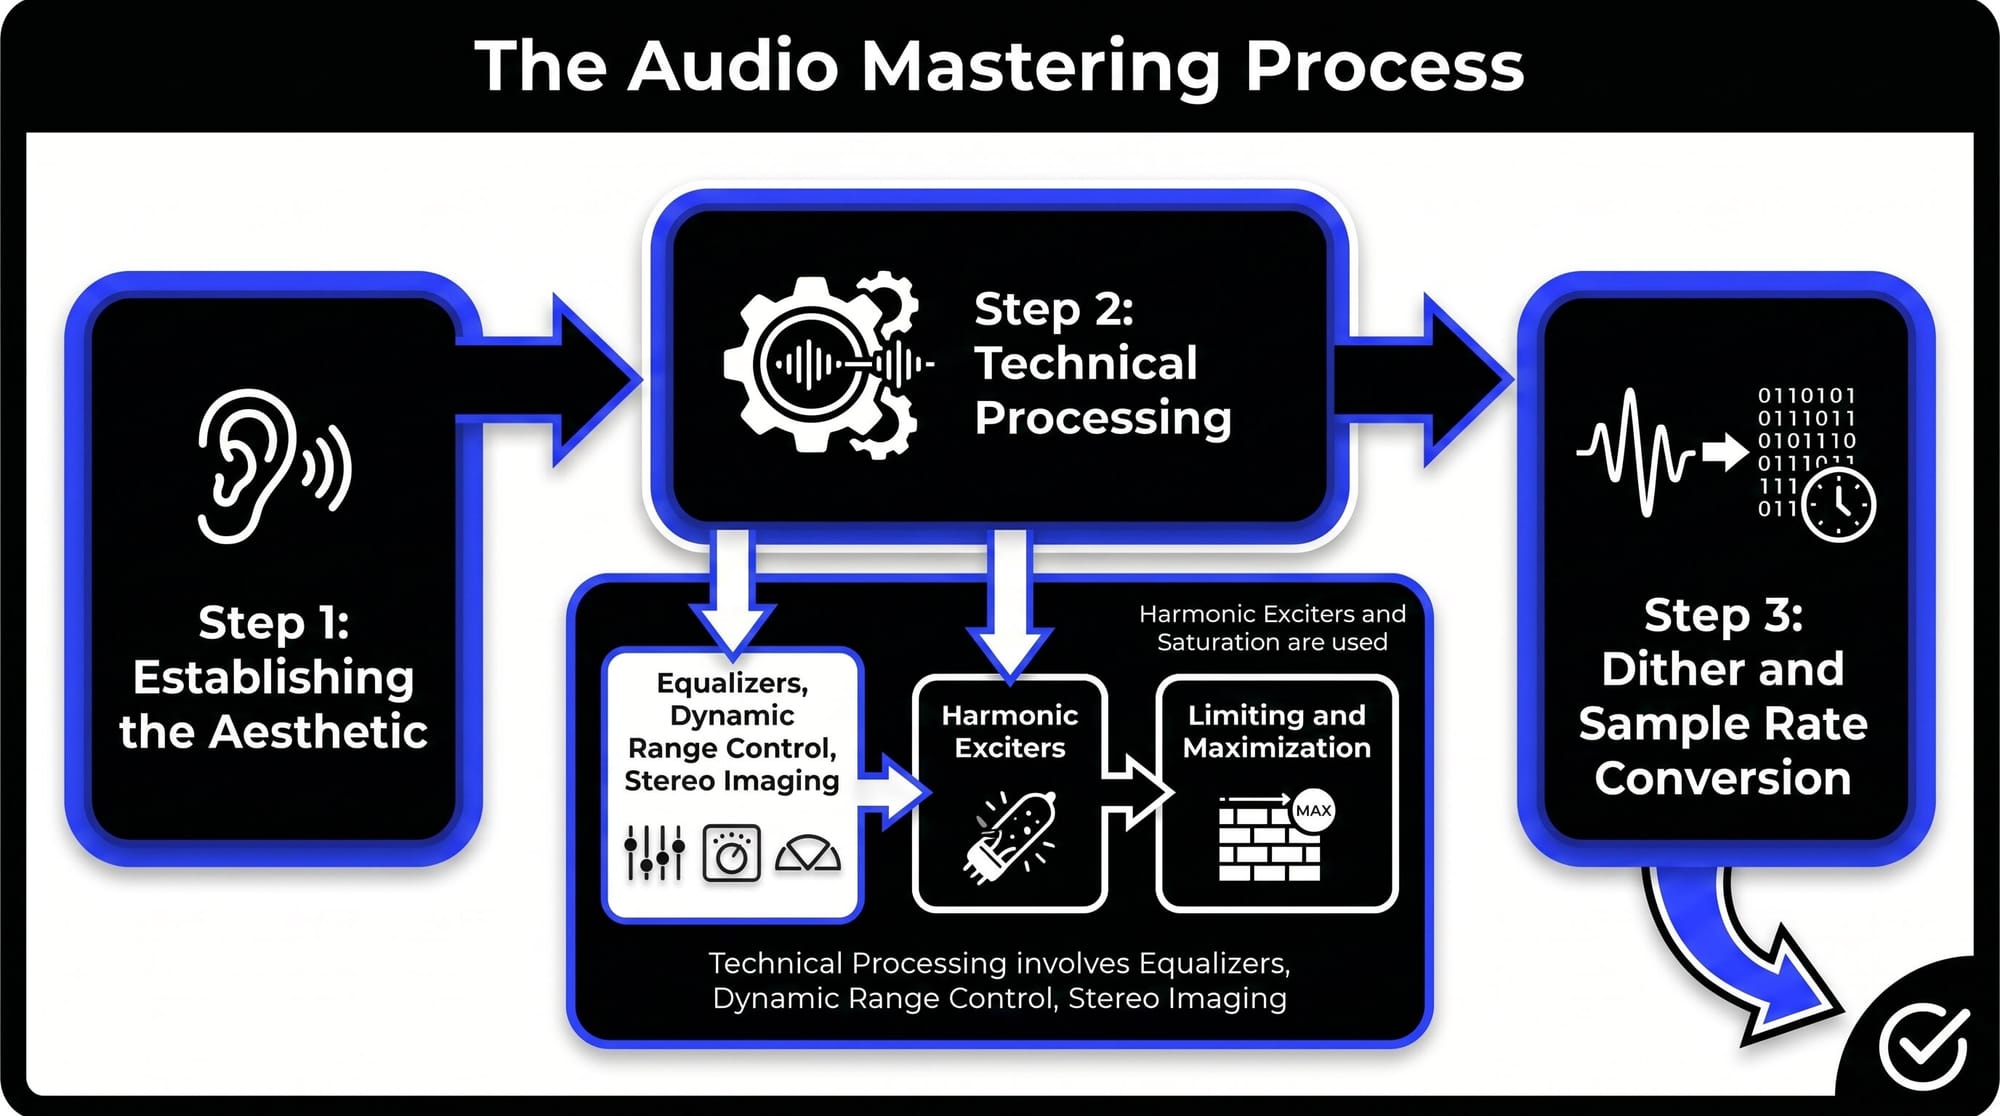
Step 1: Establishing the Aesthetic
The engineer begins by critically listening to the track to determine its strengths and weaknesses. Does it need more weight in the low end? Is the vocal too recessed? This stage defines the "sonic target" based on the genre and the artist’s vision.
Step 2: Technical Processing
This involves a specific chain of processors designed to sculpt the sound.
Equalizers (surgical and tonal)
- Surgical EQ: Used to remove problematic frequencies or resonances. For example, a sharp notch filter might remove a specific ringing frequency in a snare drum.
- Tonal EQ: Used to shape the overall balance. A gentle high-shelf boost can add air and clarity, while a low-end boost can add warmth.
Dynamic range control
- Compressors: Used to glue the mix together. Mastering compressors typically use low ratios (e.g., 1.5:1 or 2:1) to subtly control the average level.
- Multi-band compression: Allows the engineer to compress specific frequency ranges independently. This is useful if the bass is inconsistent but the high-end is perfectly stable.
- Expanders: Occasionally used to restore dynamics to an overly compressed mix.
Stereo imaging and spatial enhancement
Engineers use stereo imaging tools to manage the width of the track.
- Mid-Side (M/S) processing: This technique separates the center of the mix (Mid) from the sides. It allows the engineer to brighten the guitars on the sides without affecting the lead vocal in the center.
- Bass mono-ing: Ensuring all frequencies below approximately 100 Hz are in mono to provide a solid foundation for club systems.
Harmonic exciters and saturation
These tools add subtle harmonic distortion to the signal, simulating the warmth of analog gear like tape machines or tube consoles. This increases the perceived loudness and richness of the track without significantly increasing the peak level.
Limiting and maximization
The final stage of the chain. A limiter acts as a ceiling, preventing the signal from clipping while allowing the average volume to be raised. This is where loudness optimization occurs.
Step 3: Dither and sample rate conversion
If the final delivery format is a lower bit depth than the working file (e.g., moving from 24-bit to 16-bit for CD), dither must be applied. Dither is a low-level noise that prevents quantization distortion, ensuring the fades and quietest parts of the song remain smooth.
Professional audio mastering services
While modern software allows for high-quality DIY results, professional audio mastering services offer benefits that code cannot yet fully replicate: the human element and the acoustic environment.
The value of the engineer
A professional engineer at a facility like Abbey Road Studios brings decades of experience. They understand how a specific genre should feel. Their ears are trained to hear nuances—such as a 0.5 dB build-up at 250 Hz—that most producers might miss.
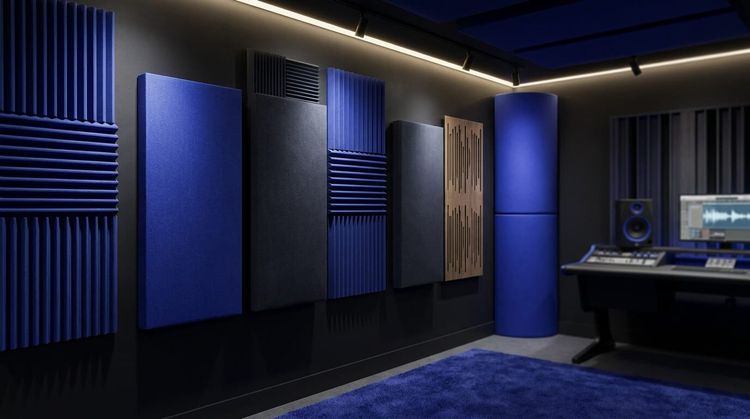
The mastering room
Mastering studios are acoustically treated to be "flat." This means the room does not emphasize any particular frequency. When an engineer makes a change in a calibrated room, they know it is because the audio requires it, not because the room is playing tricks on them.
Modern standards: loudness and immersive audio
For years, engineers engaged in the "loudness war," trying to make their tracks louder than the competition. This often resulted in distorted, lifeless audio. Today, streaming services use loudness normalization. Whether your track is mastered at -6 LUFS or -14 LUFS, the streaming platform will adjust the playback volume to a consistent level. This has encouraged a return to more dynamic, breathable masters.
As of 2026, mastering is no longer restricted to stereo. Dolby Atmos and spatial audio require a different mastering approach. Instead of a stereo file, the engineer masters a "bed" of audio and "objects" positioned in a 3D space. This requires specialized monitoring setups (e.g., 7.1.4 configurations) and a deep understanding of binaural rendering.
Audio mastering for beginners: a starting guide
If you are just starting your journey into audio mastering for beginners, follow these foundational principles to avoid common pitfalls.
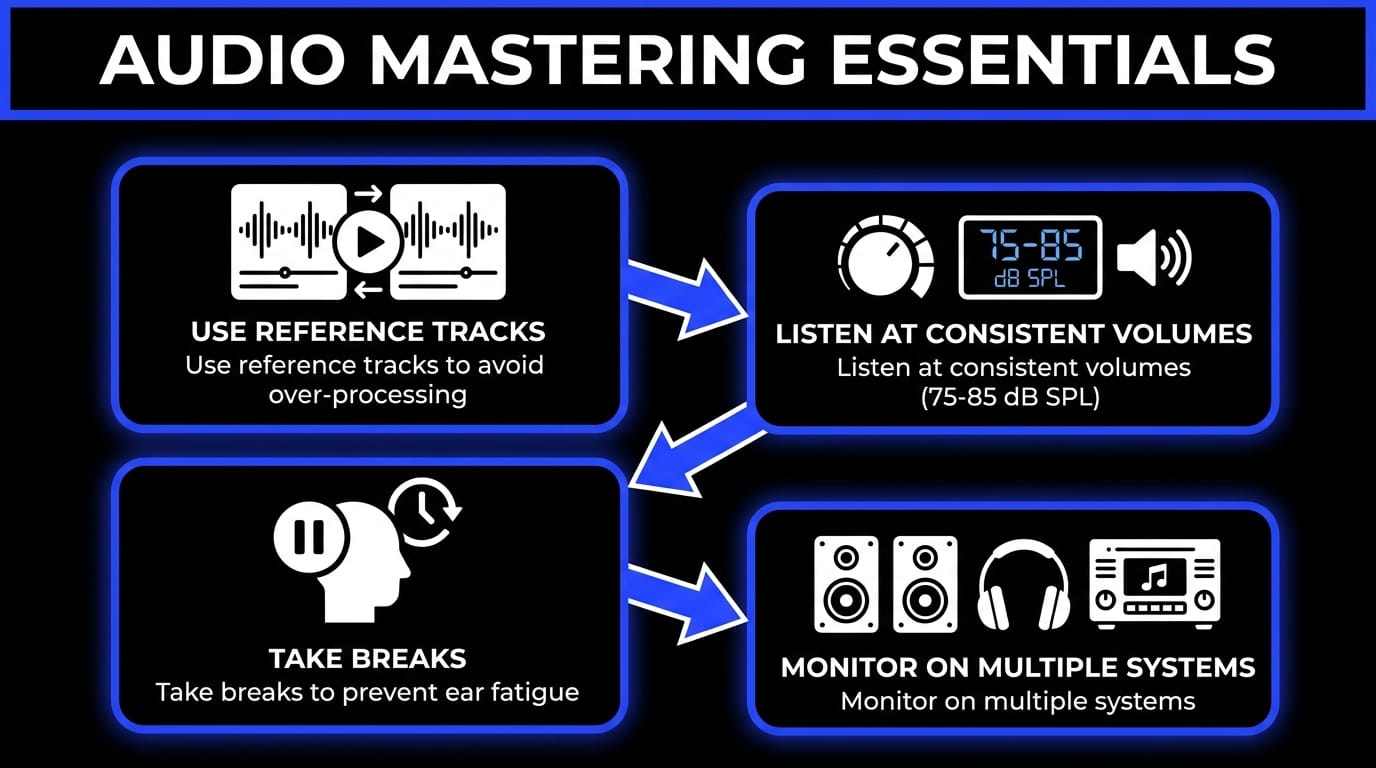
1. Use reference tracks
Always load a professionally mastered song from your genre into your DAW. Compare your master to the reference frequently. This keeps your ears calibrated and prevents you from over-processing.
2. Listen at consistent volumes
The human ear perceives more bass and treble at higher volumes (the Fletcher-Munson Curve). Always master at a consistent, moderate level (around 75-85 dB SPL) to ensure your decisions are based on the actual audio content, not just the volume.
3. Take breaks
Ear fatigue is the enemy of mastering. After 45 minutes of critical listening, your brain begins to compensate for imbalances. Take 15-minute breaks in silence to reset your hearing.
4. Monitor on multiple systems
Check your master on:
- High-quality studio monitors.
- Open-back headphones (for detail).
- Consumer earbuds.
- Laptop speakers.
- A mono Bluetooth speaker.
Glossary of mastering terms: understanding the dark arts
- Clipping: Distortion caused when a signal exceeds the maximum limit of a digital system (0 dBFS).
- Dynamic range: The ratio between the loudest peak and the quietest part of a track.
- Frequency masking: When one sound makes it difficult to hear another sound due to overlapping frequencies.
- LUFS (Loudness Units Full Scale): The industry-standard measurement for perceived loudness over time.
- Phase coherence: The timing relationship between the left and right channels; essential for mono compatibility.
- Transients: The initial, high-energy burst of a sound (e.g., the hit of a drum stick).
The future of mastering: AI and automation
As we look toward the remainder of the decade, the integration of Artificial Intelligence in mastering is undeniable. Tools like Ozone 12 use "Assistive Audio Technology" to analyze a track and suggest a starting point for EQ and compression.
Will AI replace mastering engineers?
While AI can handle the technical requirements of loudness and frequency balancing, it lacks the ability to understand "vibe" and "emotion." AI cannot decide that a song should sound "lonely" or "aggressive" based on the lyrics. In 2026, the most successful workflows are hybrid: using AI to handle the tedious, surgical tasks while the human engineer makes the final creative and aesthetic decisions.
Frequently Asked Questions about audio mastering
How does the primary objective of mastering differ from the mixing stage?
The fundamental distinction lies in the perspective and the scale of the audio being manipulated. Mixing is a micro-level process where an engineer balances dozens or even hundreds of individual elements—such as vocals, drums, and synthesizers—to create a cohesive stereo file. Mastering is a macro-level process that treats the entire song as a finished unit, focusing on how that song will perform in the real world across various playback systems. While mixing creates the internal balance and emotional movement of a track, mastering provides the external polish, technical compliance, and sonic translation required for commercial release.
What is the recommended loudness target for modern streaming platforms?
In the current landscape of 2026, most major streaming services like Spotify, Apple Music, and YouTube use loudness normalization to ensure a consistent experience for listeners. The industry-standard target remains approximately -14 LUFS (Loudness Units Full Scale) with a true peak ceiling of -1.0 dBTP. However, many professional engineers master tracks significantly louder—often between -9 and -6 LUFS—if the genre demands it, knowing that the streaming algorithm will turn the volume down. The priority is to achieve a competitive level of density and impact without introducing audible distortion or sacrificing too much transient punch.
Can a mastering engineer correct significant issues found in a poor mix?
There is a common saying in the industry: you cannot polish a bad mix. While a mastering engineer uses surgical equalization and multi-band dynamics to hide minor flaws, they cannot fix fundamental issues like a buried lead vocal, excessive reverb on a snare, or phase cancellation between two guitars. If a mix has deep structural problems, the mastering process will often highlight those flaws rather than hide them. In these scenarios, the most professional course of action is to return to the mixing stage and resolve the issues at the source before attempting the final master.
Is expensive analog hardware required to achieve professional mastering results?
The gap between high-end analog hardware and digital signal processing has largely closed. While many elite studios still utilize vacuum tube compressors and solid-state equalizers for their unique harmonic character and tactile workflow, modern plugins are more than capable of delivering world-class results. The most critical component of a mastering setup is not the hardware itself, but the acoustic accuracy of the listening environment and the experience of the engineer. Many chart-topping albums are now mastered entirely in the box using advanced digital emulations and high-resolution workstations.
Which file format is considered the industry standard for mastering submission?
To maintain the highest level of audio integrity, you should always export your final mix in a lossless, uncompressed format such as WAV or AIFF. The file should remain at the native sample rate used during the recording and mixing process, typically 48 kHz or 96 kHz, to avoid unnecessary conversion artifacts. Furthermore, it is essential to export at a bit depth of 24-bit or 32-bit floating point to preserve the dynamic range and prevent quantization errors. Submitting a lossy format like an MP3 is unacceptable for professional mastering, as the data compression has already permanently removed critical frequency information.